
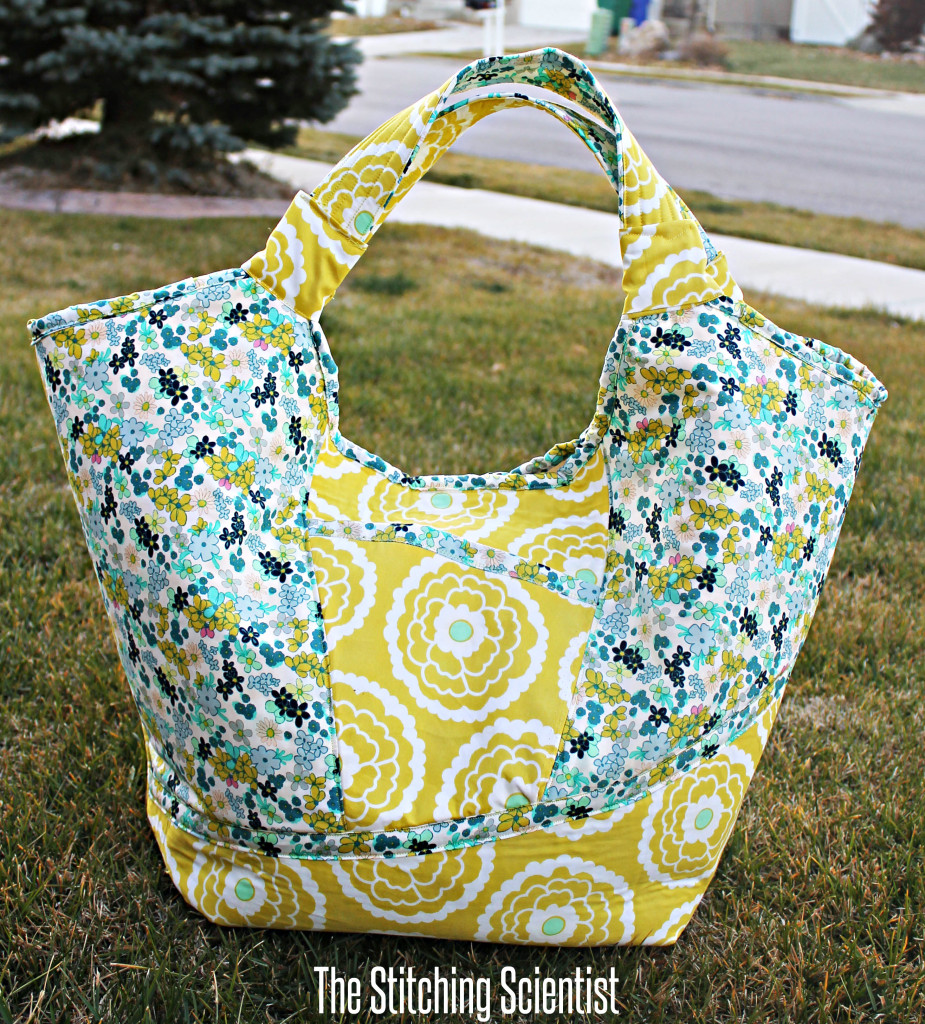
Printable Instructions and Pattern Pieces
SUPPLIES
– 1/2 yard exterior fabric
– 1 yard interior fabric
– 2 yards Pellon SF-101 fusible woven interfacing
– 1 yard Pellon 520F (or you may substitute 1 yard Pellon Peltex 70 Ultra-Firm Sew-In combined with 1 yard fusible woven interfacing)
– 1/2 yard Pellon fusible fleece
– 20″ zipper
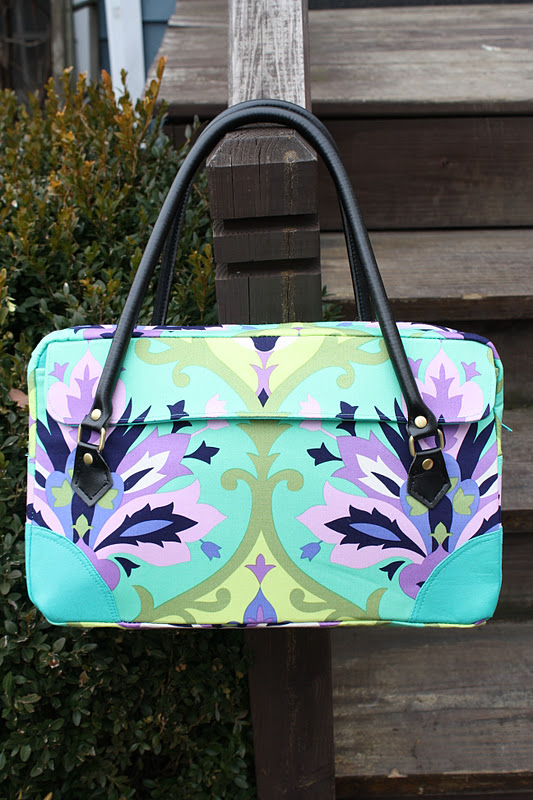
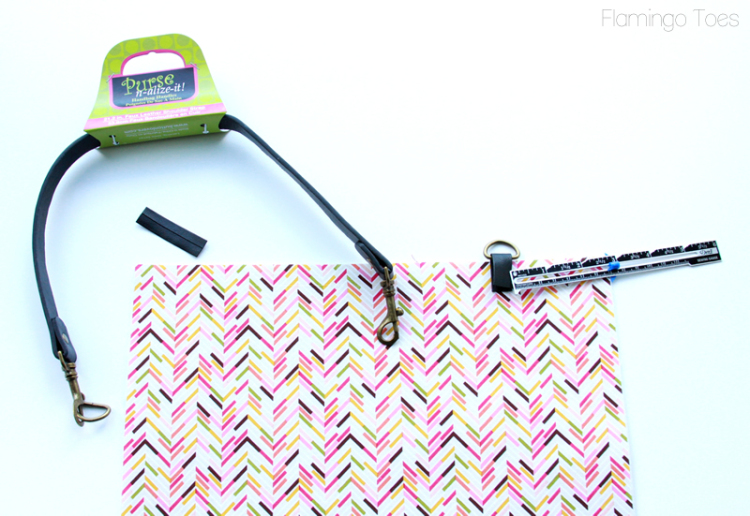
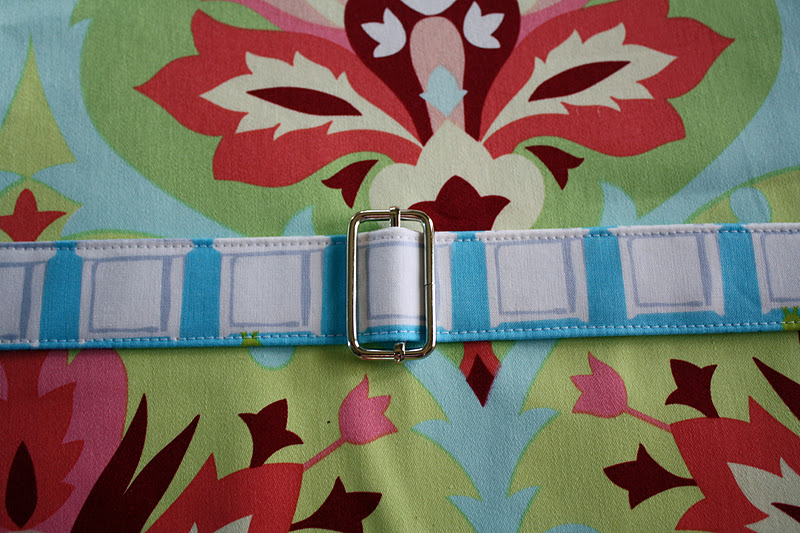
– 23″ – 28″ leather handles (I used size 28″ handles for a shoulder bag)
– 1/2″ magnetic snap
– zipper foot
– seam ripper
– coordinating thread
– hand sewing needle
– fabric marker or chalk
Helpful Hint: I purchased my handles here; I found these to be the best price around, and the quality is exceptional.
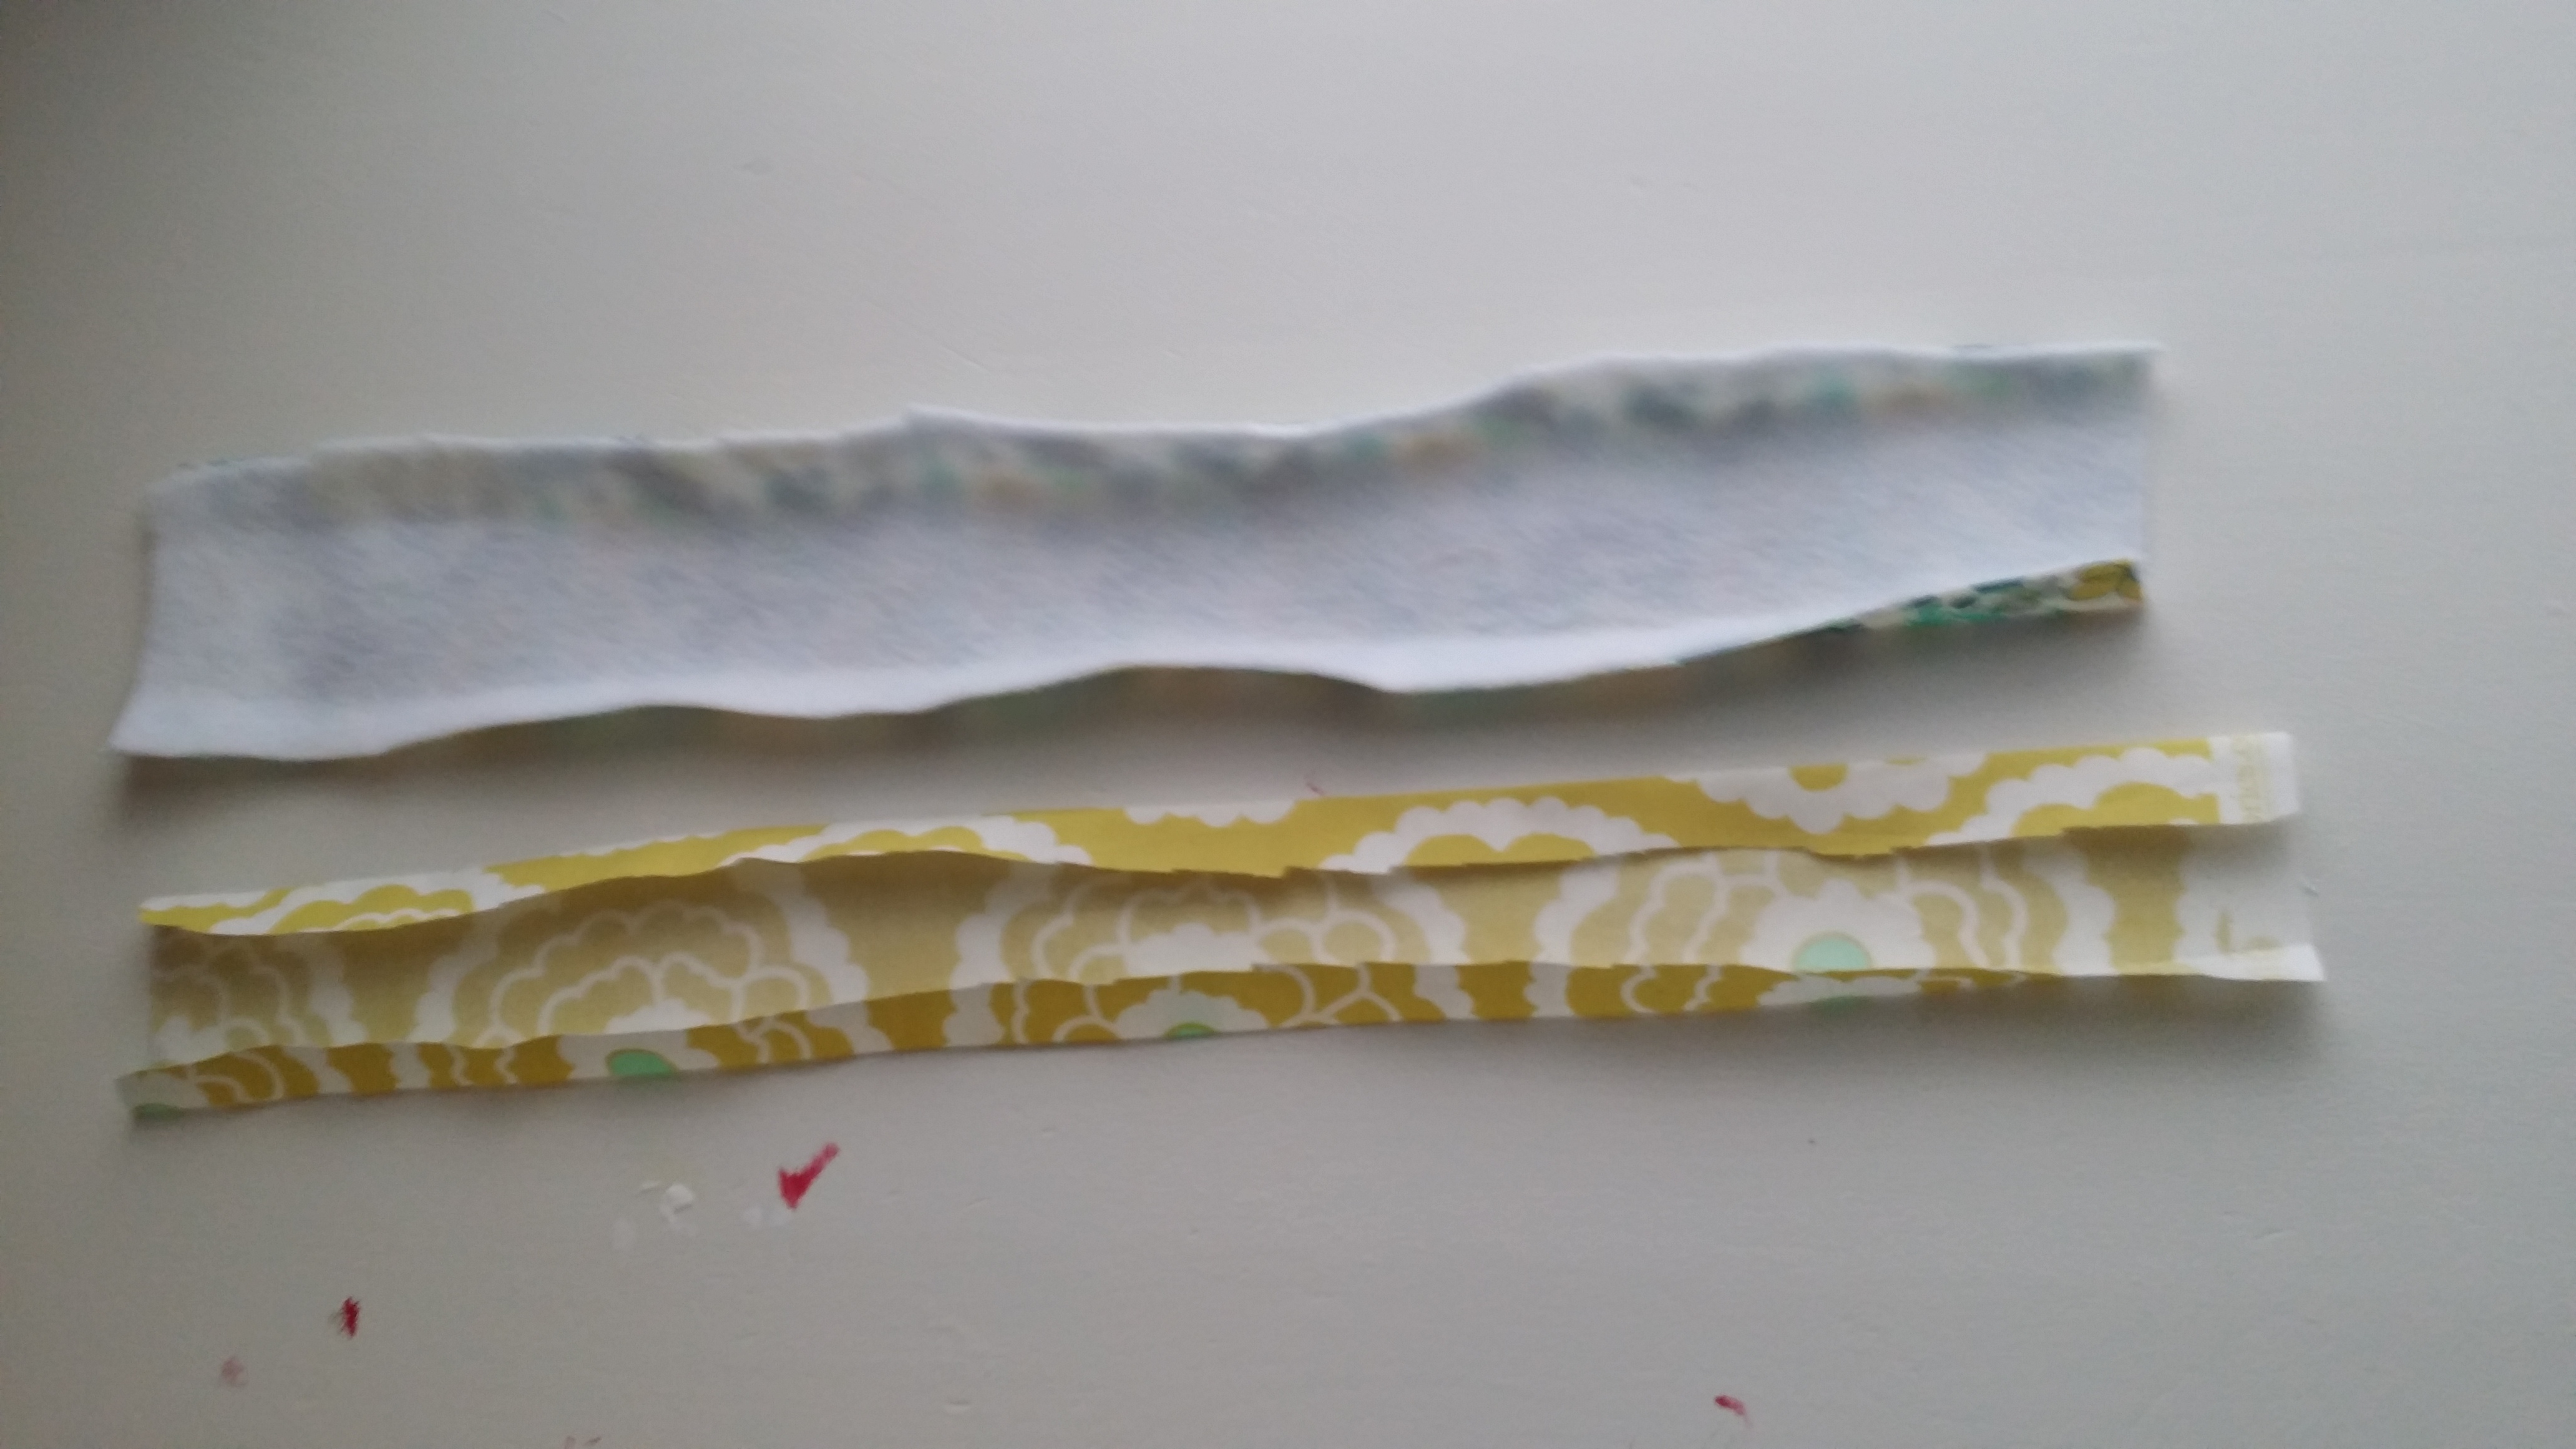
STEP 1 ~ CUT OUT YOUR FABRIC
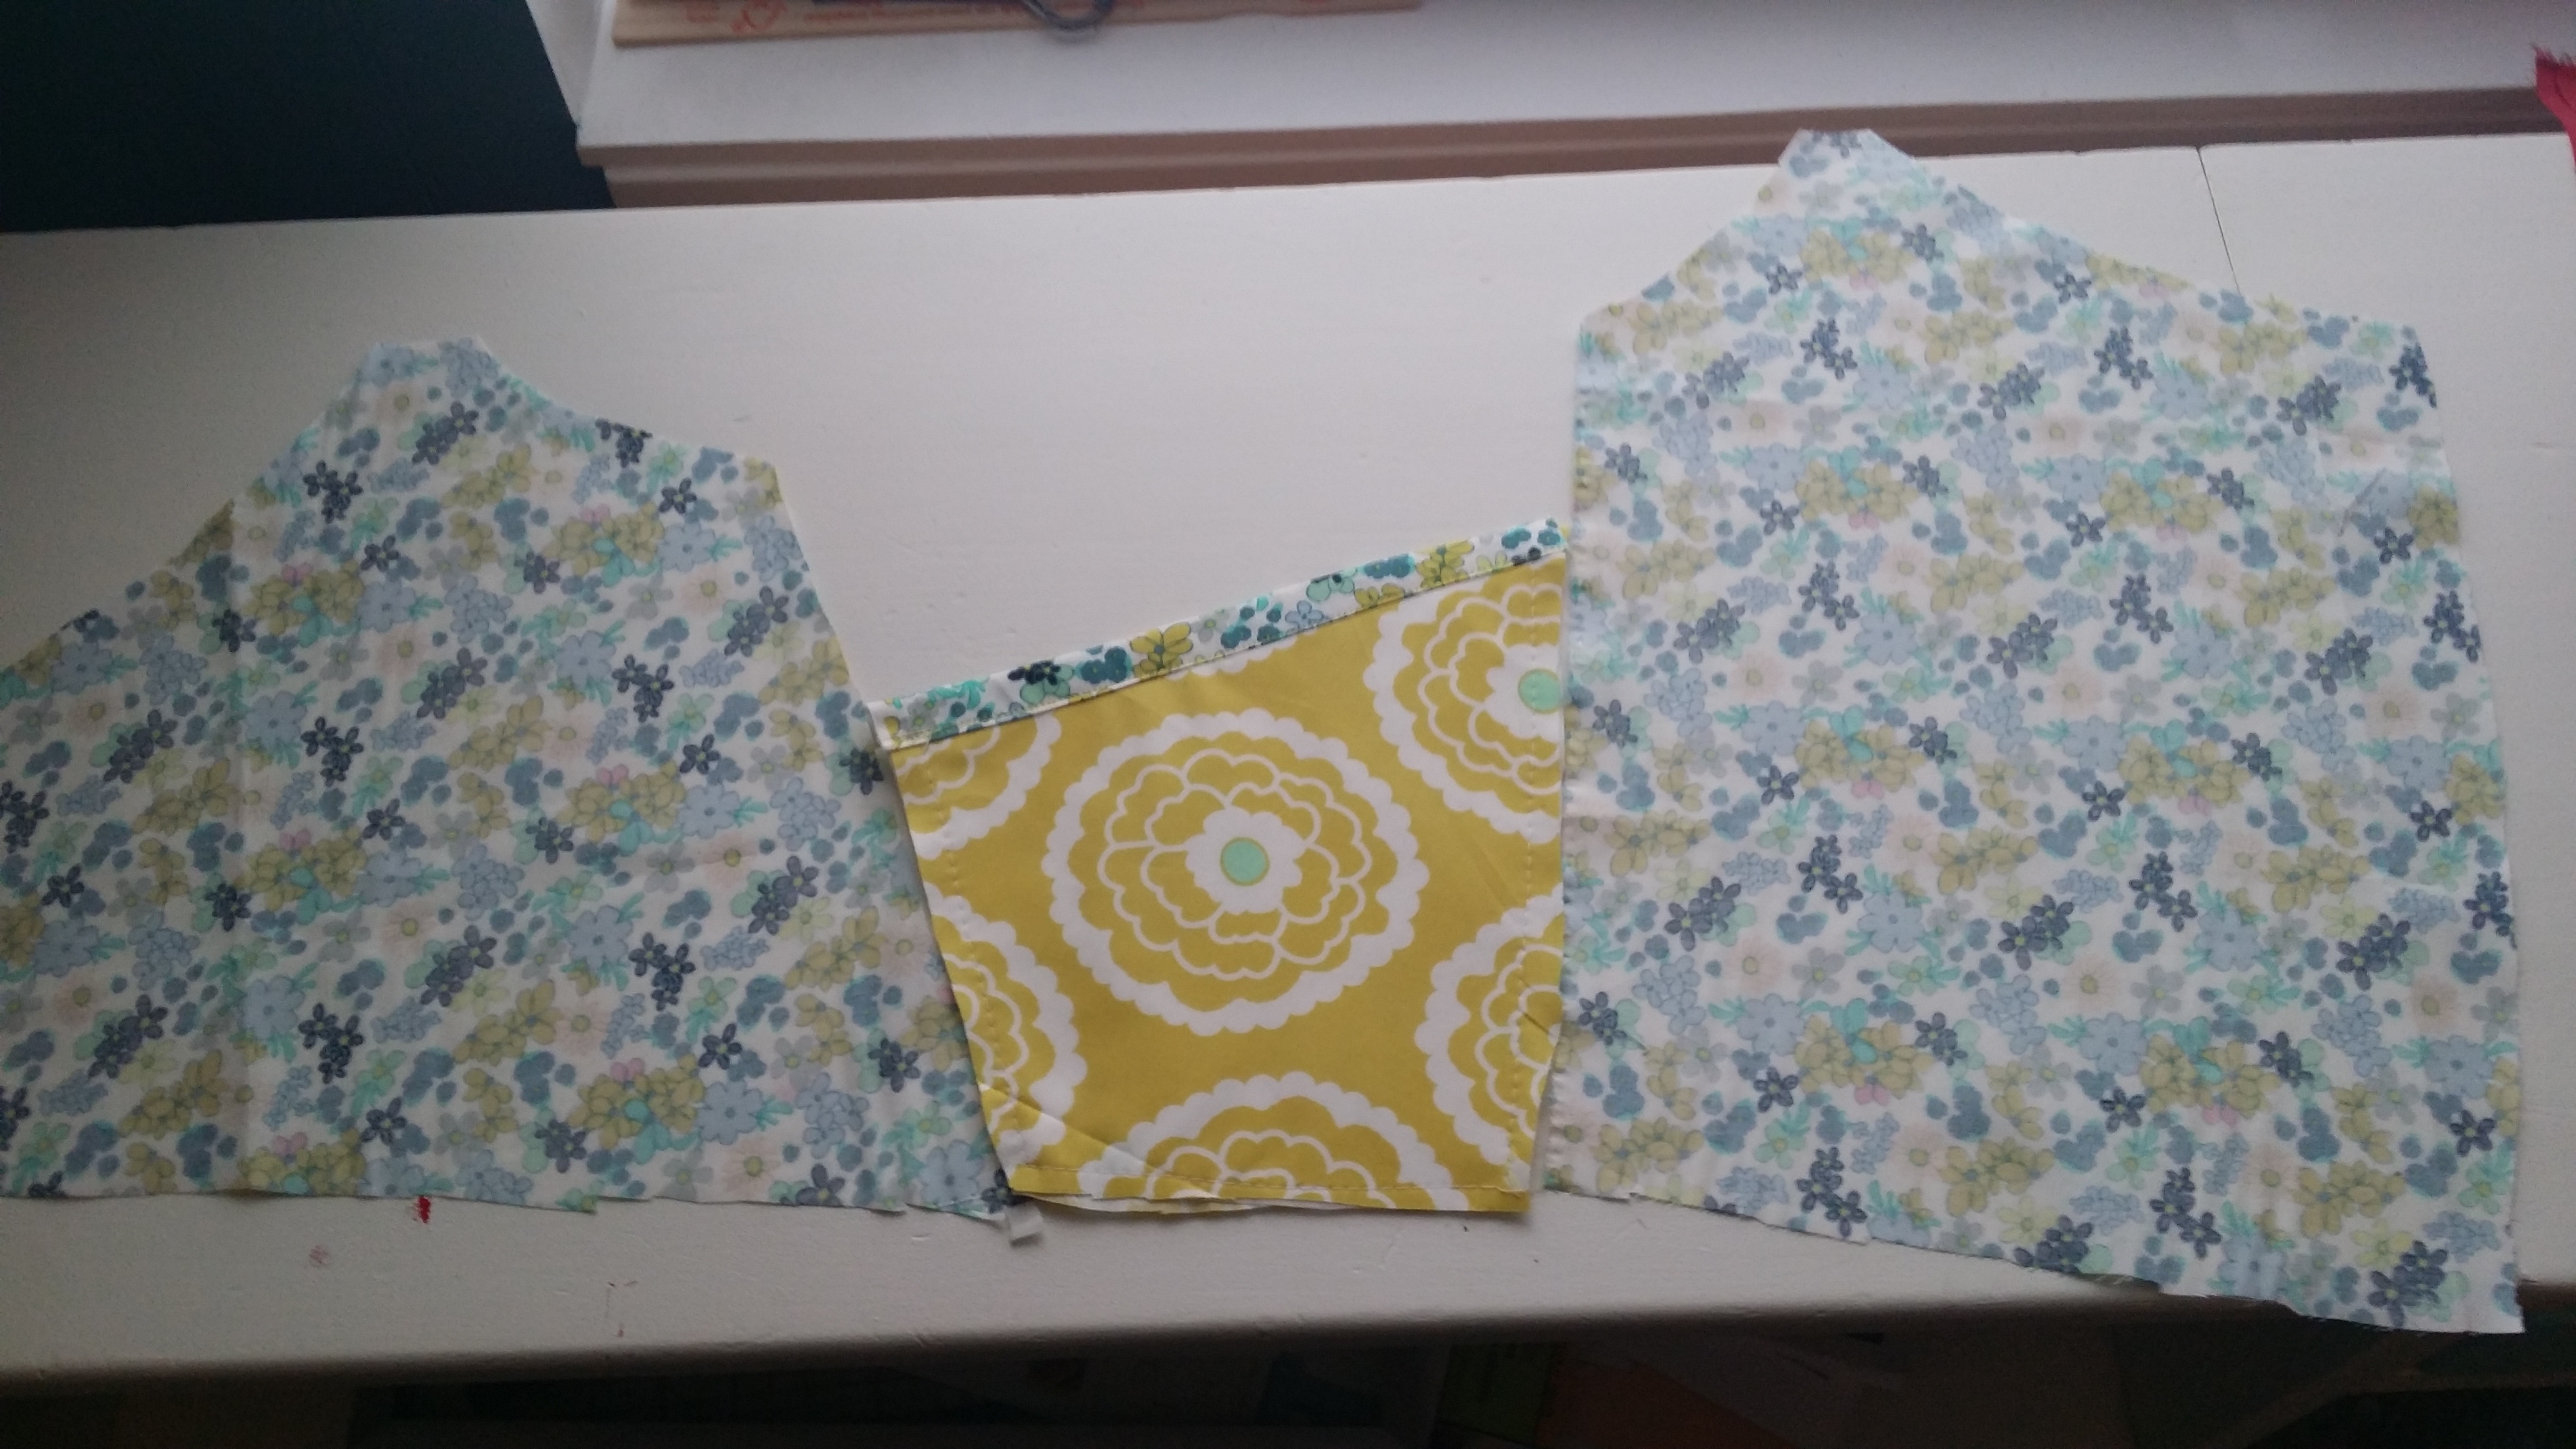
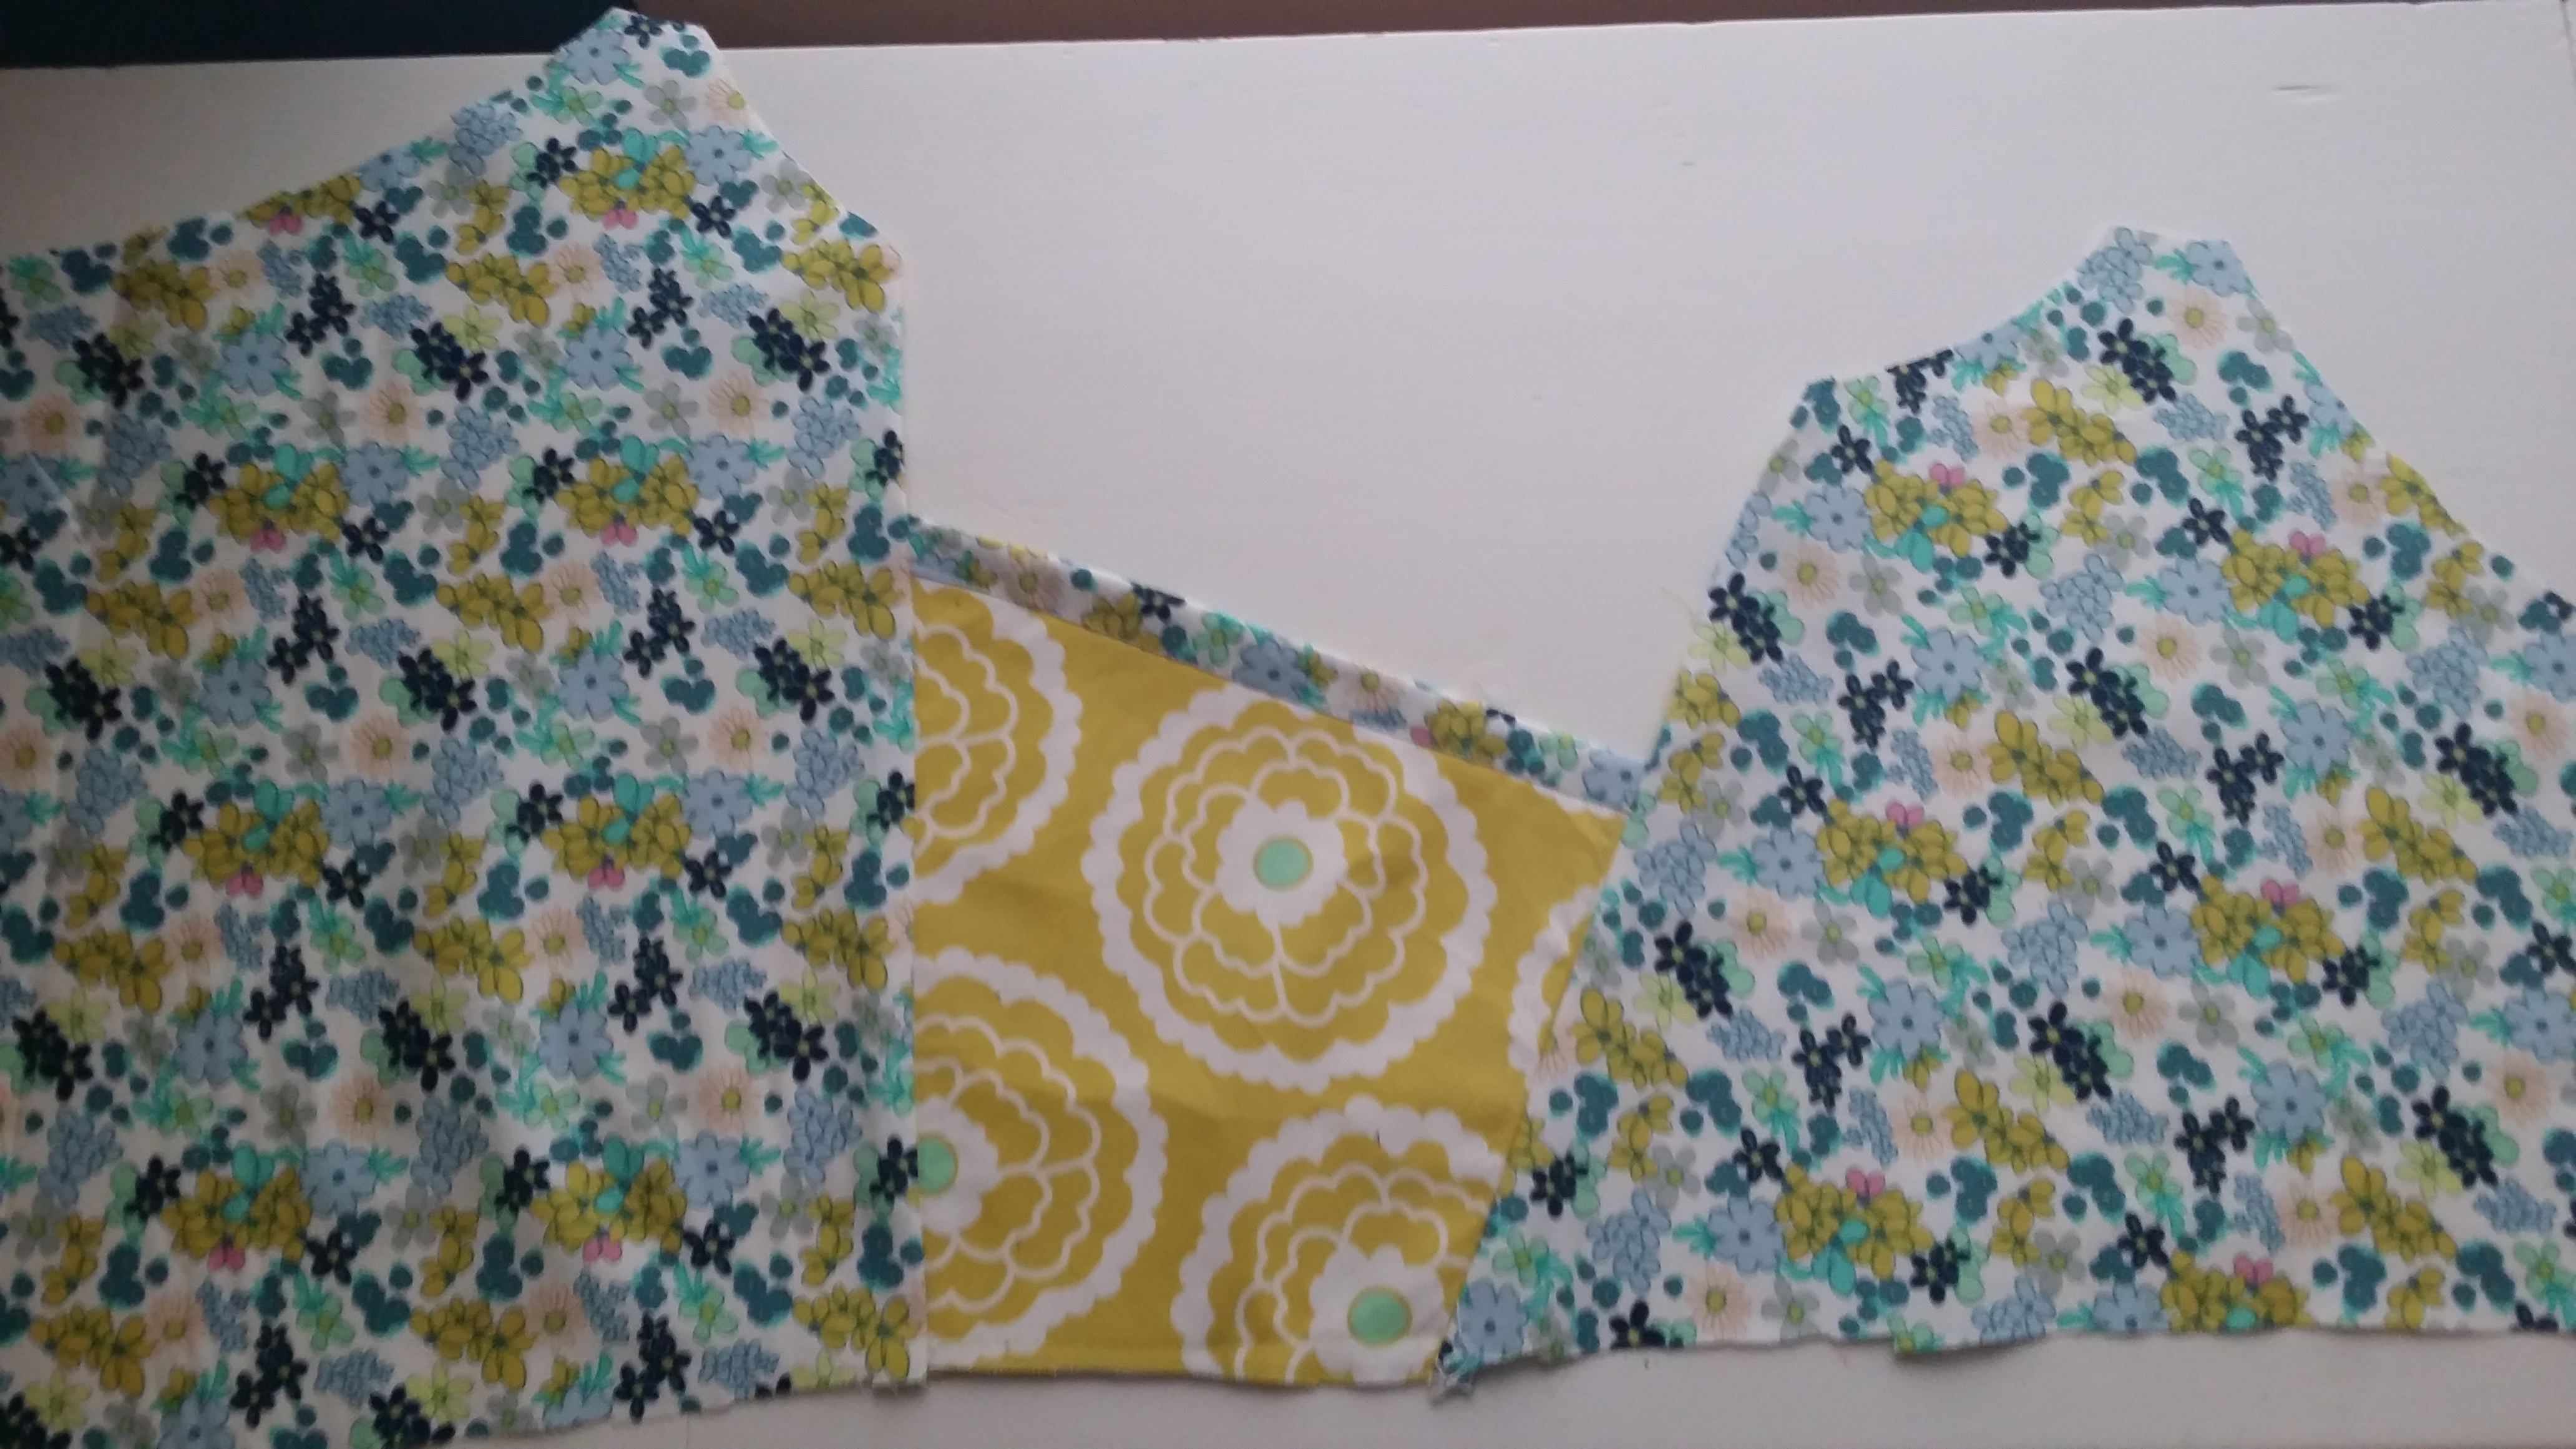
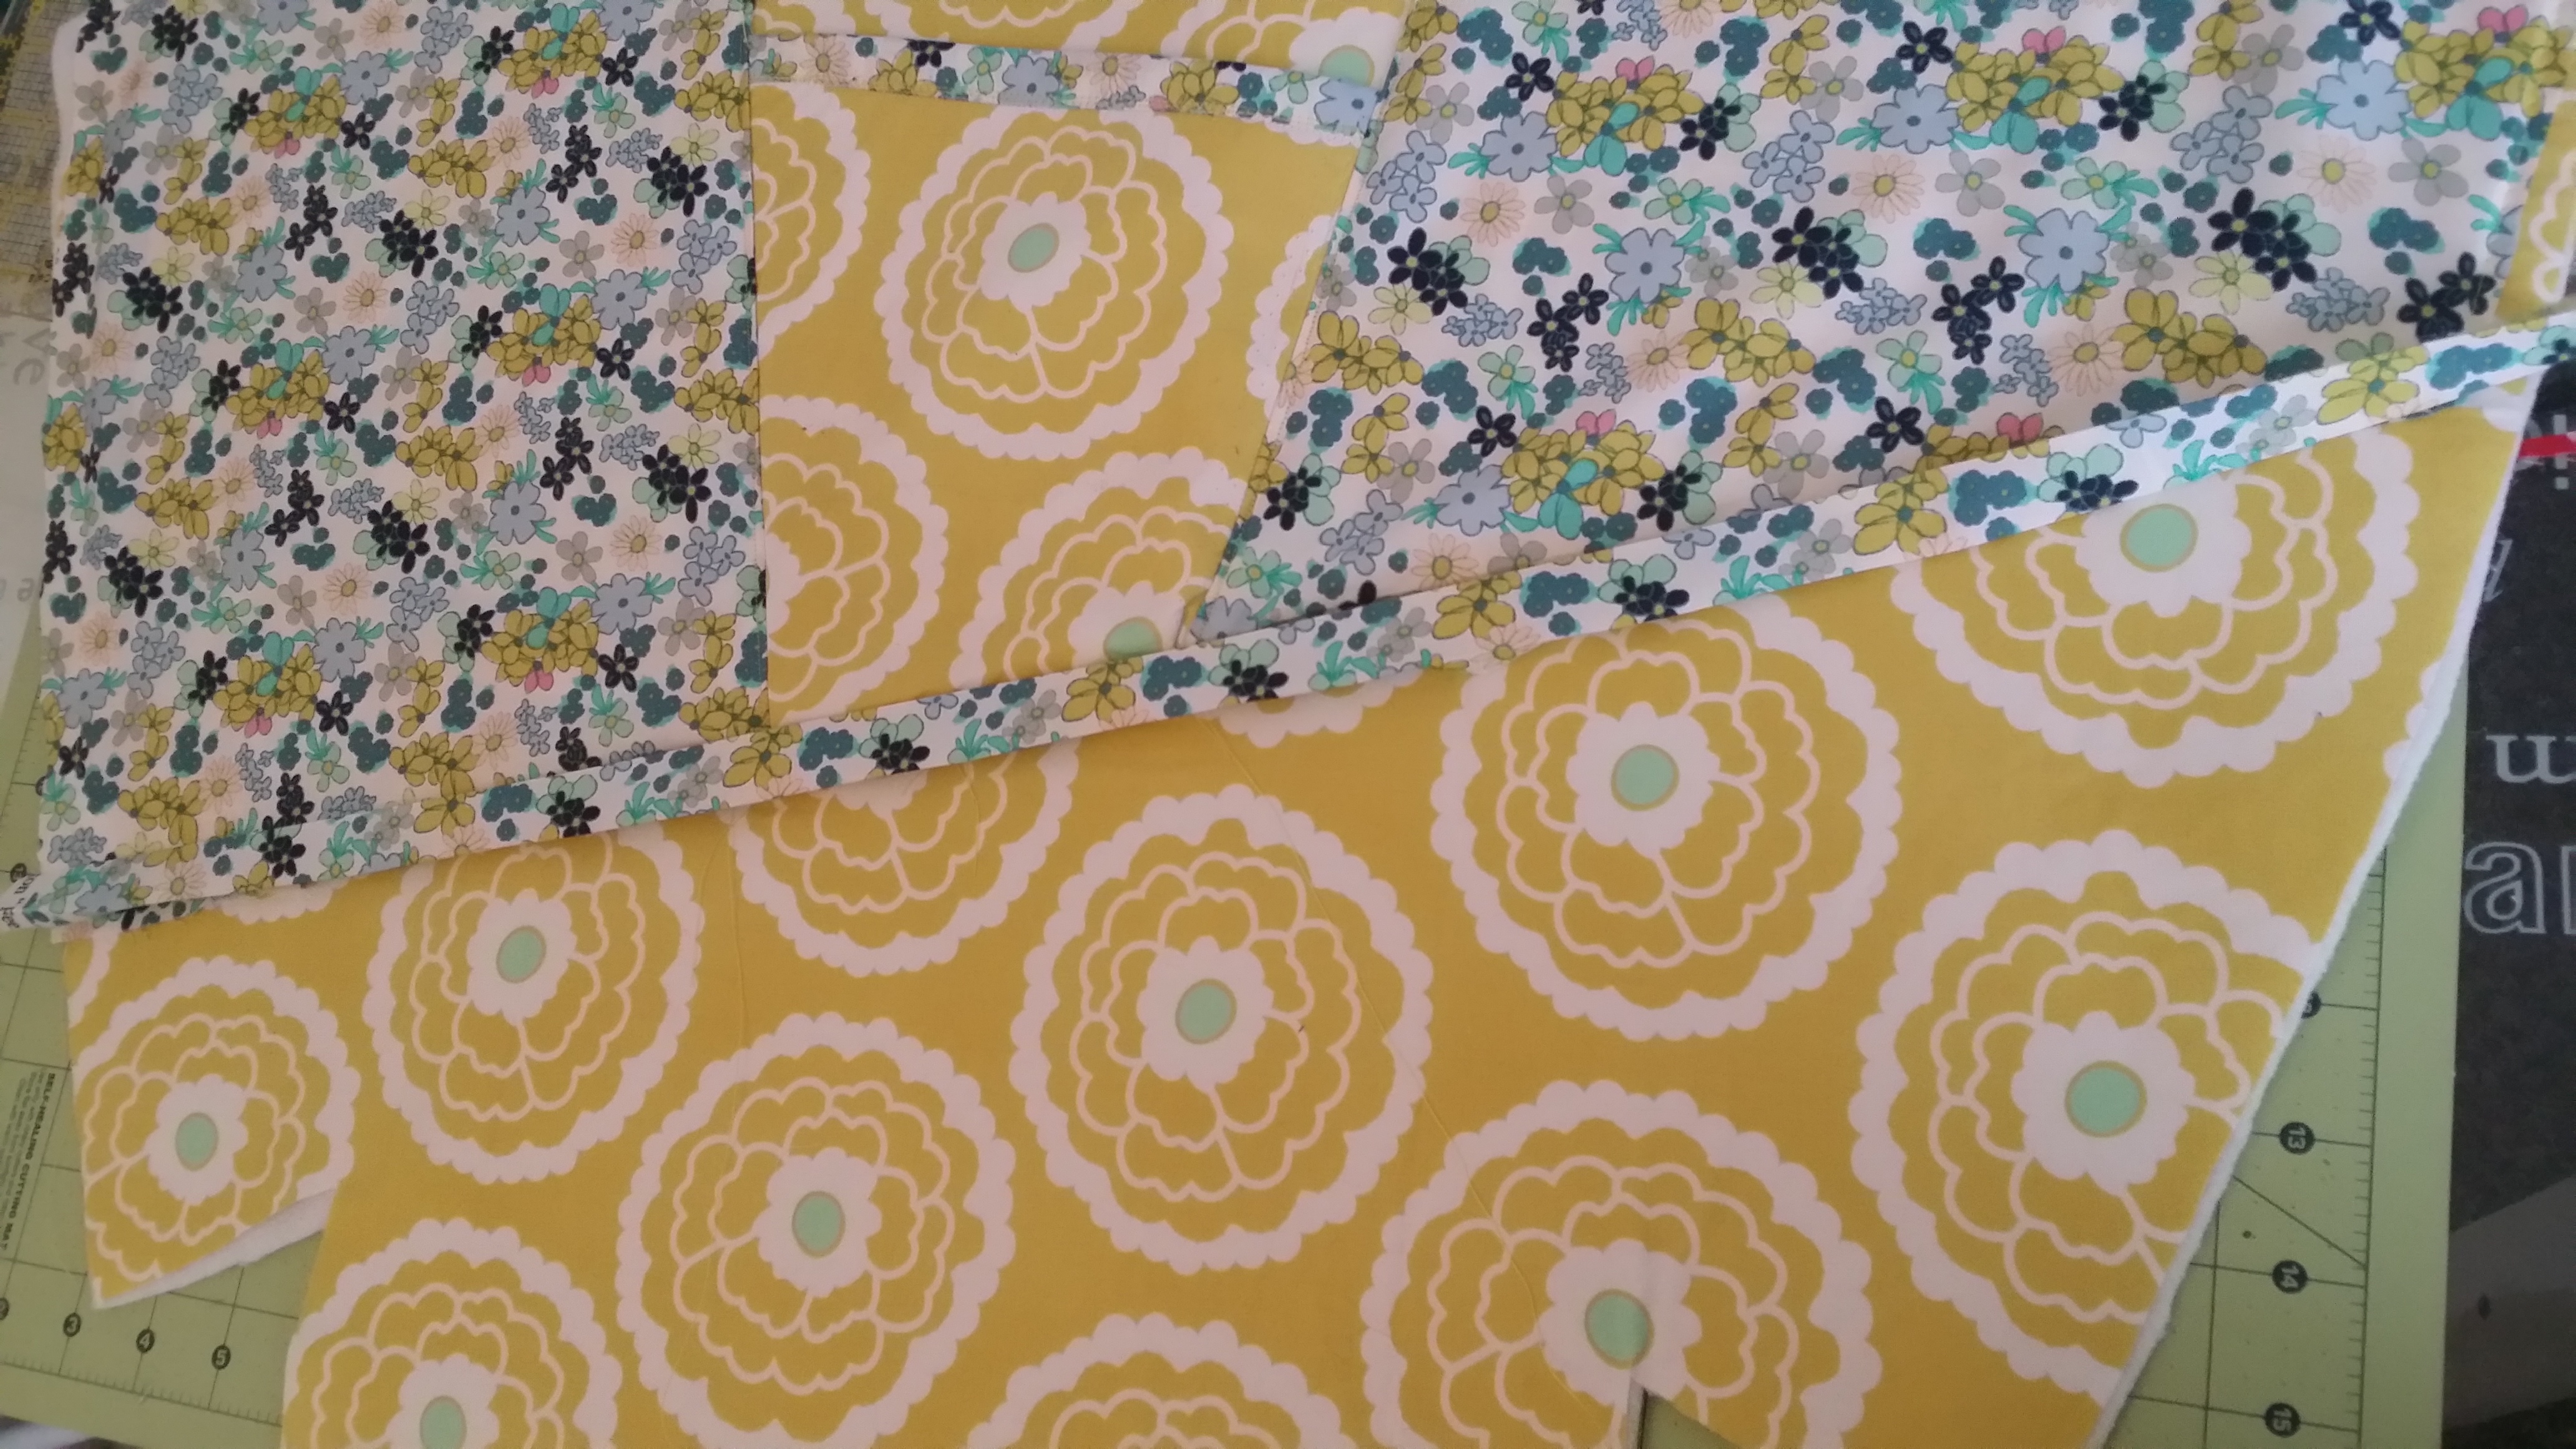
From the Exterior Fabric
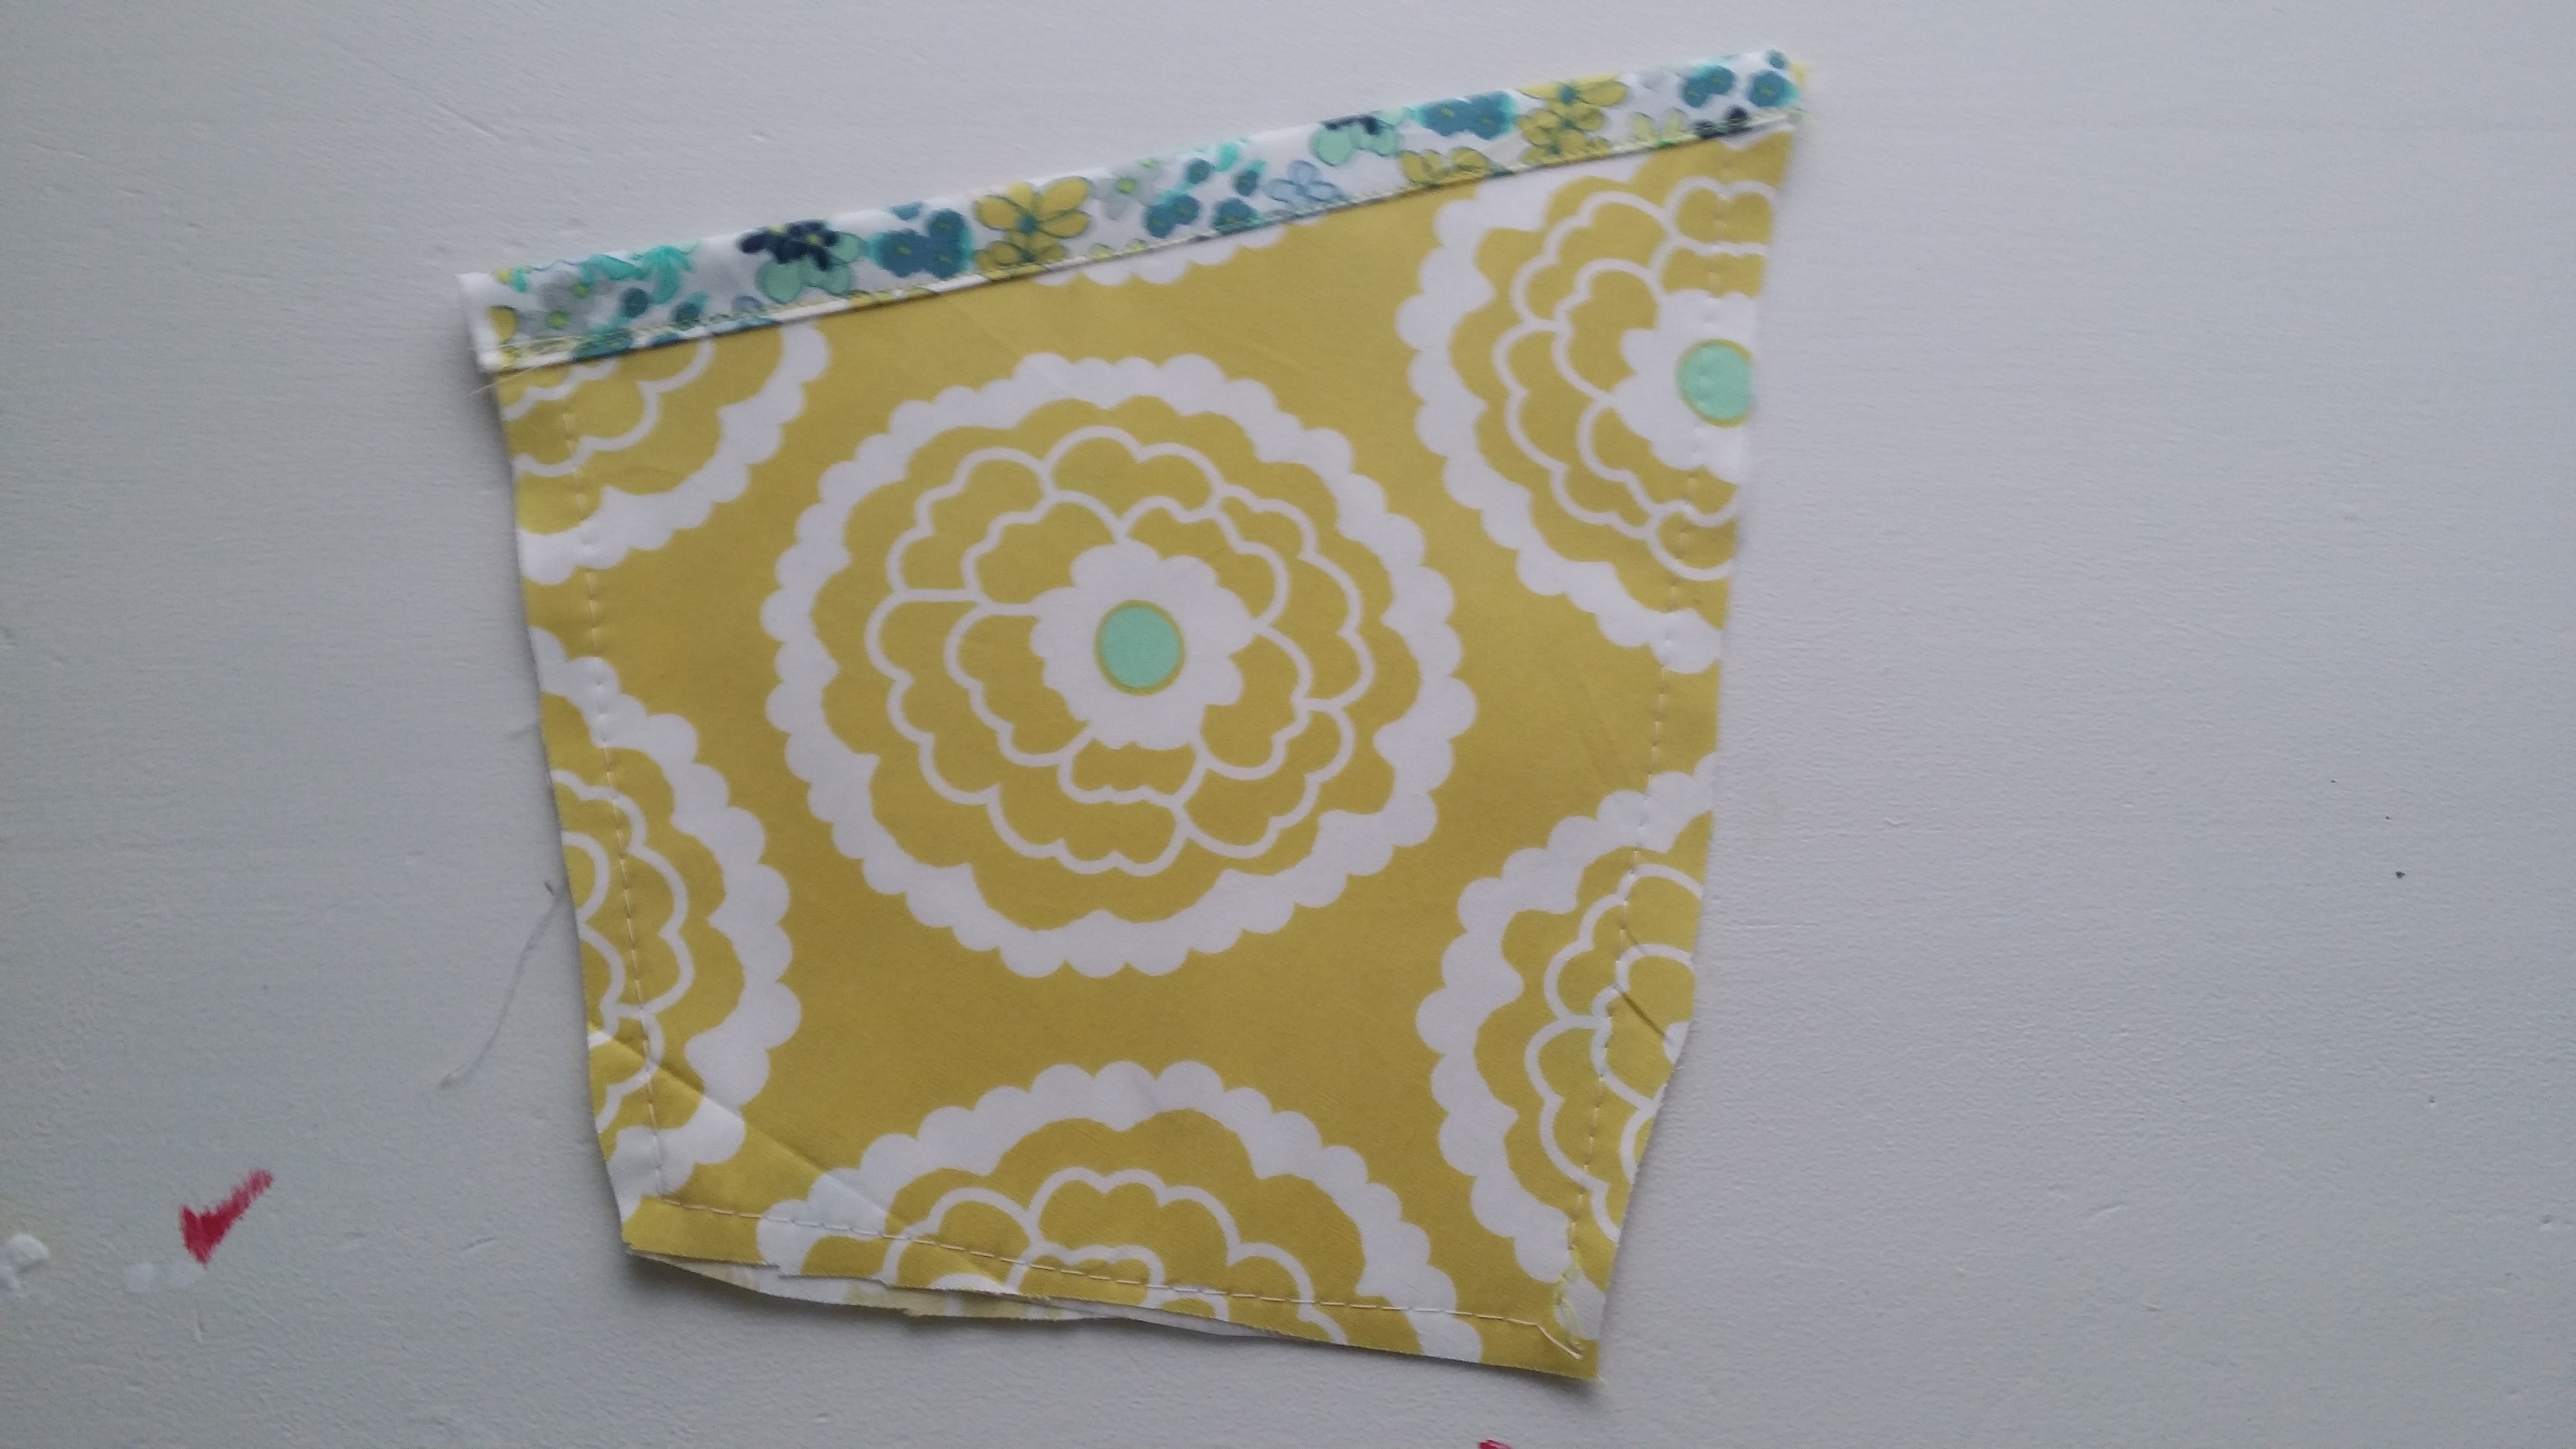
1f. Using the Flap pattern piece, cut 1 on the fold. This will be your Interior Flap.
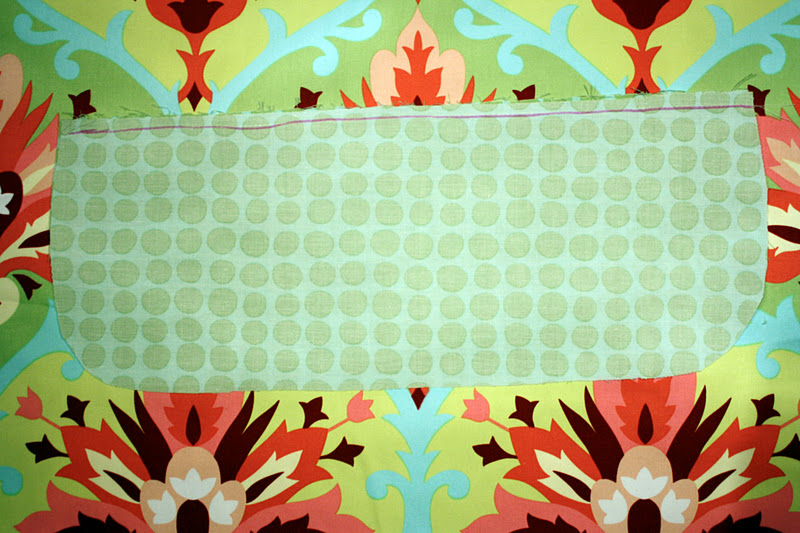
1g. Cut a piece measuring 5-1/2″ tall by 14″ long. This will be your Interior Bottom Panel.
1h. Cut 2 each, with each piece measuring 5-1/2″ tall by 5-1/2″ long. These will be your Interior Side Panels.
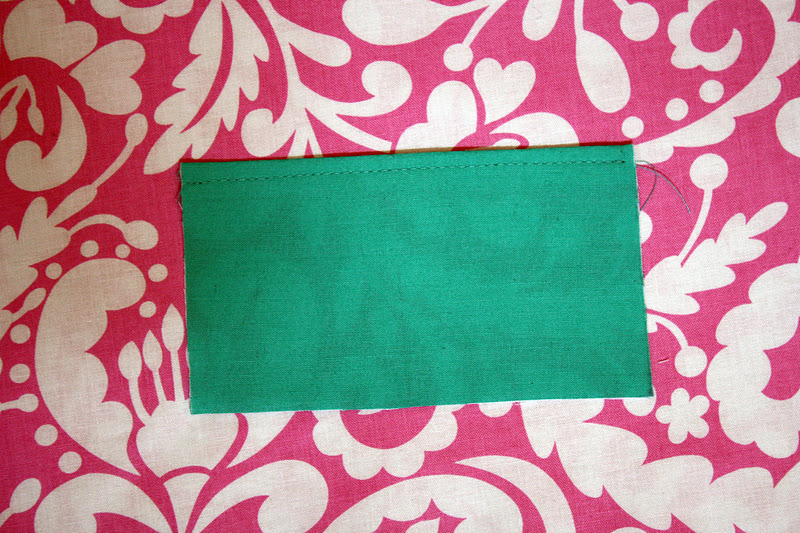
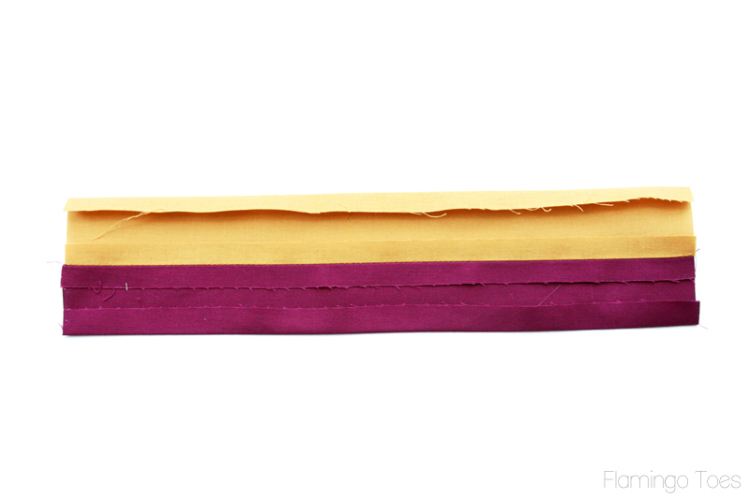
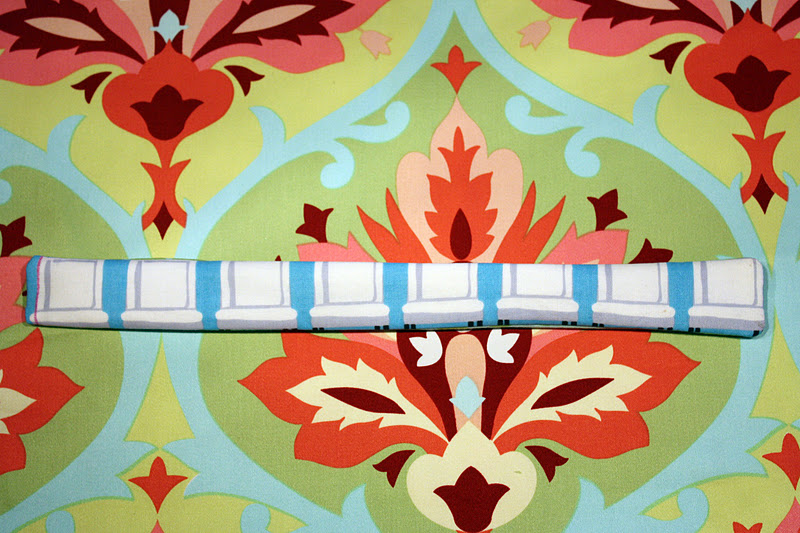
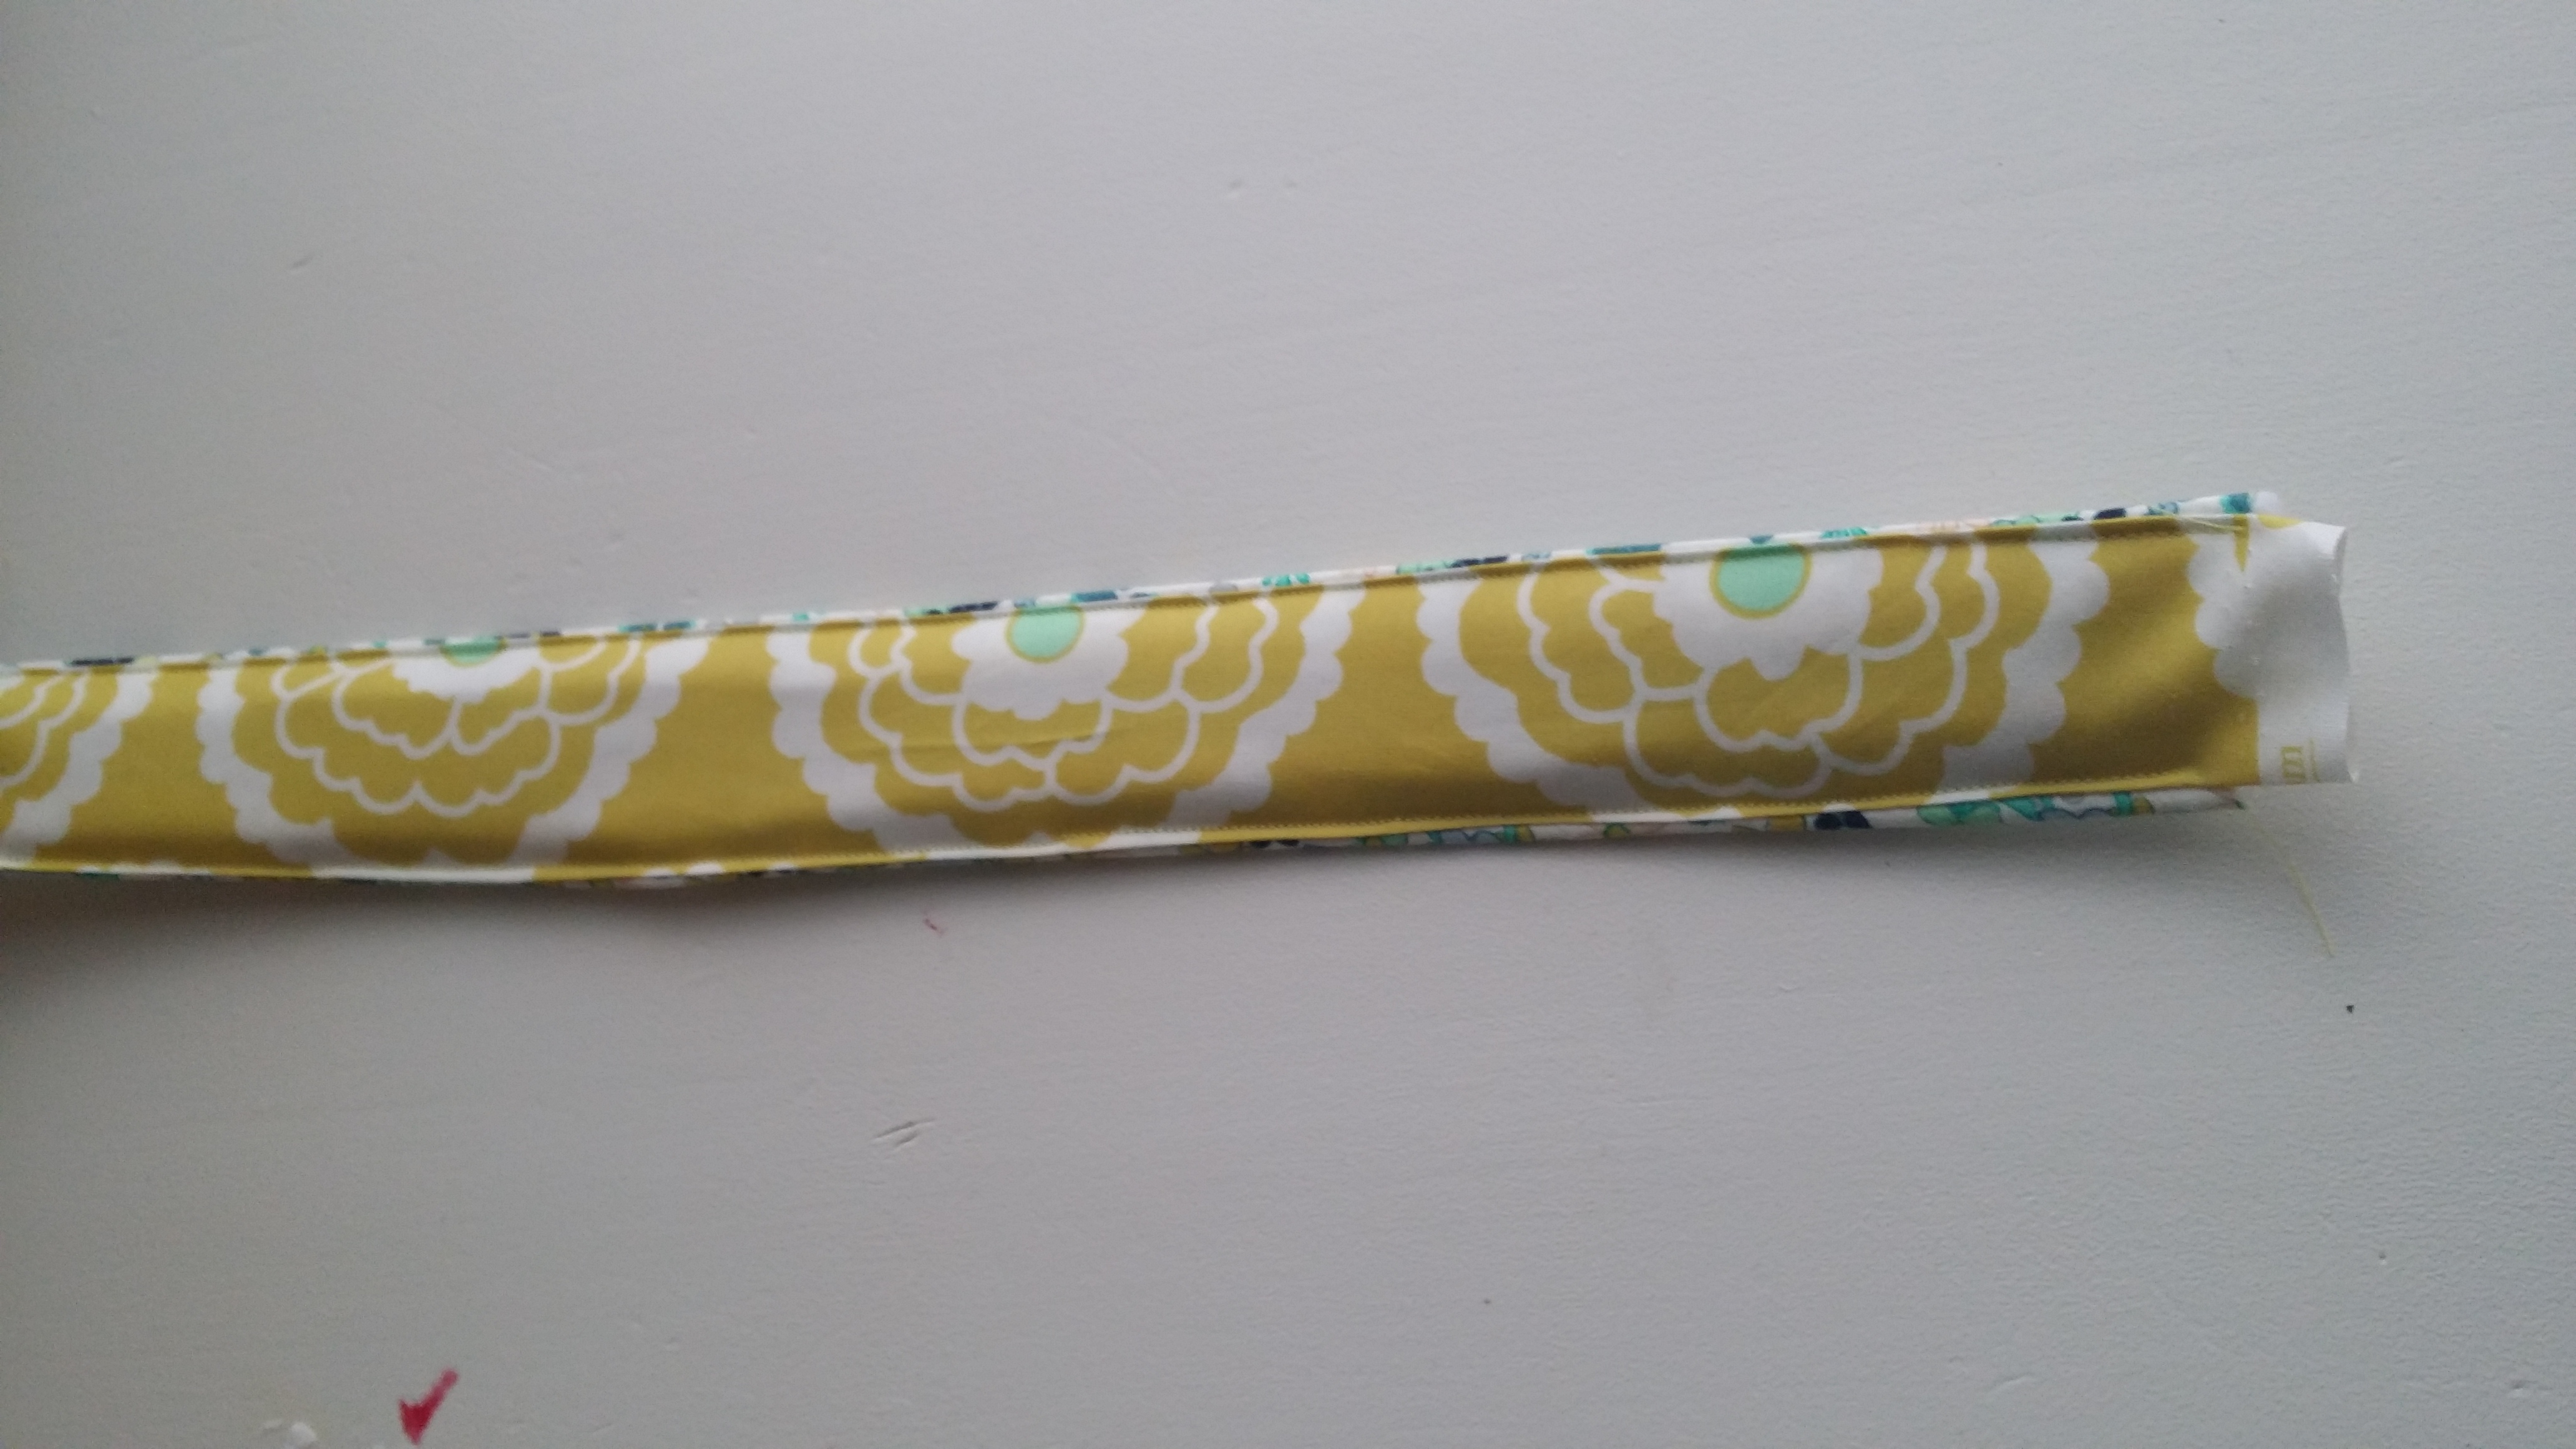
1i. Cut 2 pieces, each measuring 4-3/4″ x 22″. These will be your Zipper Panels.
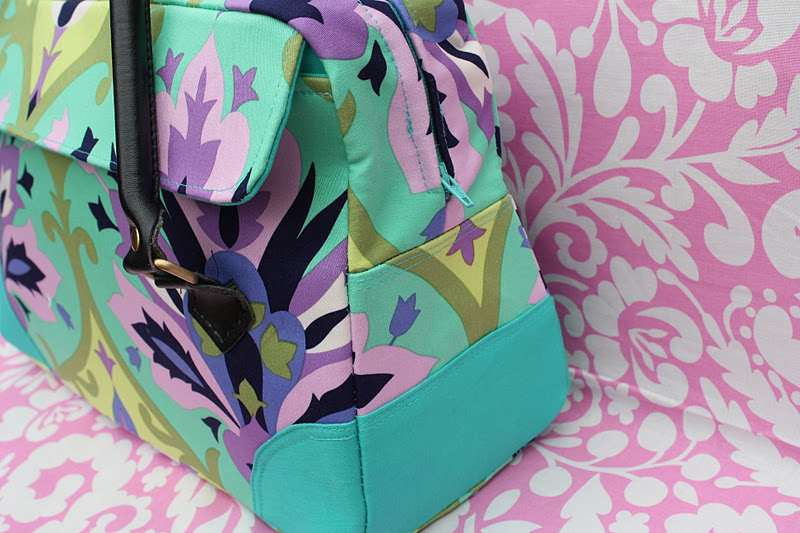
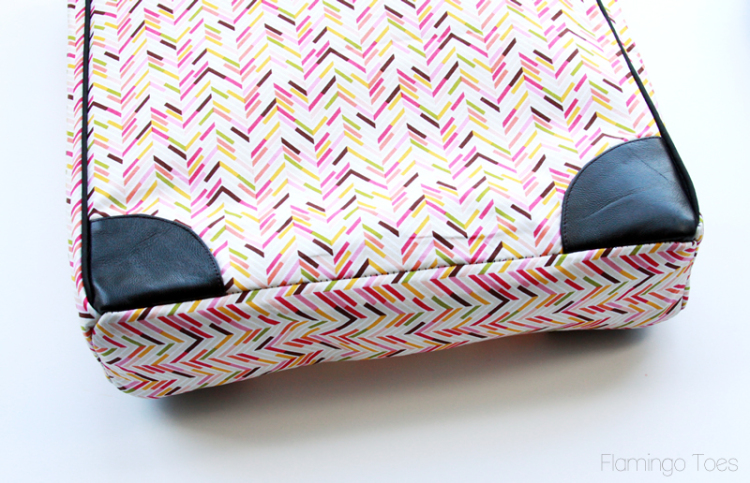
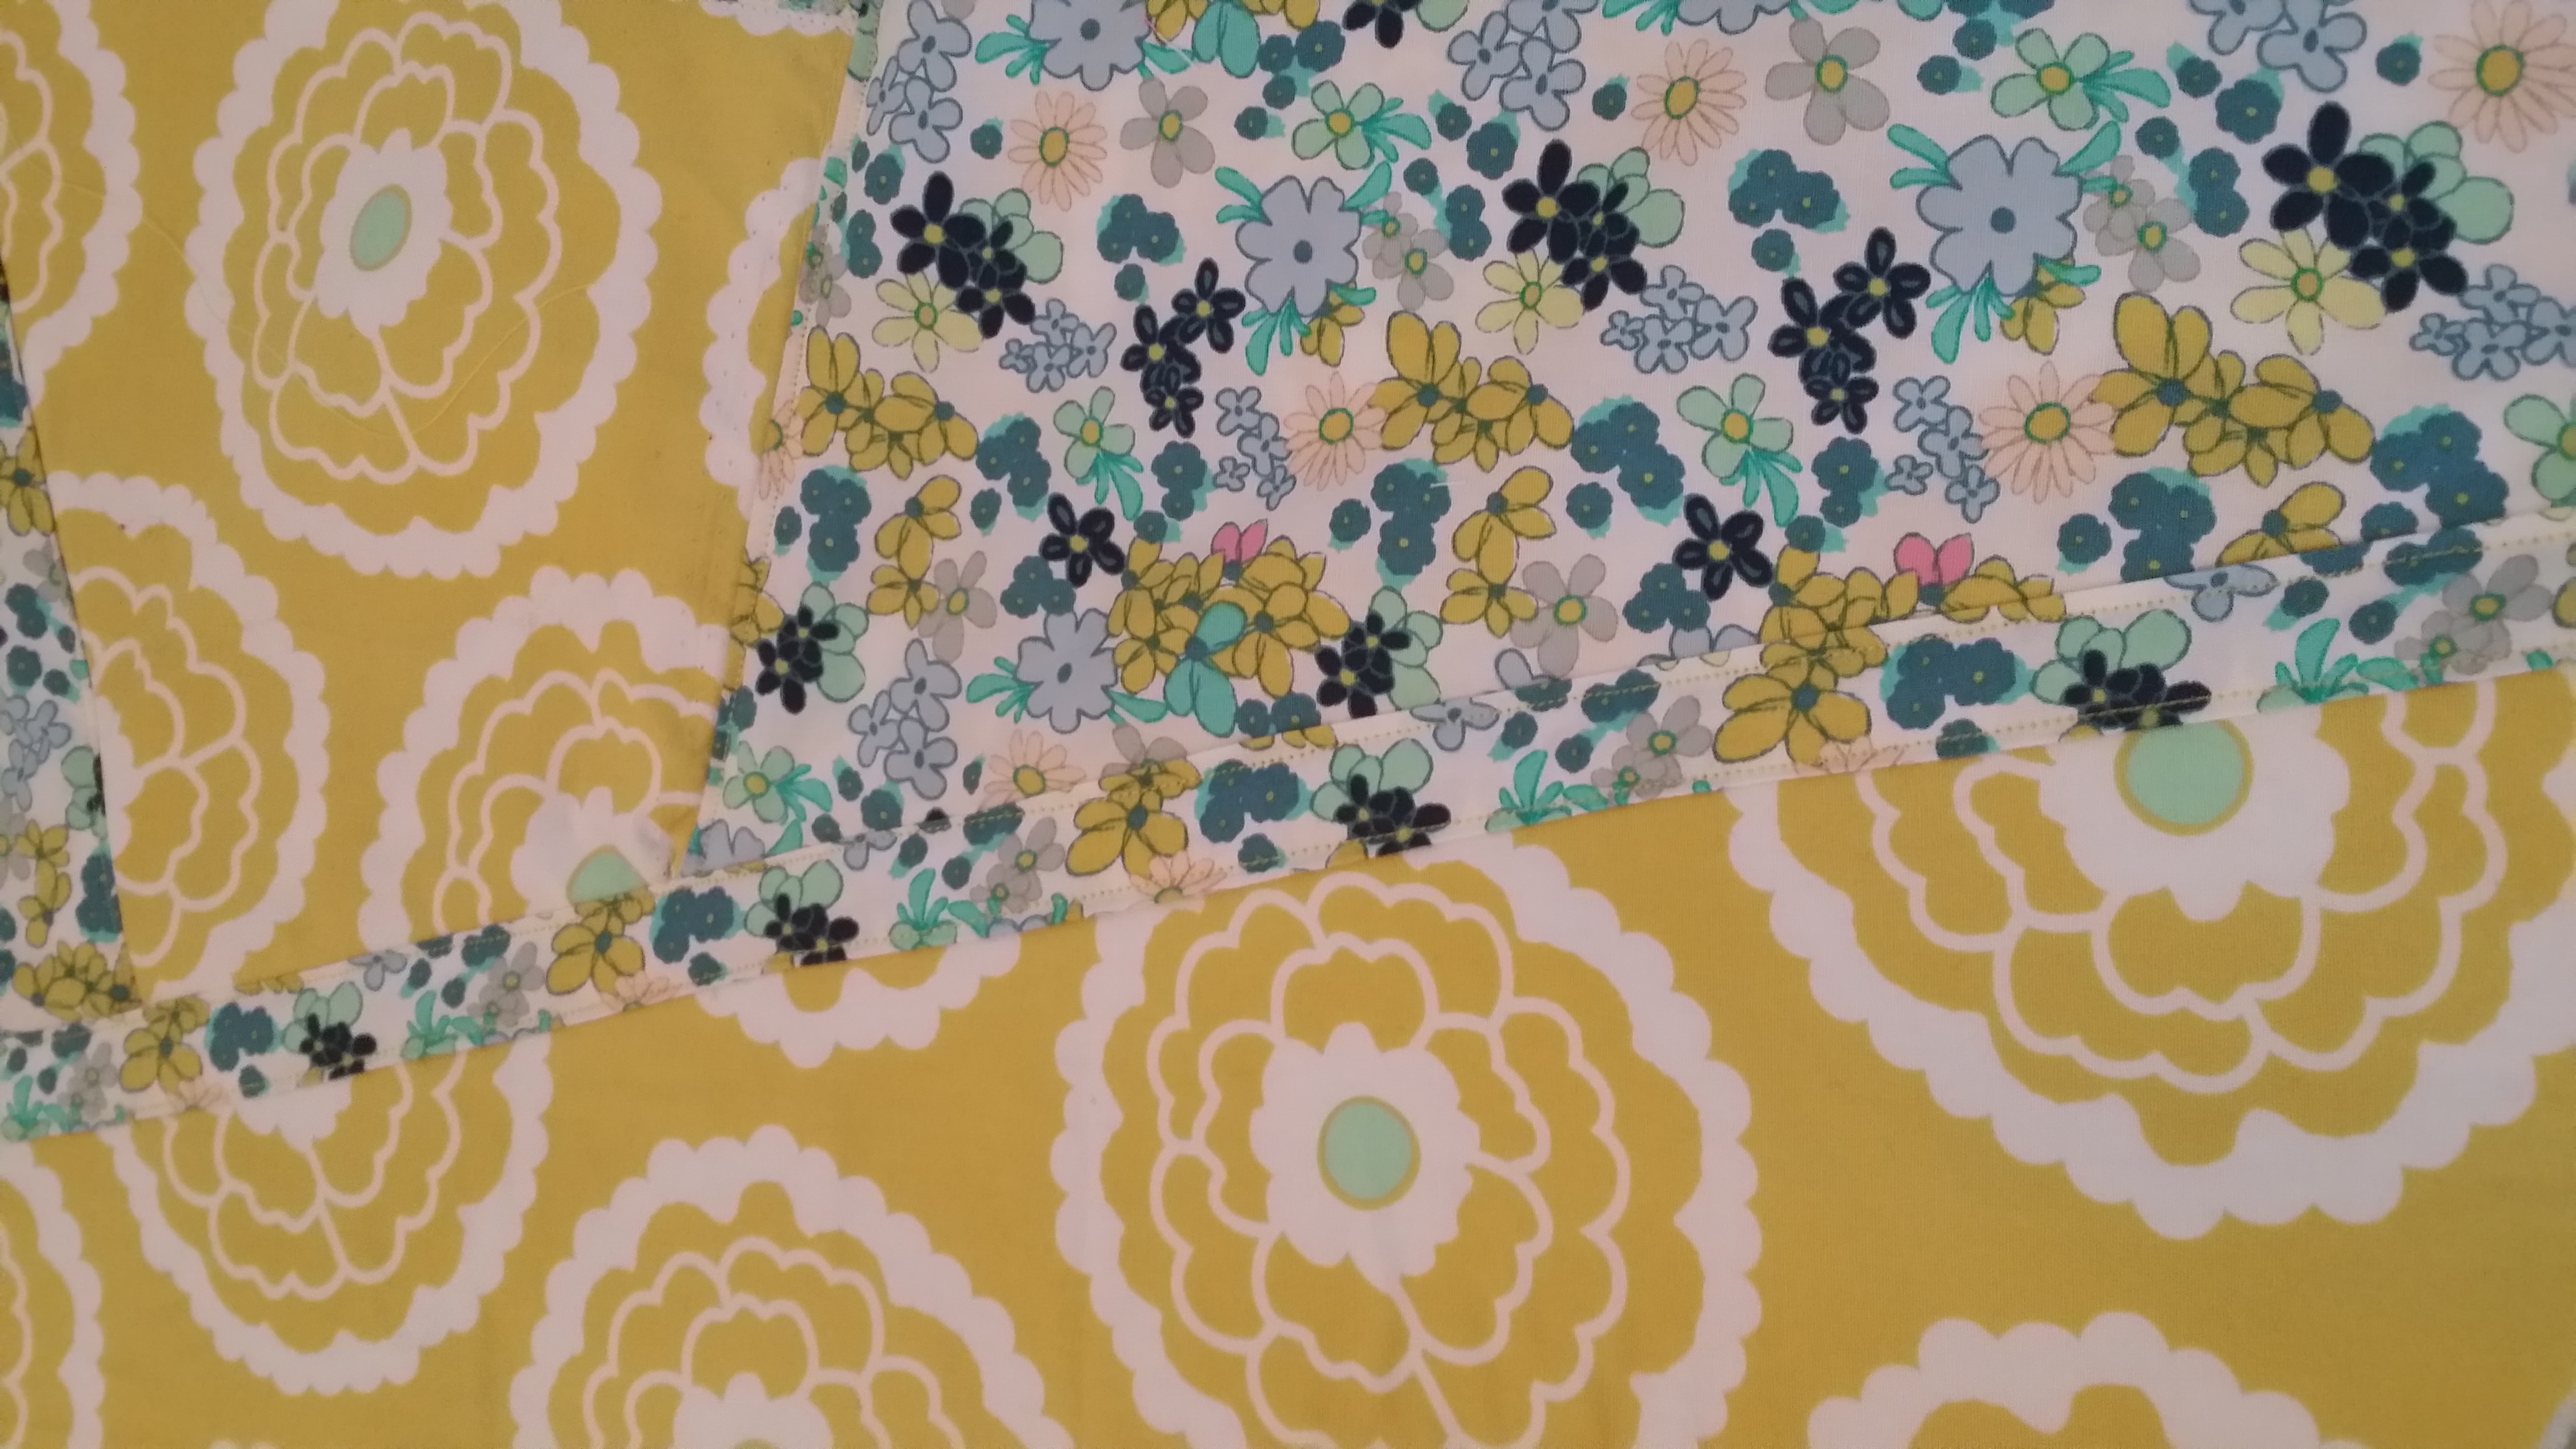
1j. Using your Side Accent pattern piece, cut 4 pieces. Also cut 2 pieces that are each 3-1/2″ tall by 5-1/2″ long. These will be your Side Accent pieces.
From the Fusible Woven Interfacing
1k. Repeat Steps 2e. through 2j.
From the Fusible Fleece
1l. Repeat Step 2i. Also cut 1 Main Panel and 1 Flap. Cut 2 small 2″ x 2″ scraps of fleece as well.
From the Pellon 520F
(if you are using Pellon Peltex sew-in interfacing instead, please cut Step 2l. as 1 layer of fusible woven and 1 layer of Peltex sew-in; you will trim the Peltex by 1/2″ on all sides. For all future instructions referring to Pellon 520F, you will do this instead: place the Peltex against the wrong side of your fabric, centered. Follow that with one piece of fusible woven interfacing, with the fusible side against the Peltex. Fuse in place, sealing the Peltex against your fabric).
1m. Cut 2 each of the Main Panels, 1 each of the Flap, 2 each of the Side Panels, and 1 each of the Bottom Panel.
STEP 2 ~ FUSE YOUR FABRICS
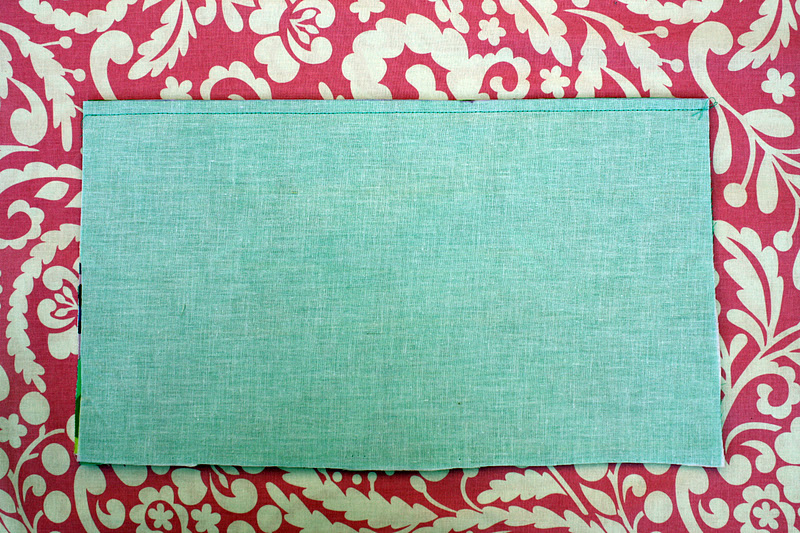
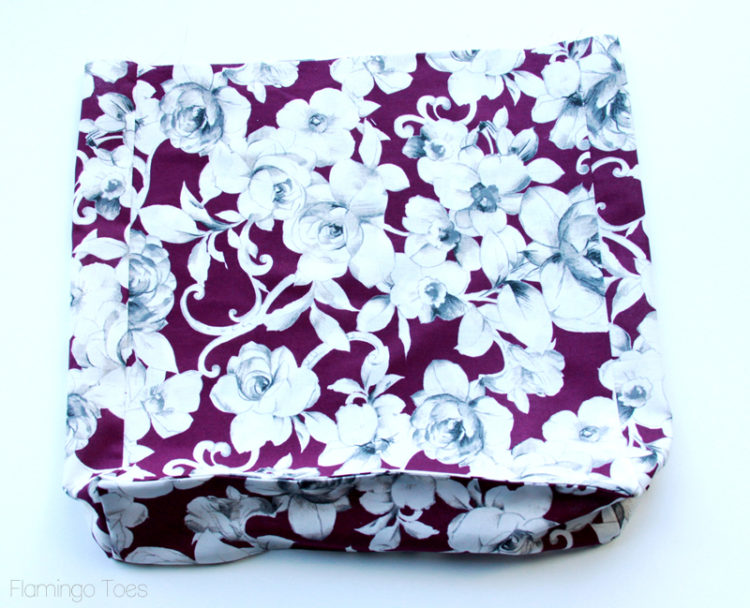
2a. Take 1 Interior Main Panel and one of the corresponding fusible woven interfacing pieces. Fuse the woven interfacing to the wrong side of the Interior Main Panel using manufacturer instructions. Repeat for 2 more Interior Main Panels. Also repeat for the Interior Bottom, the Interior Flap, and the Interior Side Panels.
2b. Take the remaining Interior Main Panel and one of the Main Panel pieces cut from Pellon 520F and fuse to the wrong side of your fabric following manufacturer instructions. Repeat for only 1 of the Exterior Main Panels, the Exterior Flap, the Exterior Bottom, and the Exterior Side Panels.
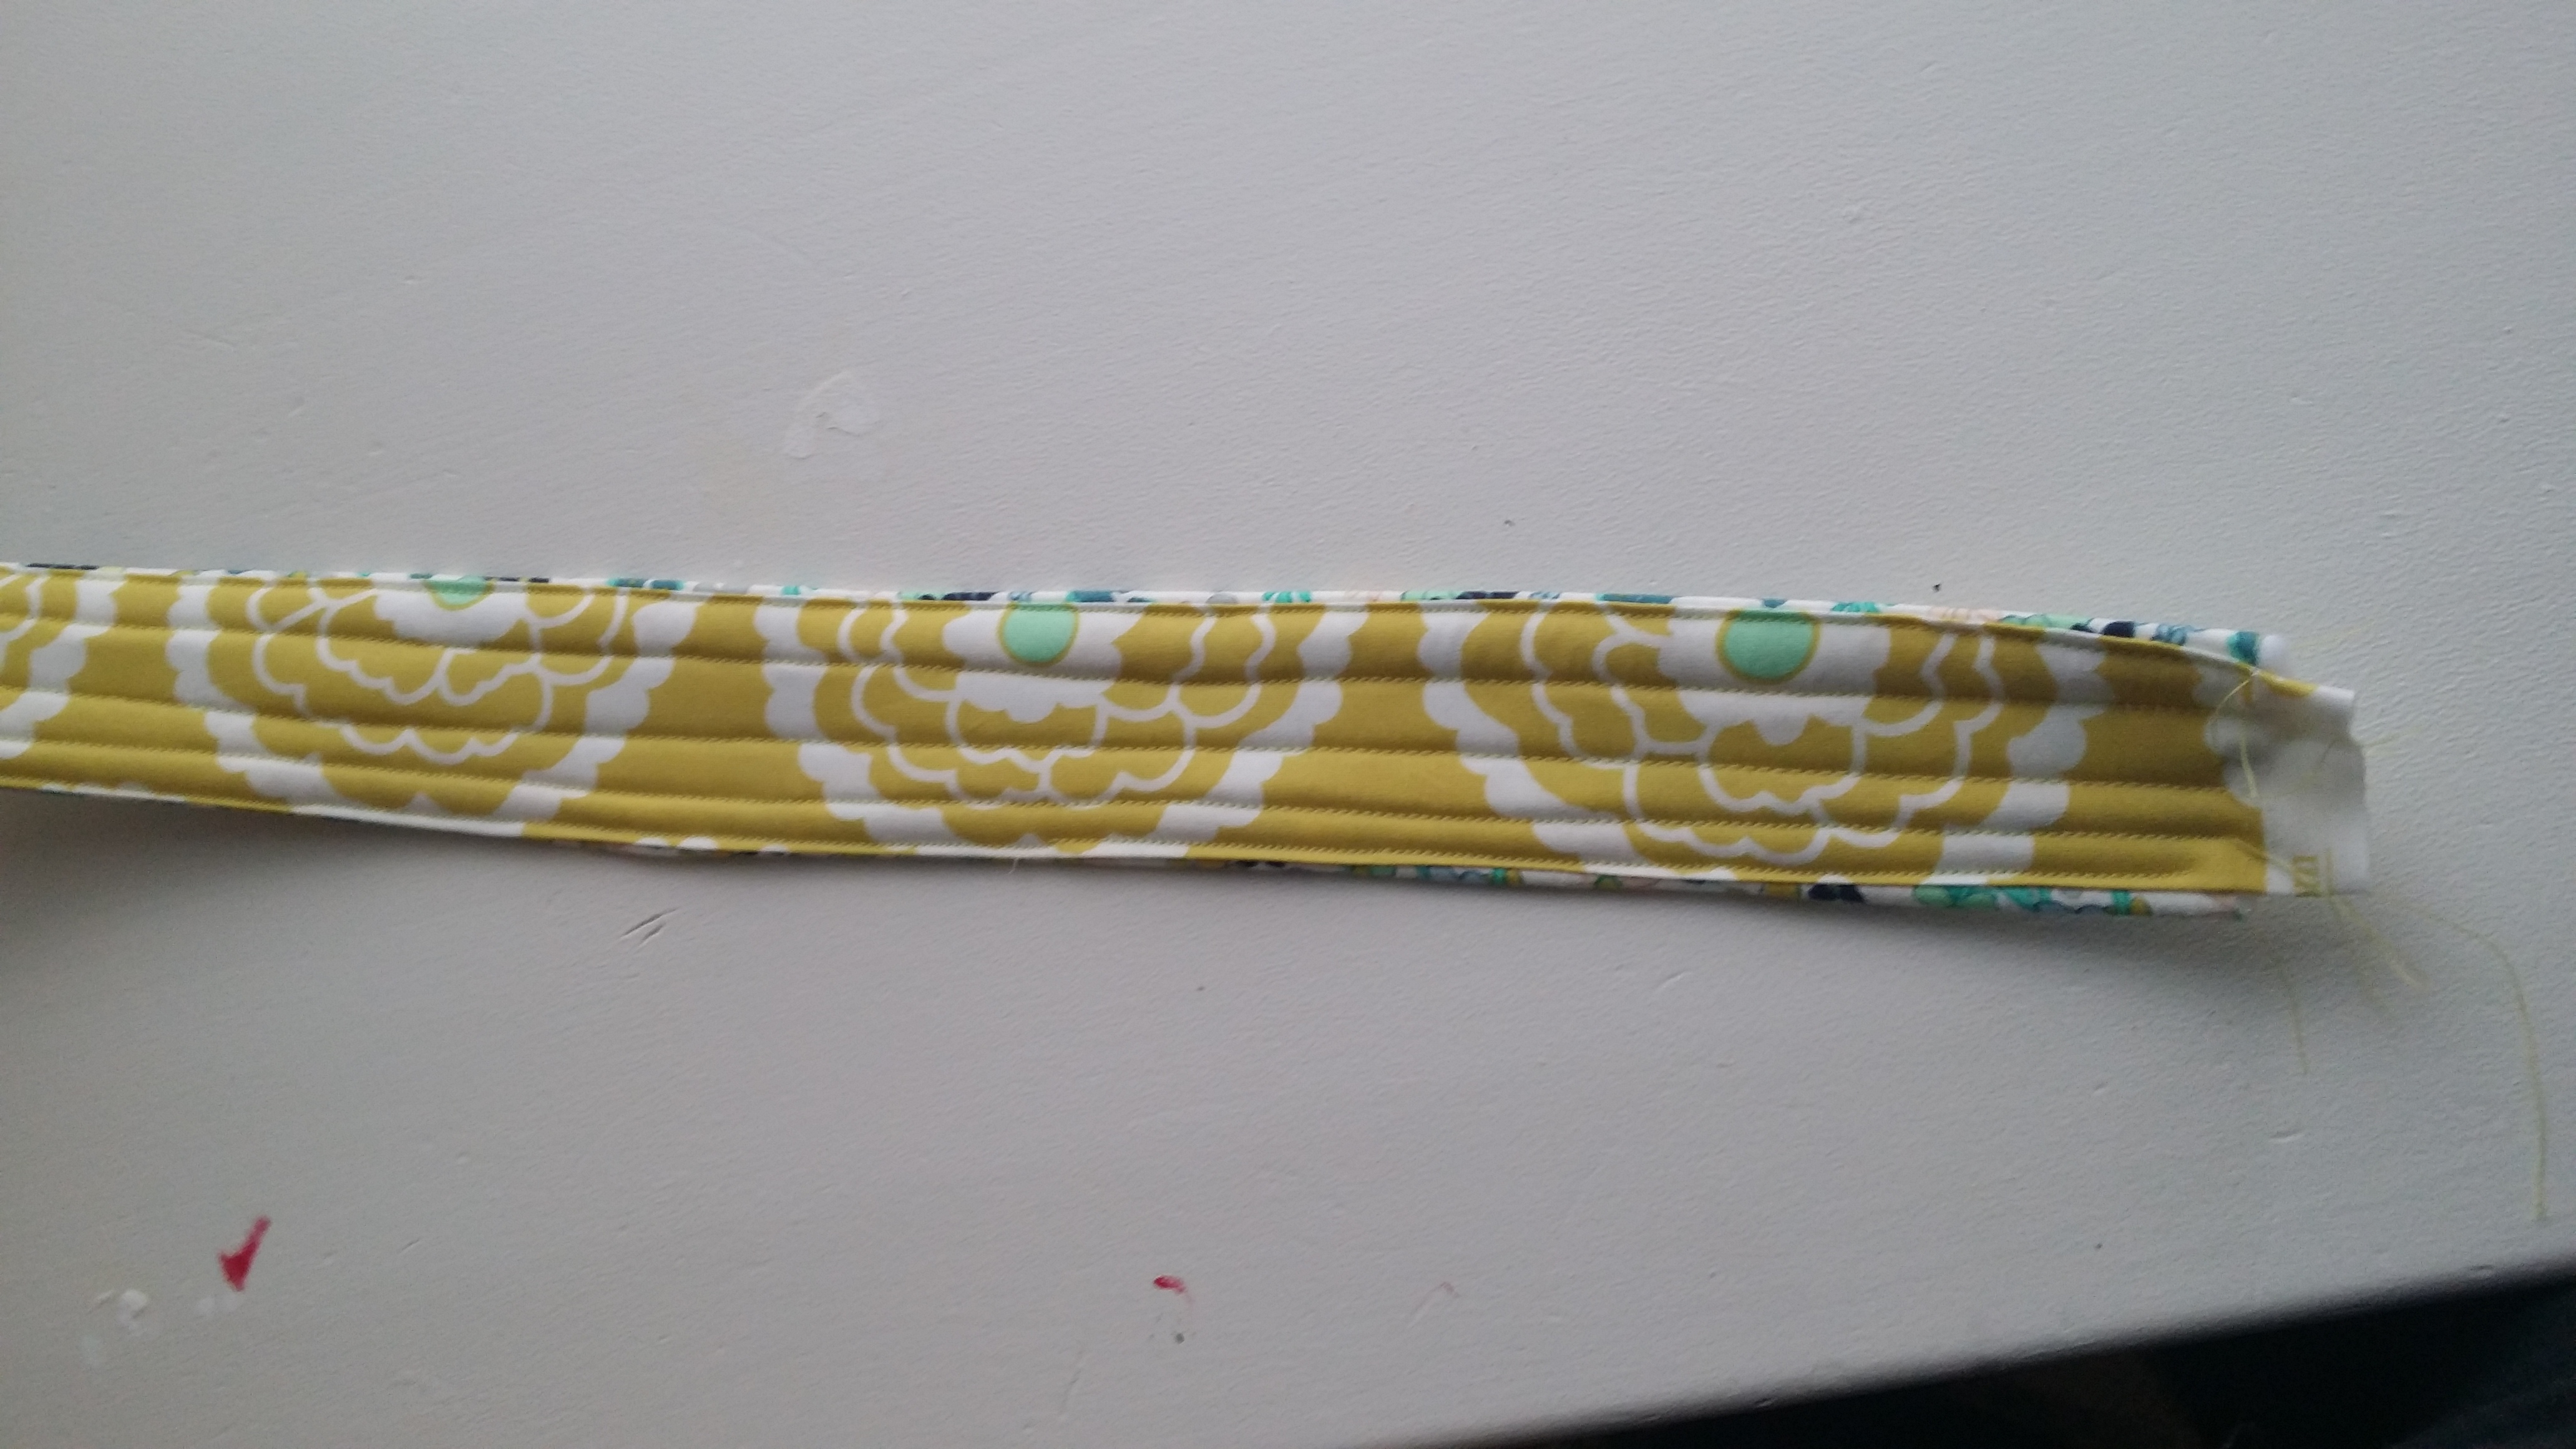
2c. Use the remaining Exterior Main Panel and one of the corresponding fusible woven interfacing pieces. Fuse the woven interfacing to the wrong side of the Exterior Main Panel. Then fuse the fusible fleece against the fusible woven interfacing. Repeat for the 2 Zipper Panels.
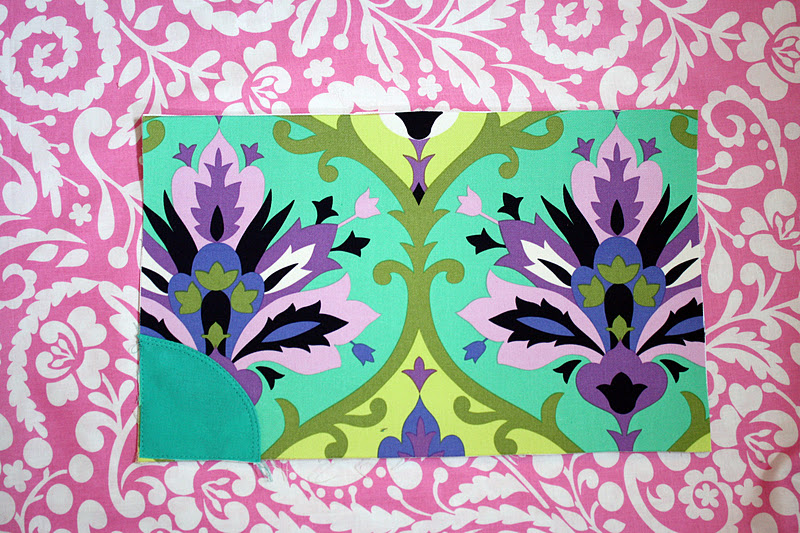
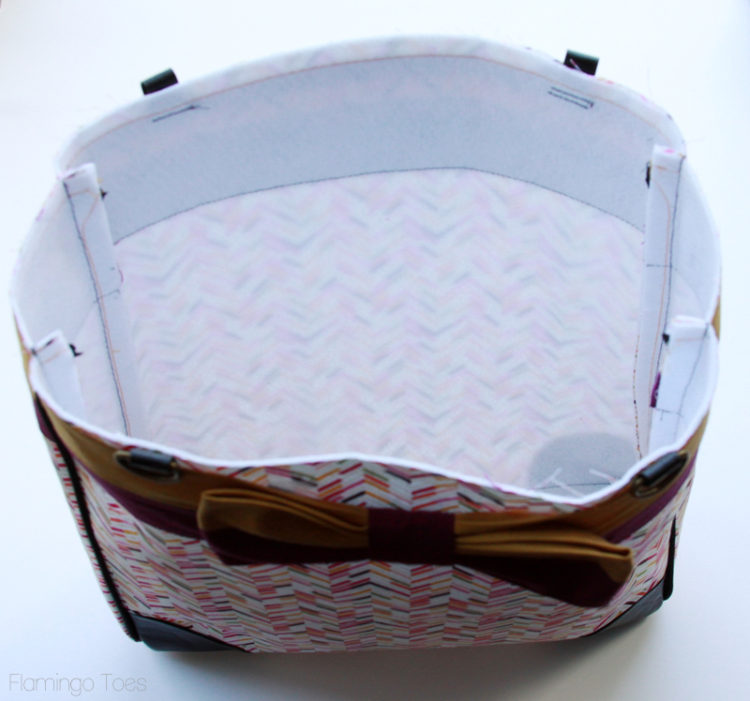
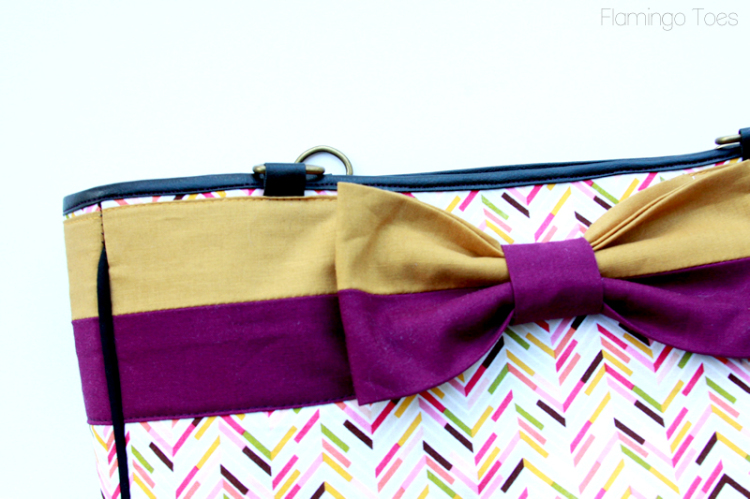
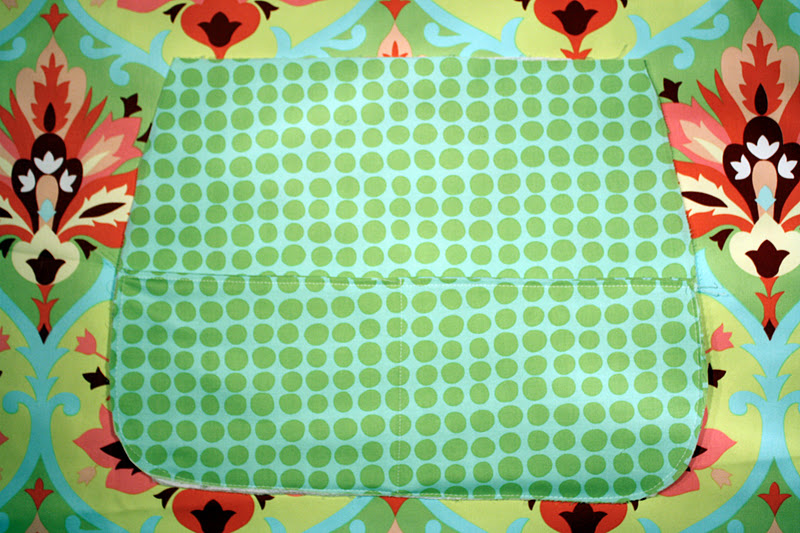
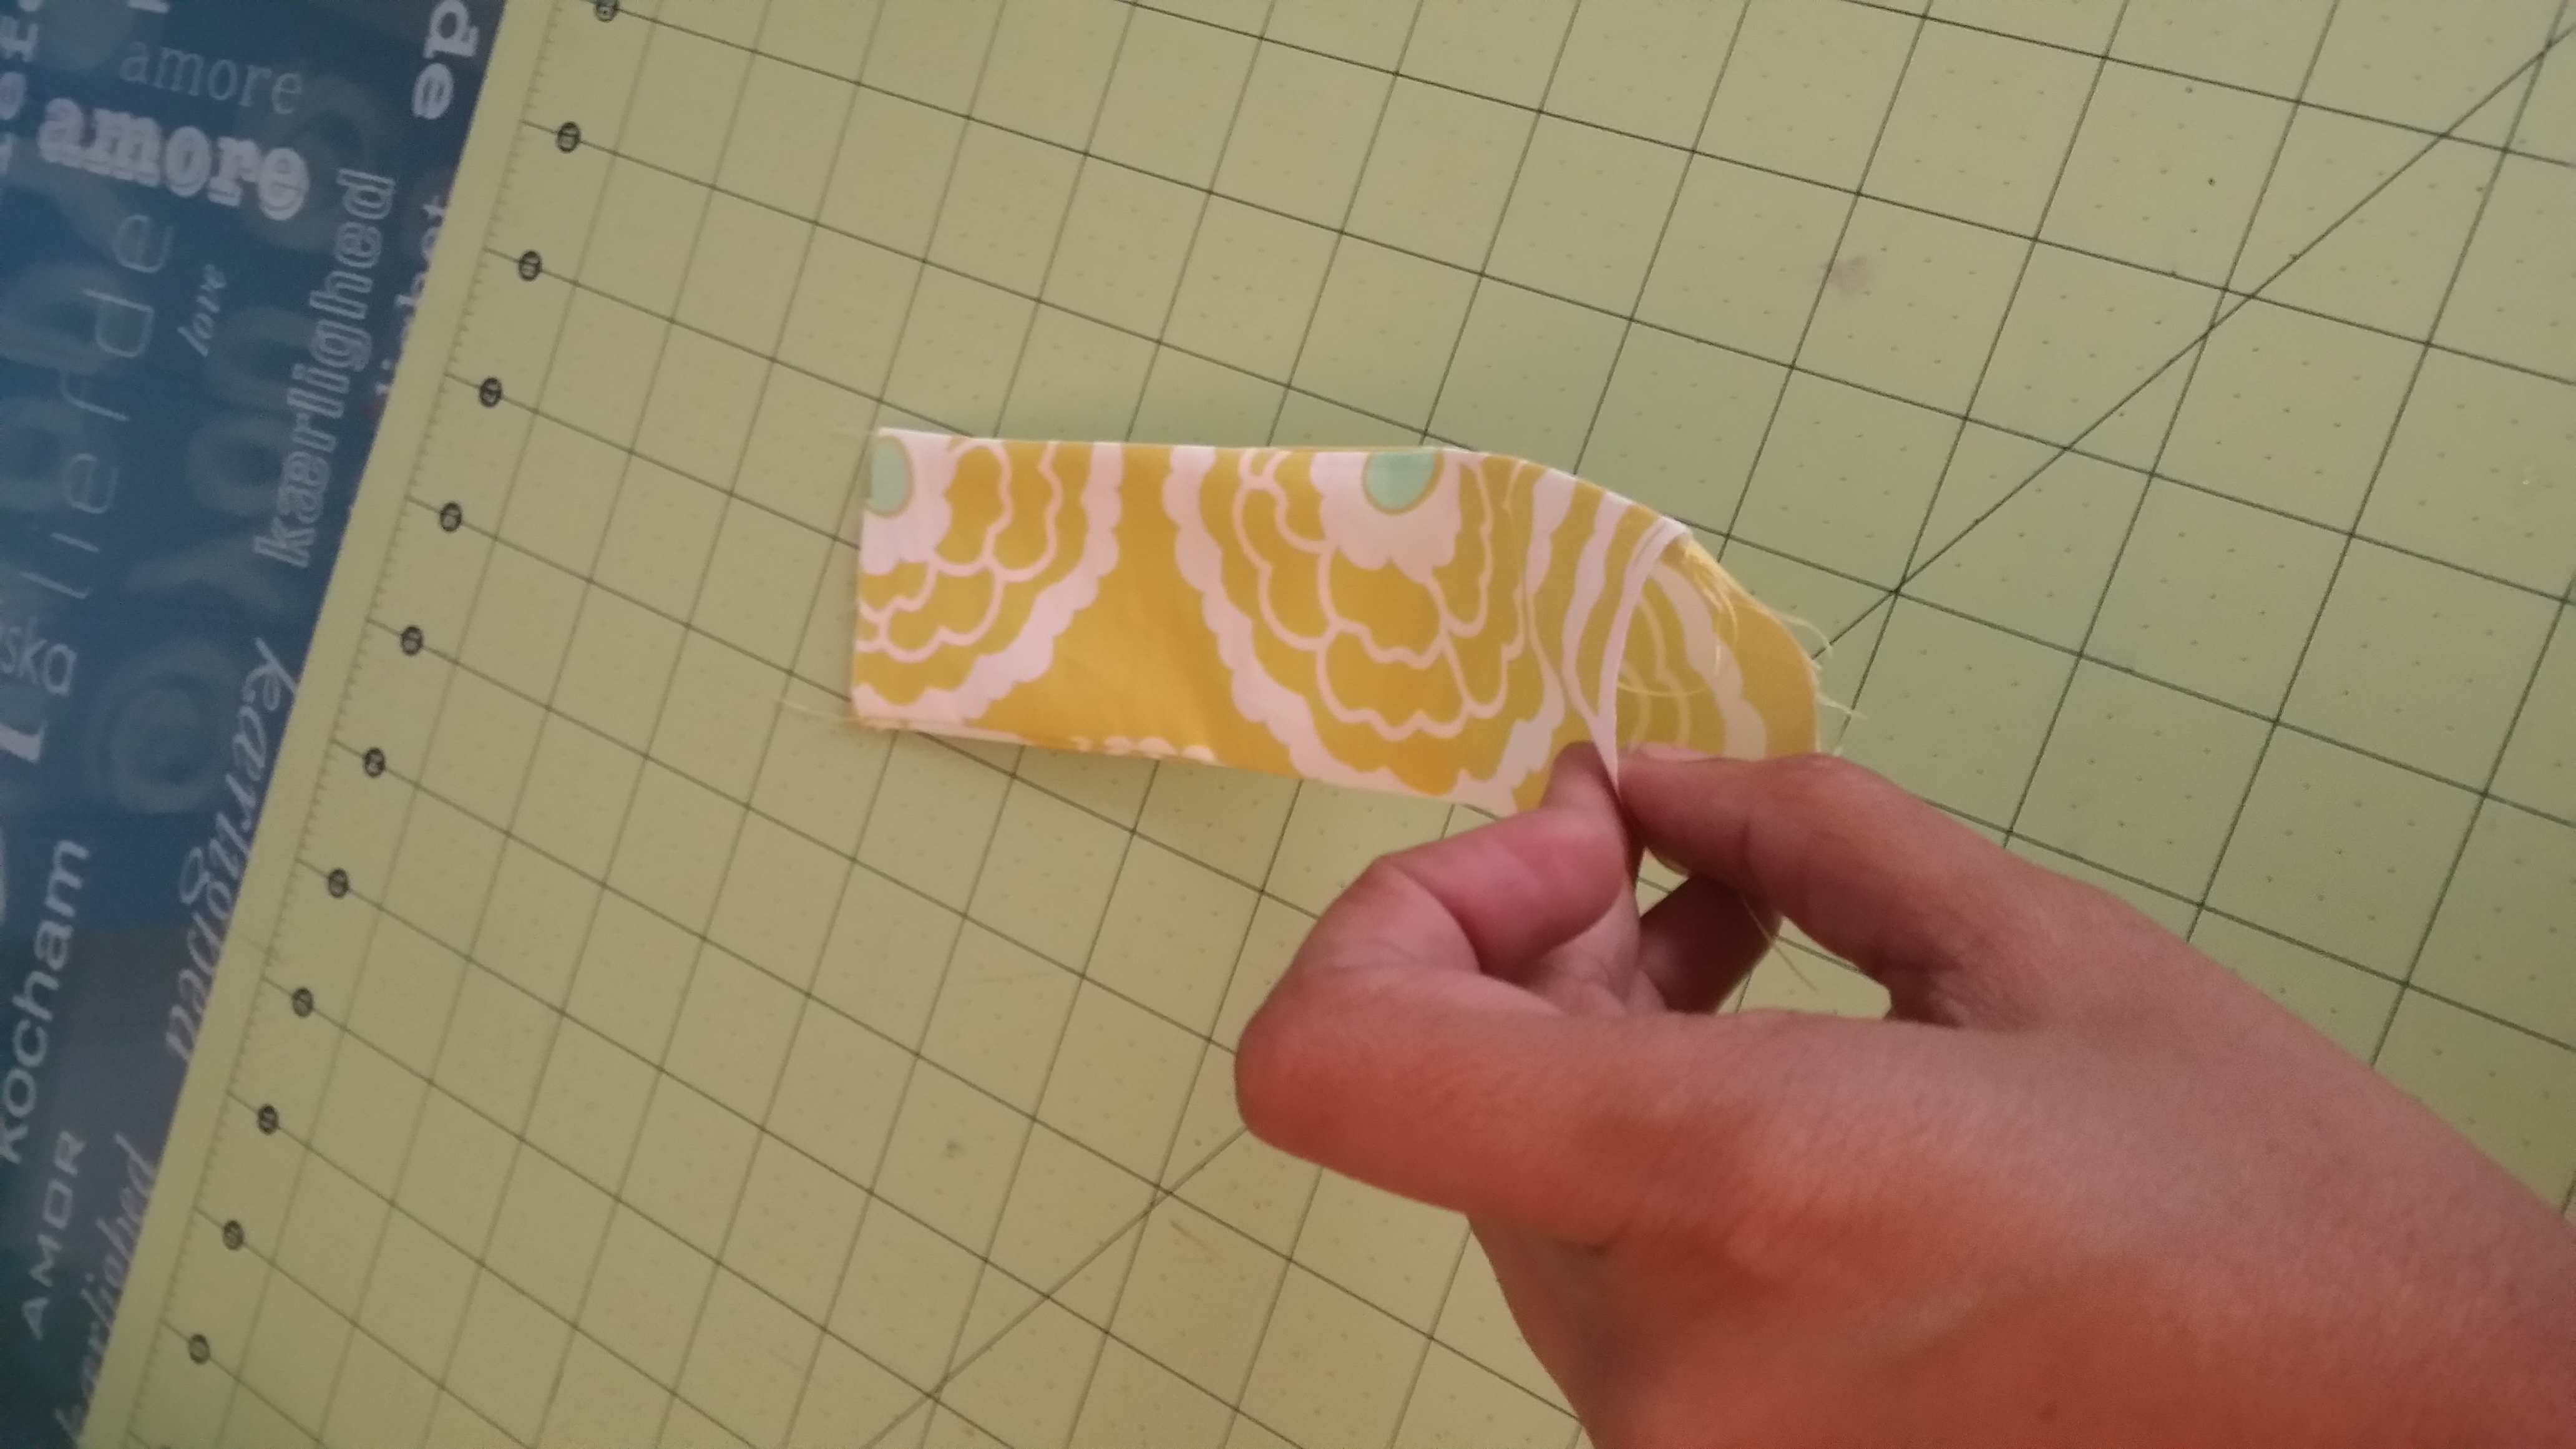
STEP 3 ~ ASSEMBLE THE FLAP
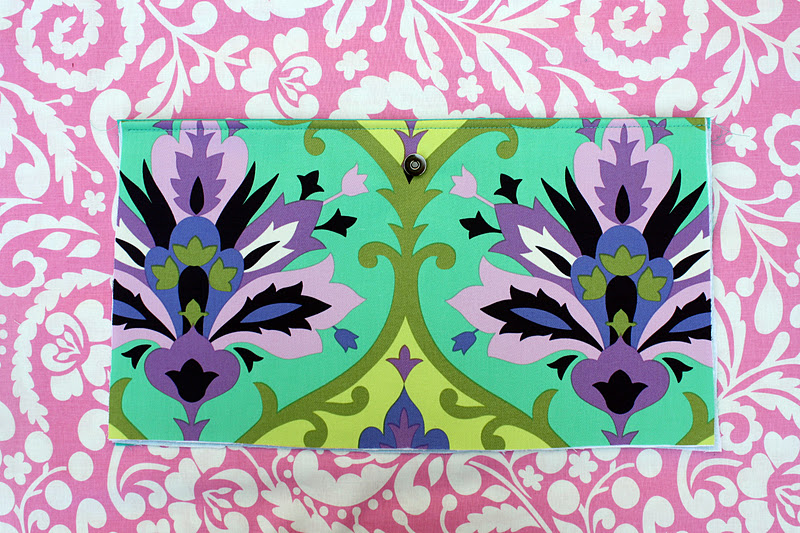
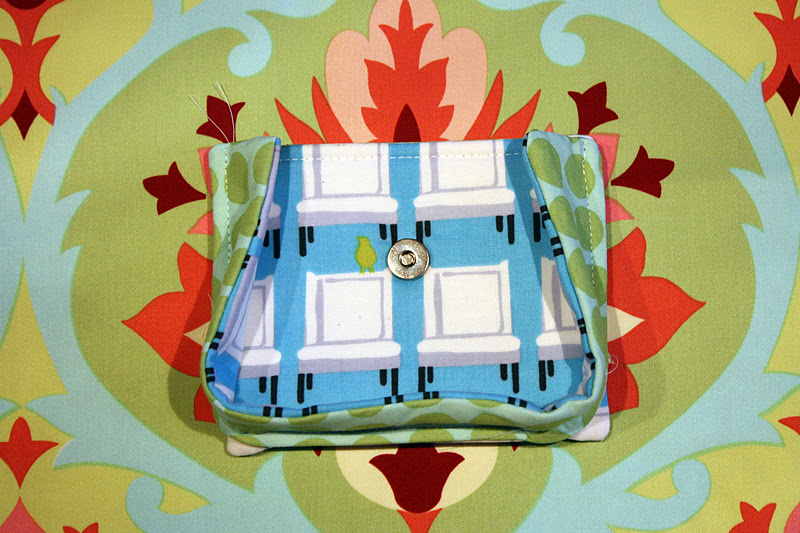
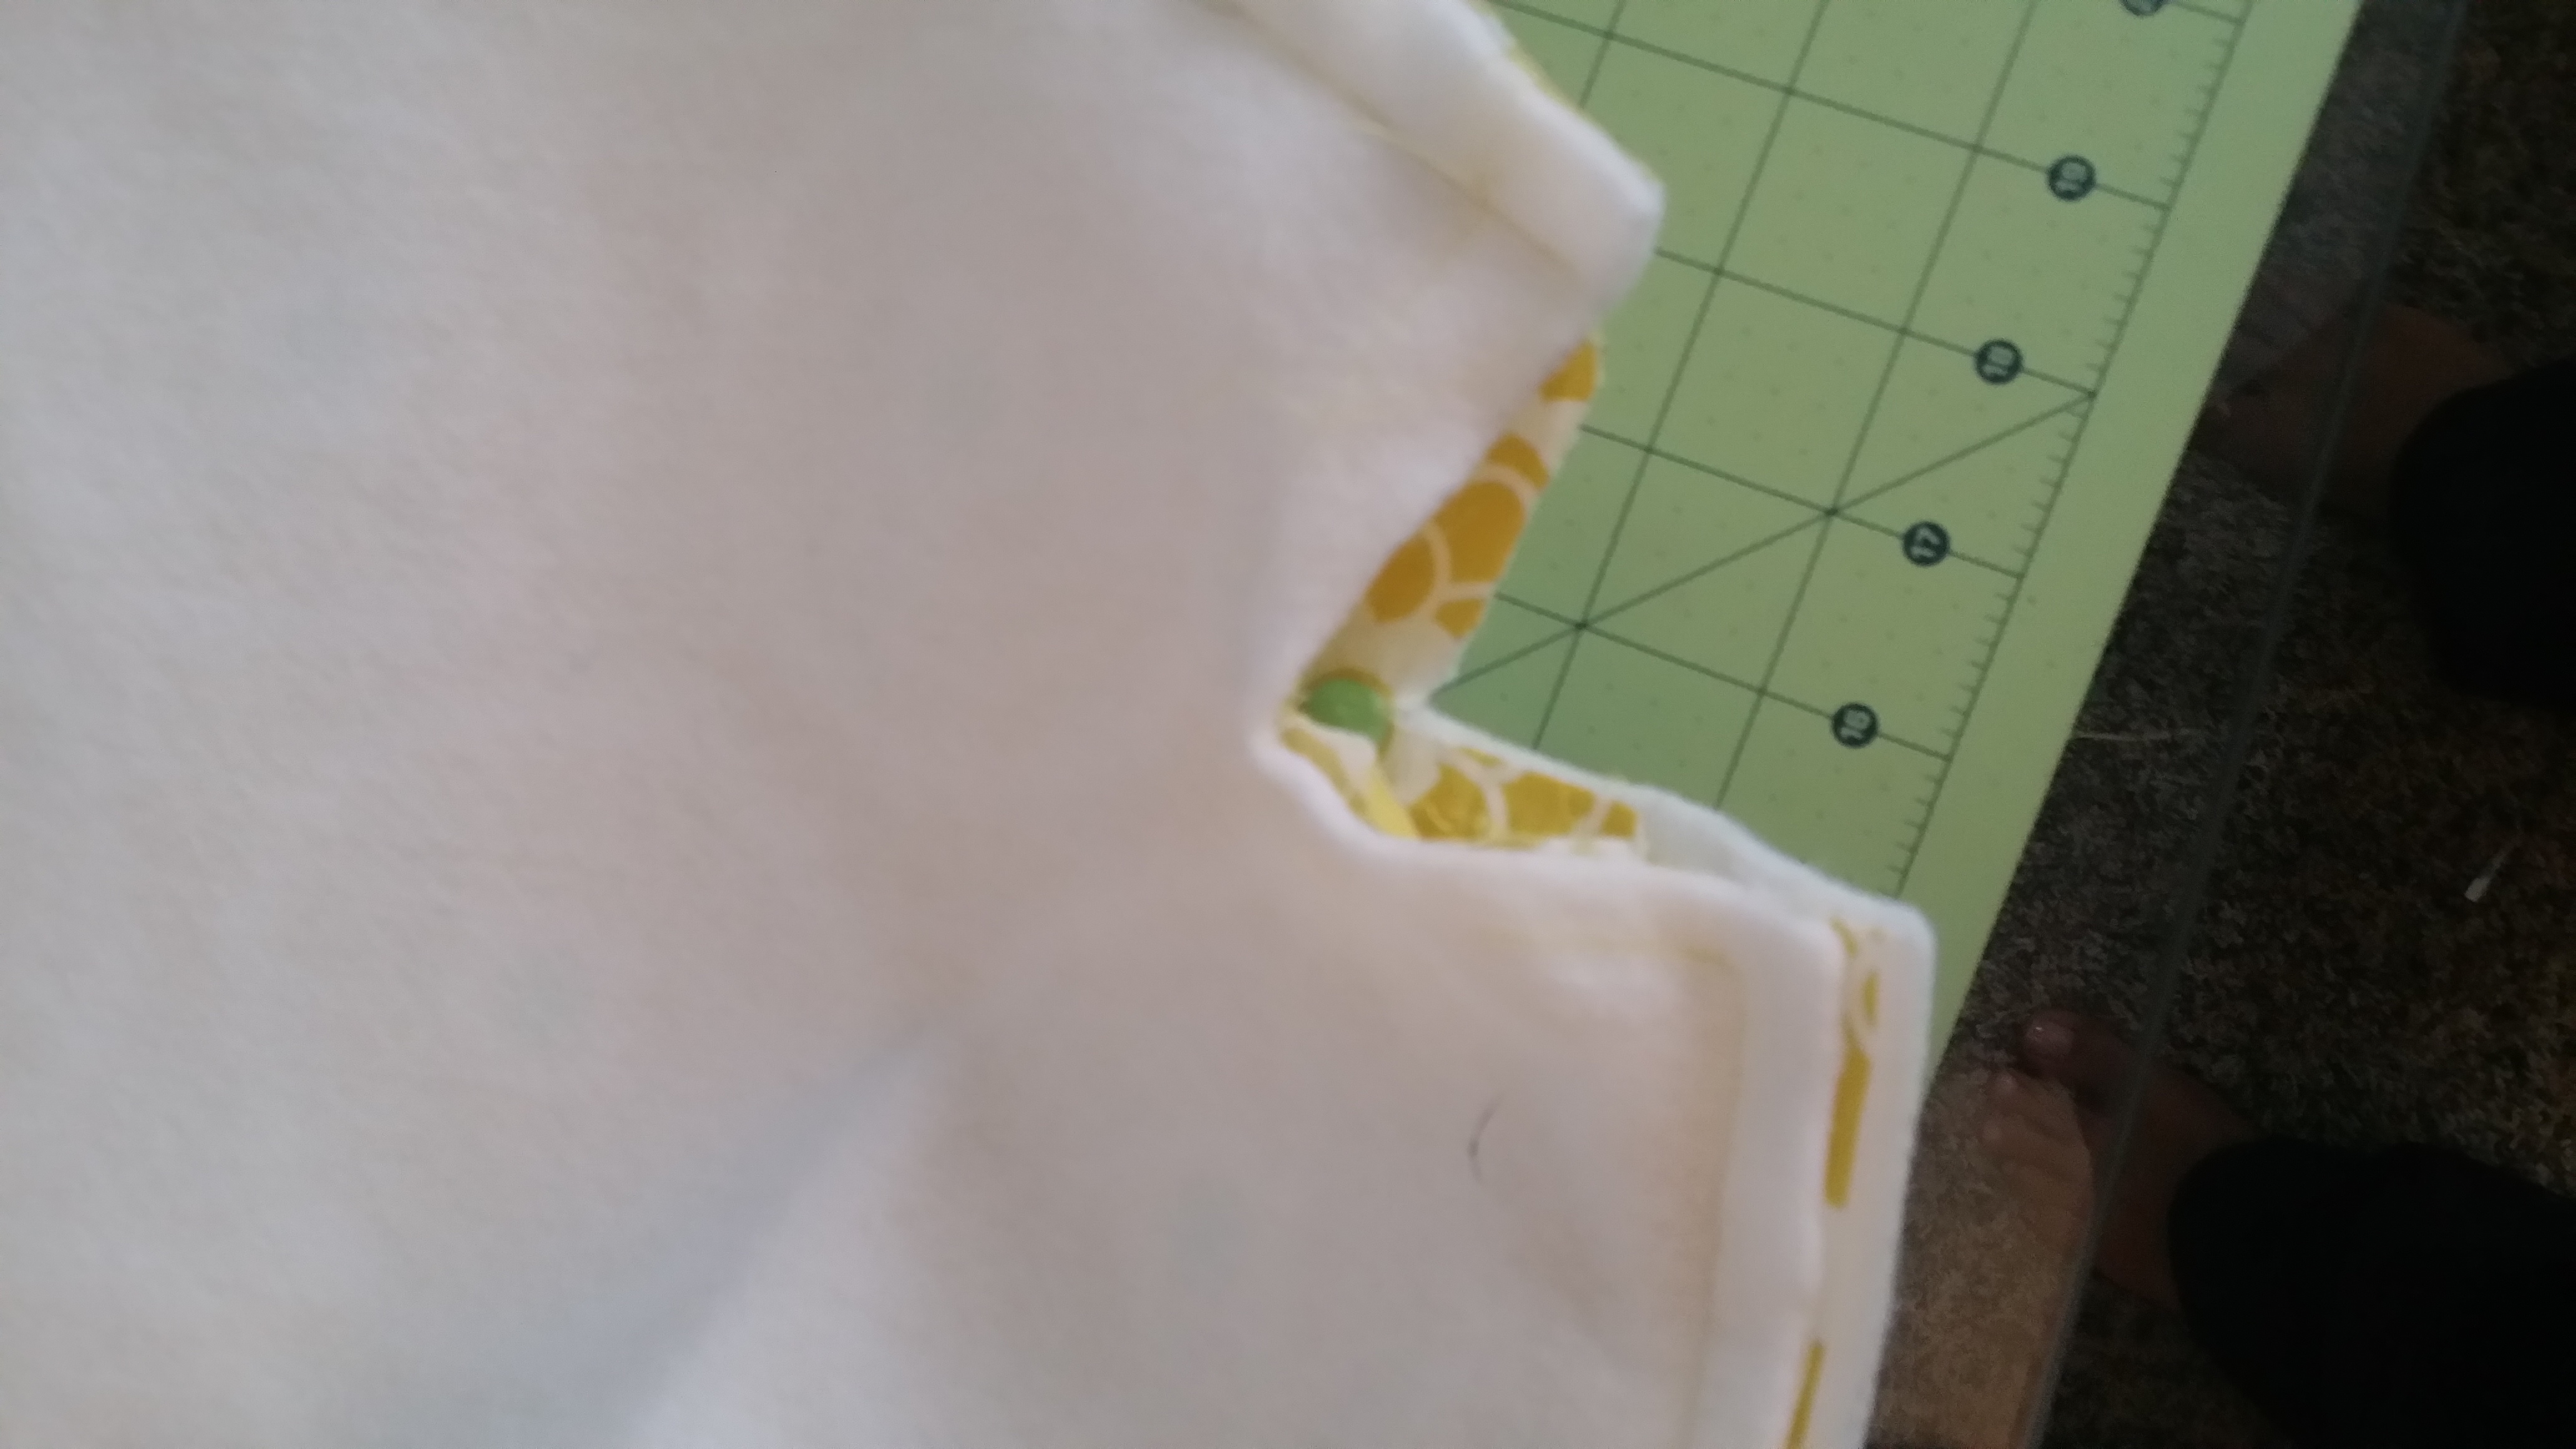
3a. Take your Interior Flap. Fold it in half, lengthwise, and lightly finger press the crease. Make a mark with your fabric marker that is 2″ down from the longest straight edge.
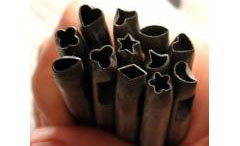
3b. You will be using the smaller half of the magnetic snap. Take out the washer and place it on the mark that you made on the Interior Flap. Make a mark, using the washer, where the slits are to go. Use your scissors and cut small slits where the marks are. Repeat this for the center of one of your 2″x2″ scraps of fleece. The reason that you are using the fleece is that it will help to reinforce your fabric against the pull from the magnetic snap every time you open and shut the flap.
Helpful Hint: I like to put a dab of Fray Check on the slits that were cut. I feel this helps the fabric hold up a bit better under the stress of the magnetic snap.
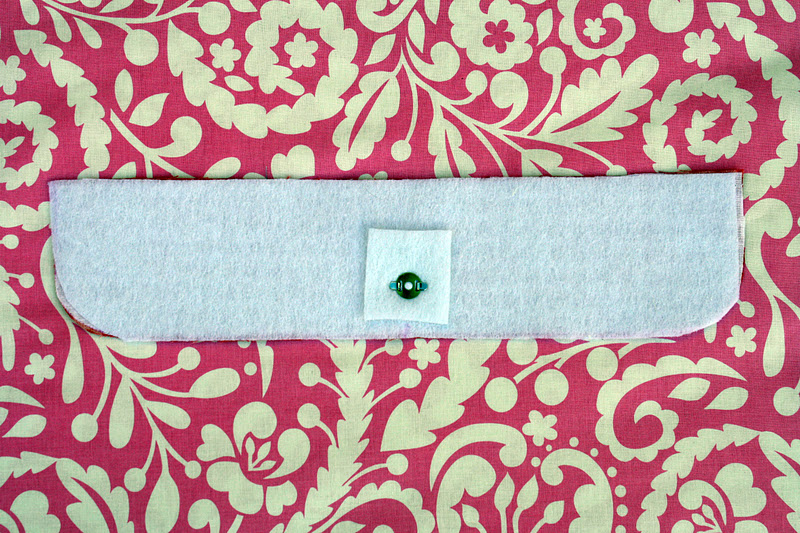
3c. Slide the prongs of the snap through the right side of the Interior Flap. Place the fleece square, then the washer, over the prongs. Close the prongs outward (use pliers with a piece of scrap fabric over the metal, if you need to), making sure they lie flat.
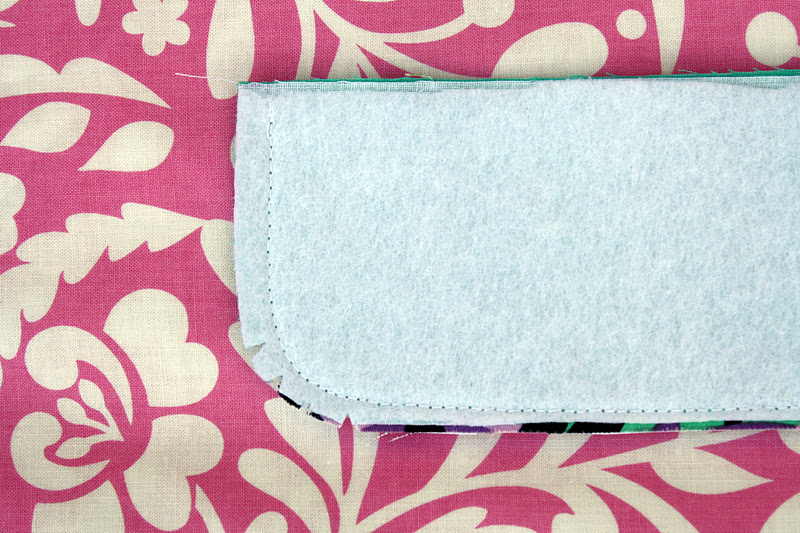
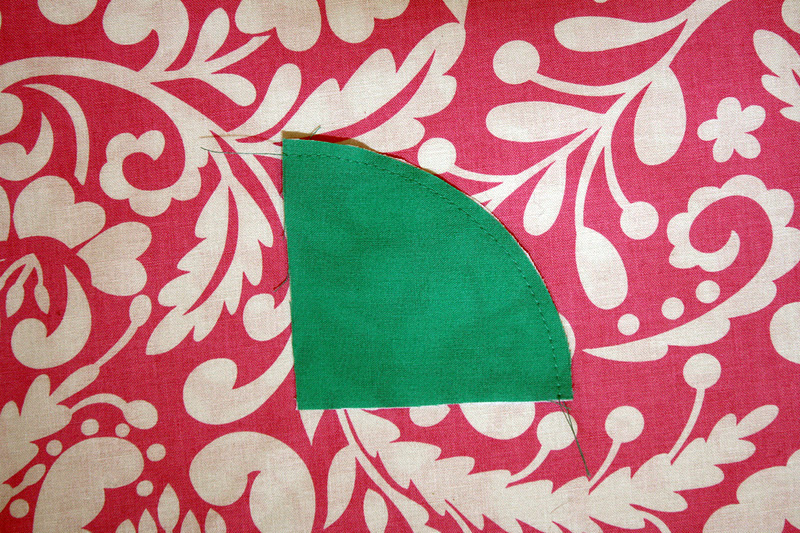
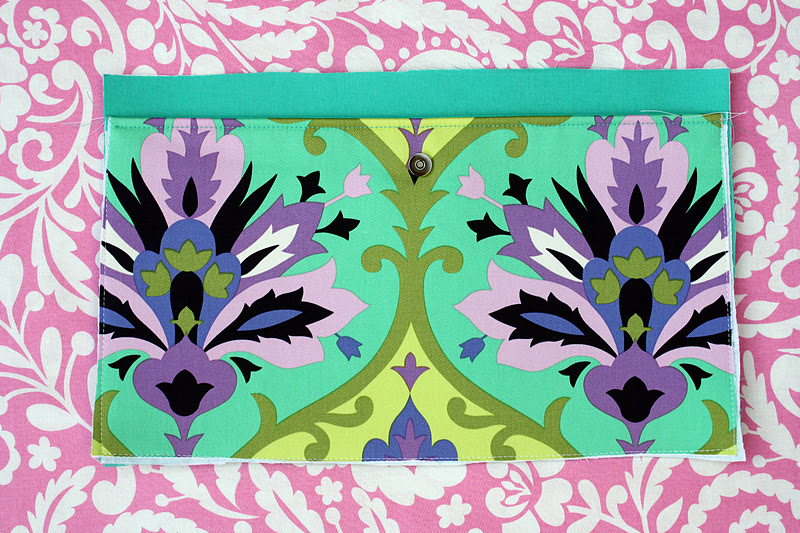
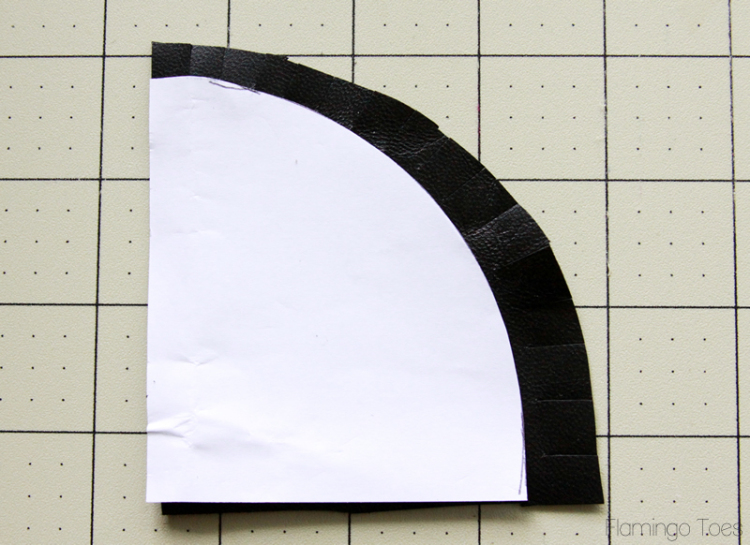
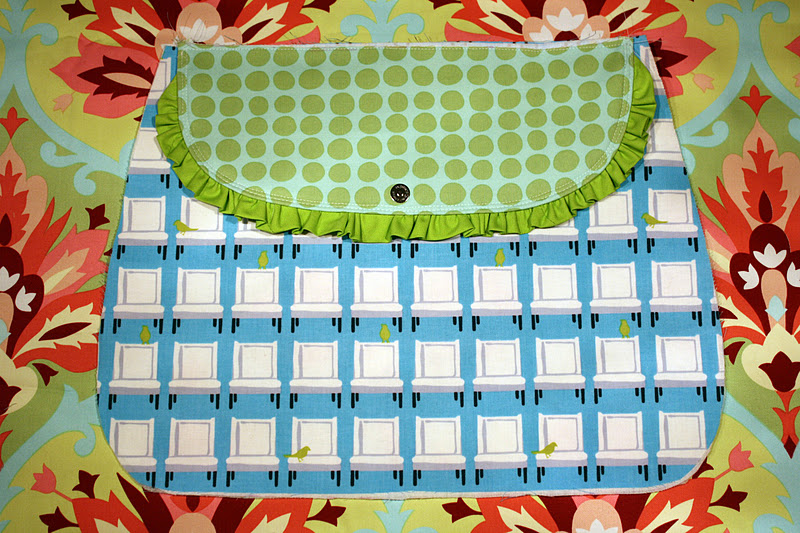
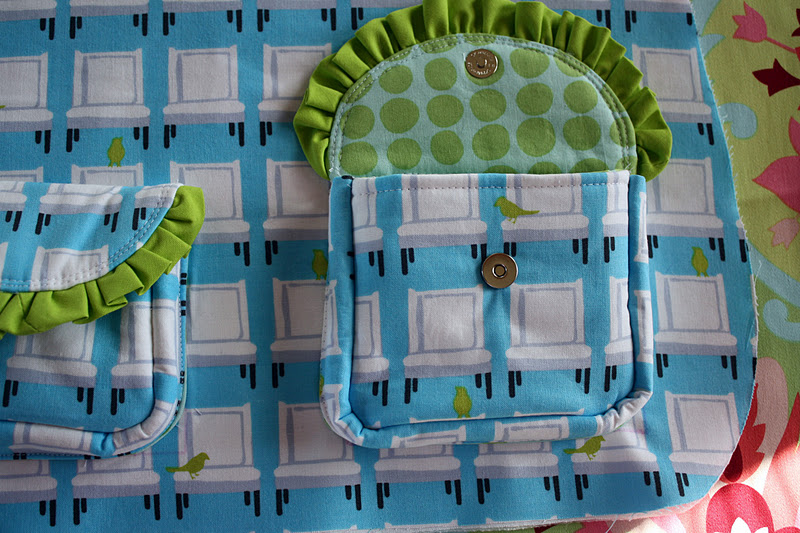
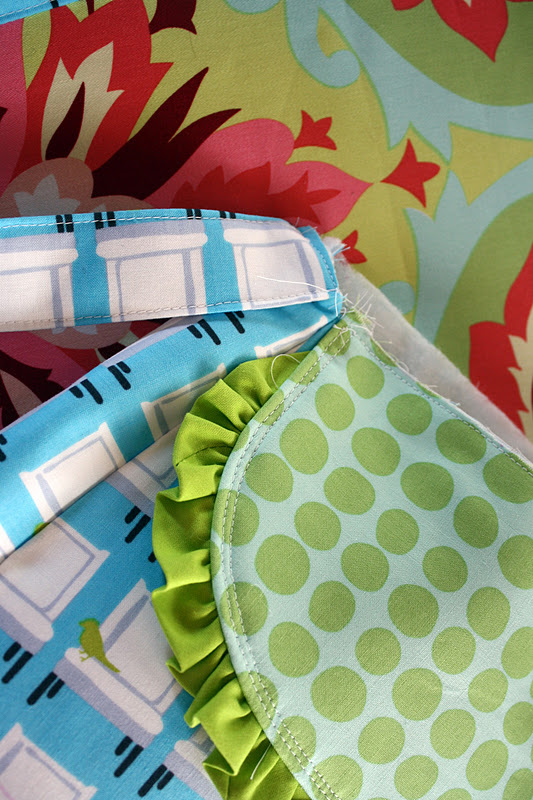
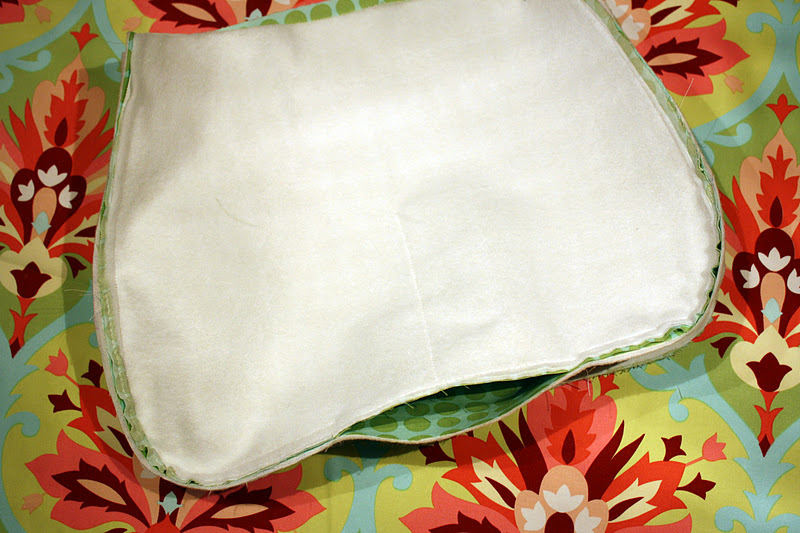
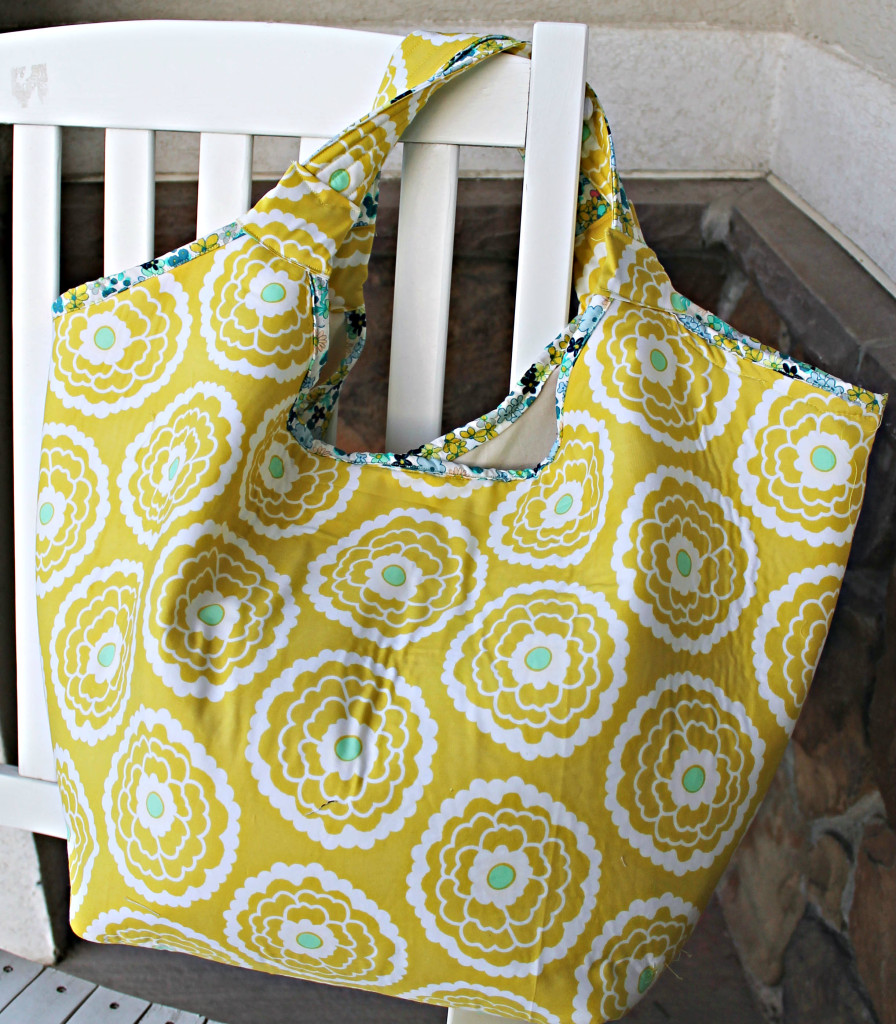
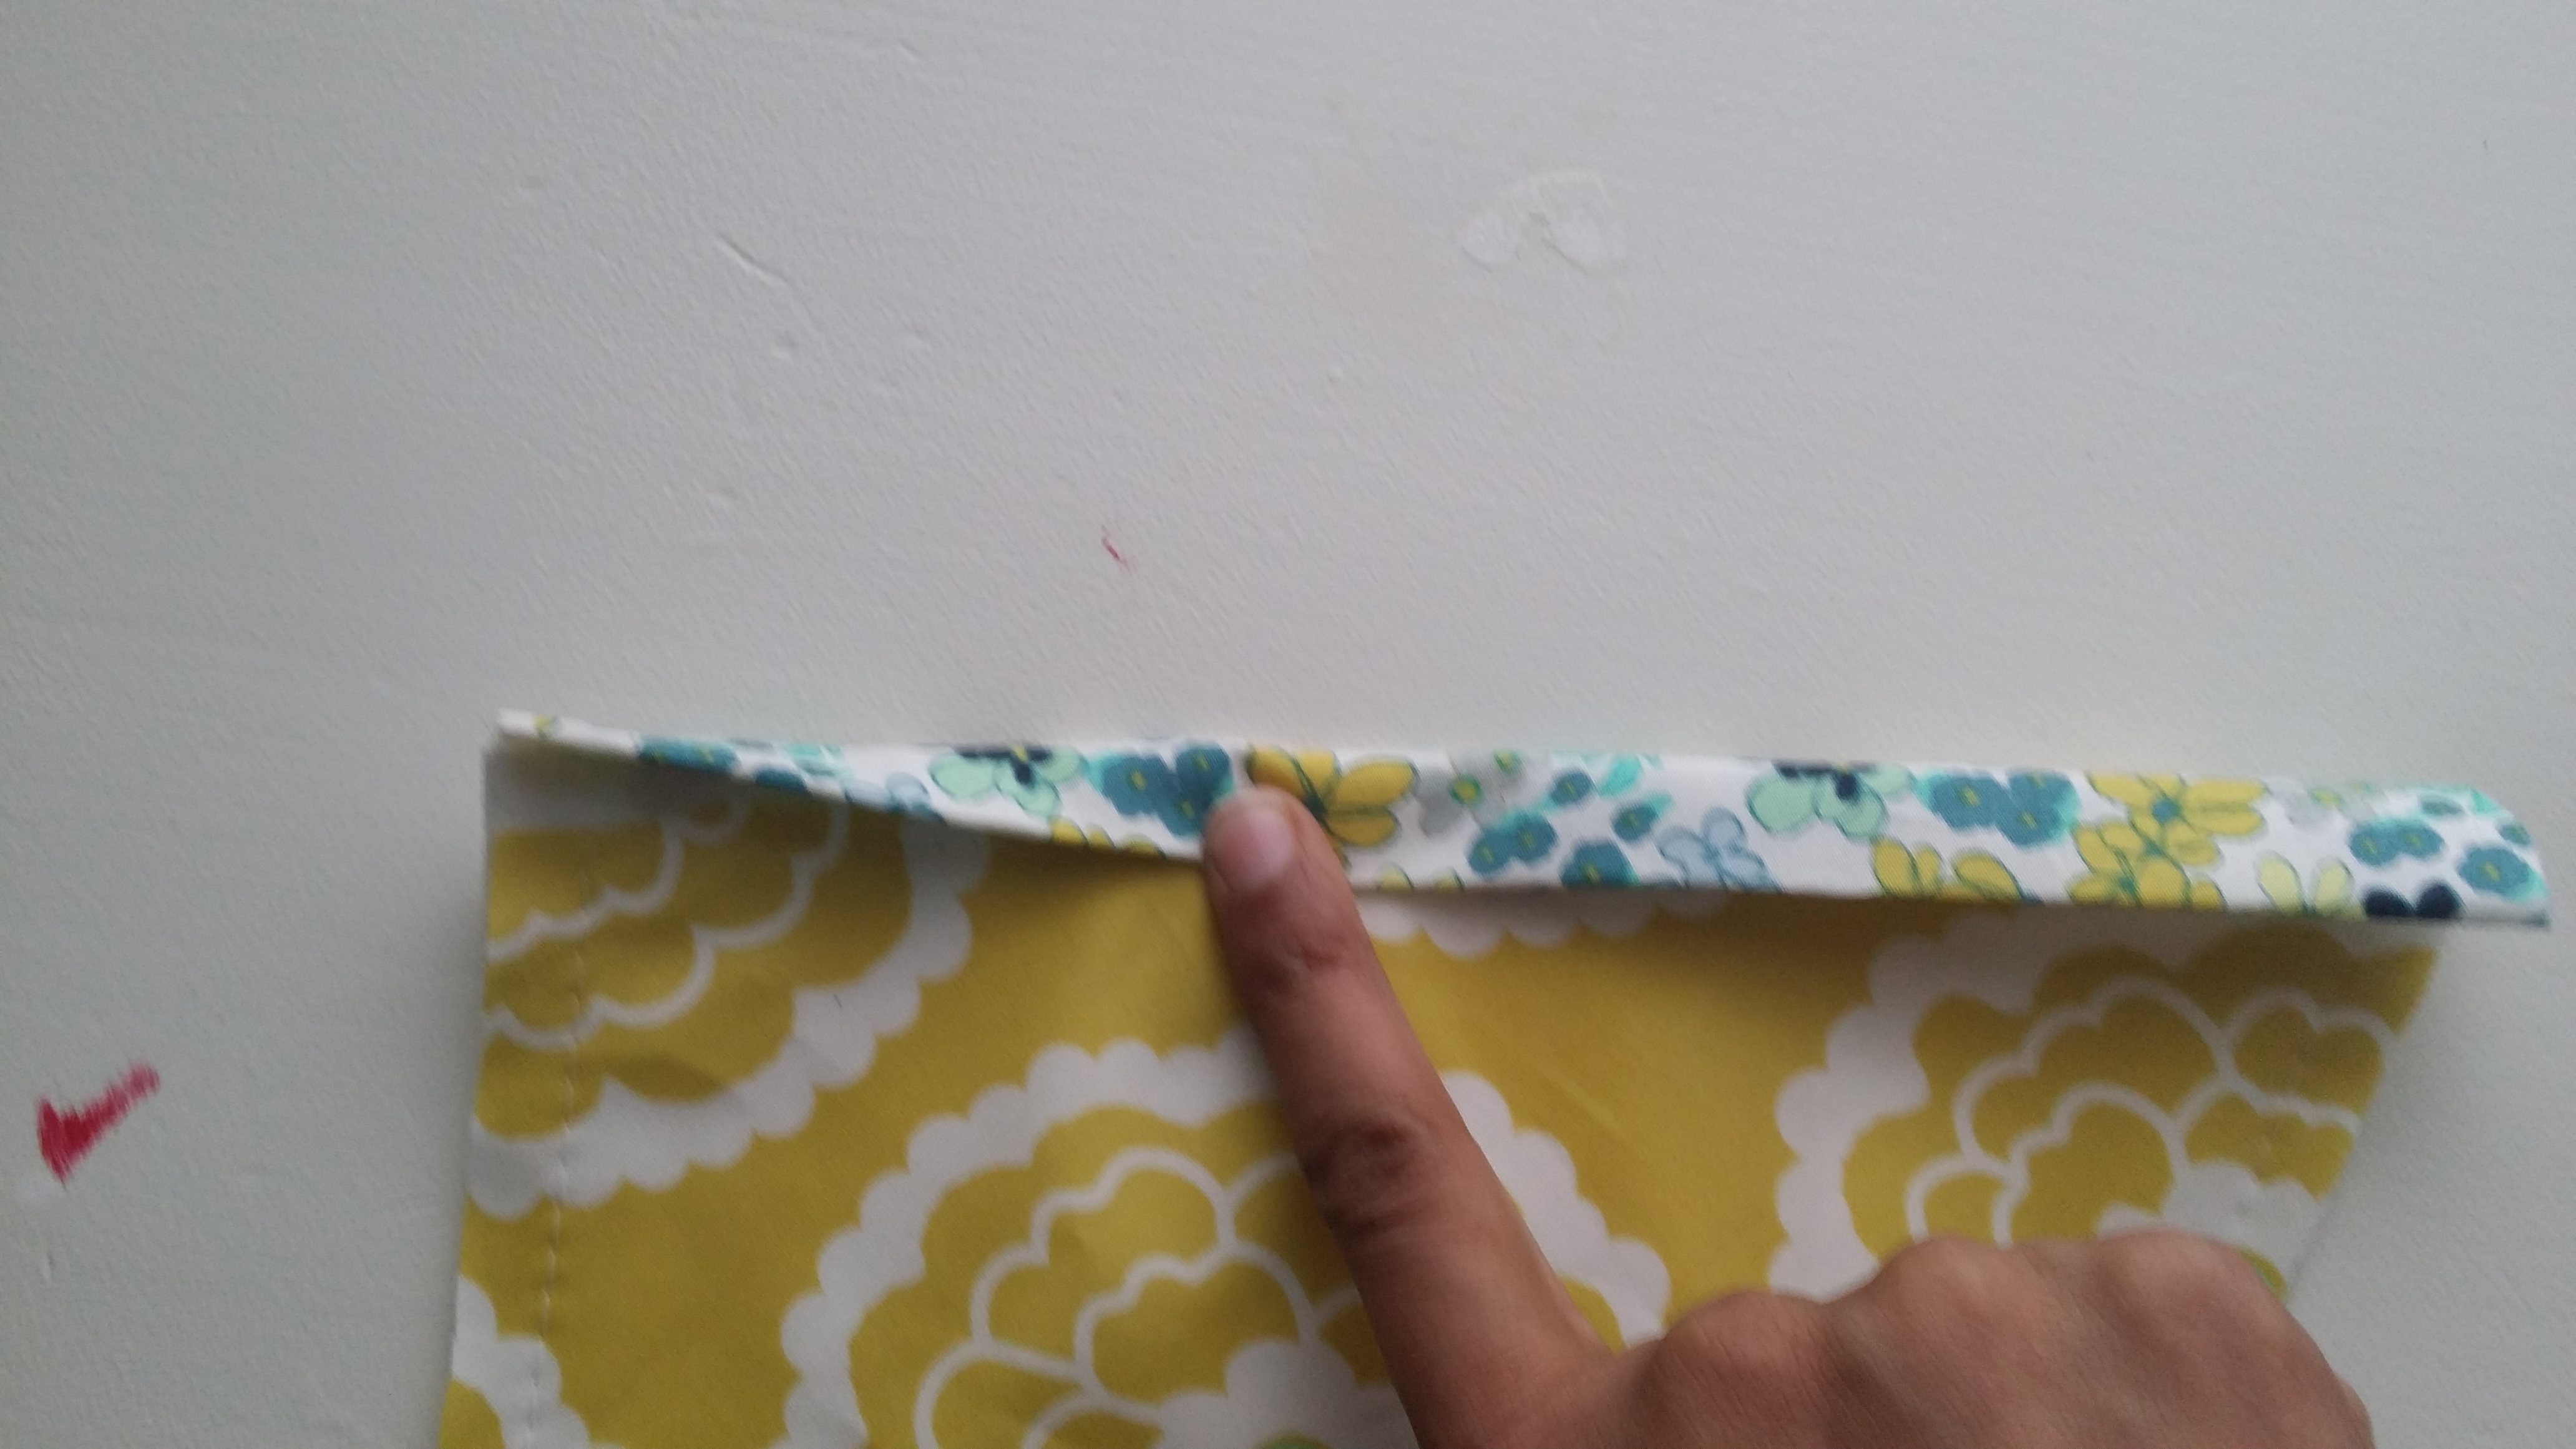
3d. Take your Exterior Flap and your Interior Flap, and place them right sides together. Sew along the curved edge using a 1/4″ seam allowance (do not sew the straight edge). Notch your seam (cutting small v’s every 1/2″), being careful not to cut into the stitching. Turn your fabric right side out and press.

3e. Topstitch the Flap, 1/8″ from the edge, along the edge that you sewed in Step 4d.
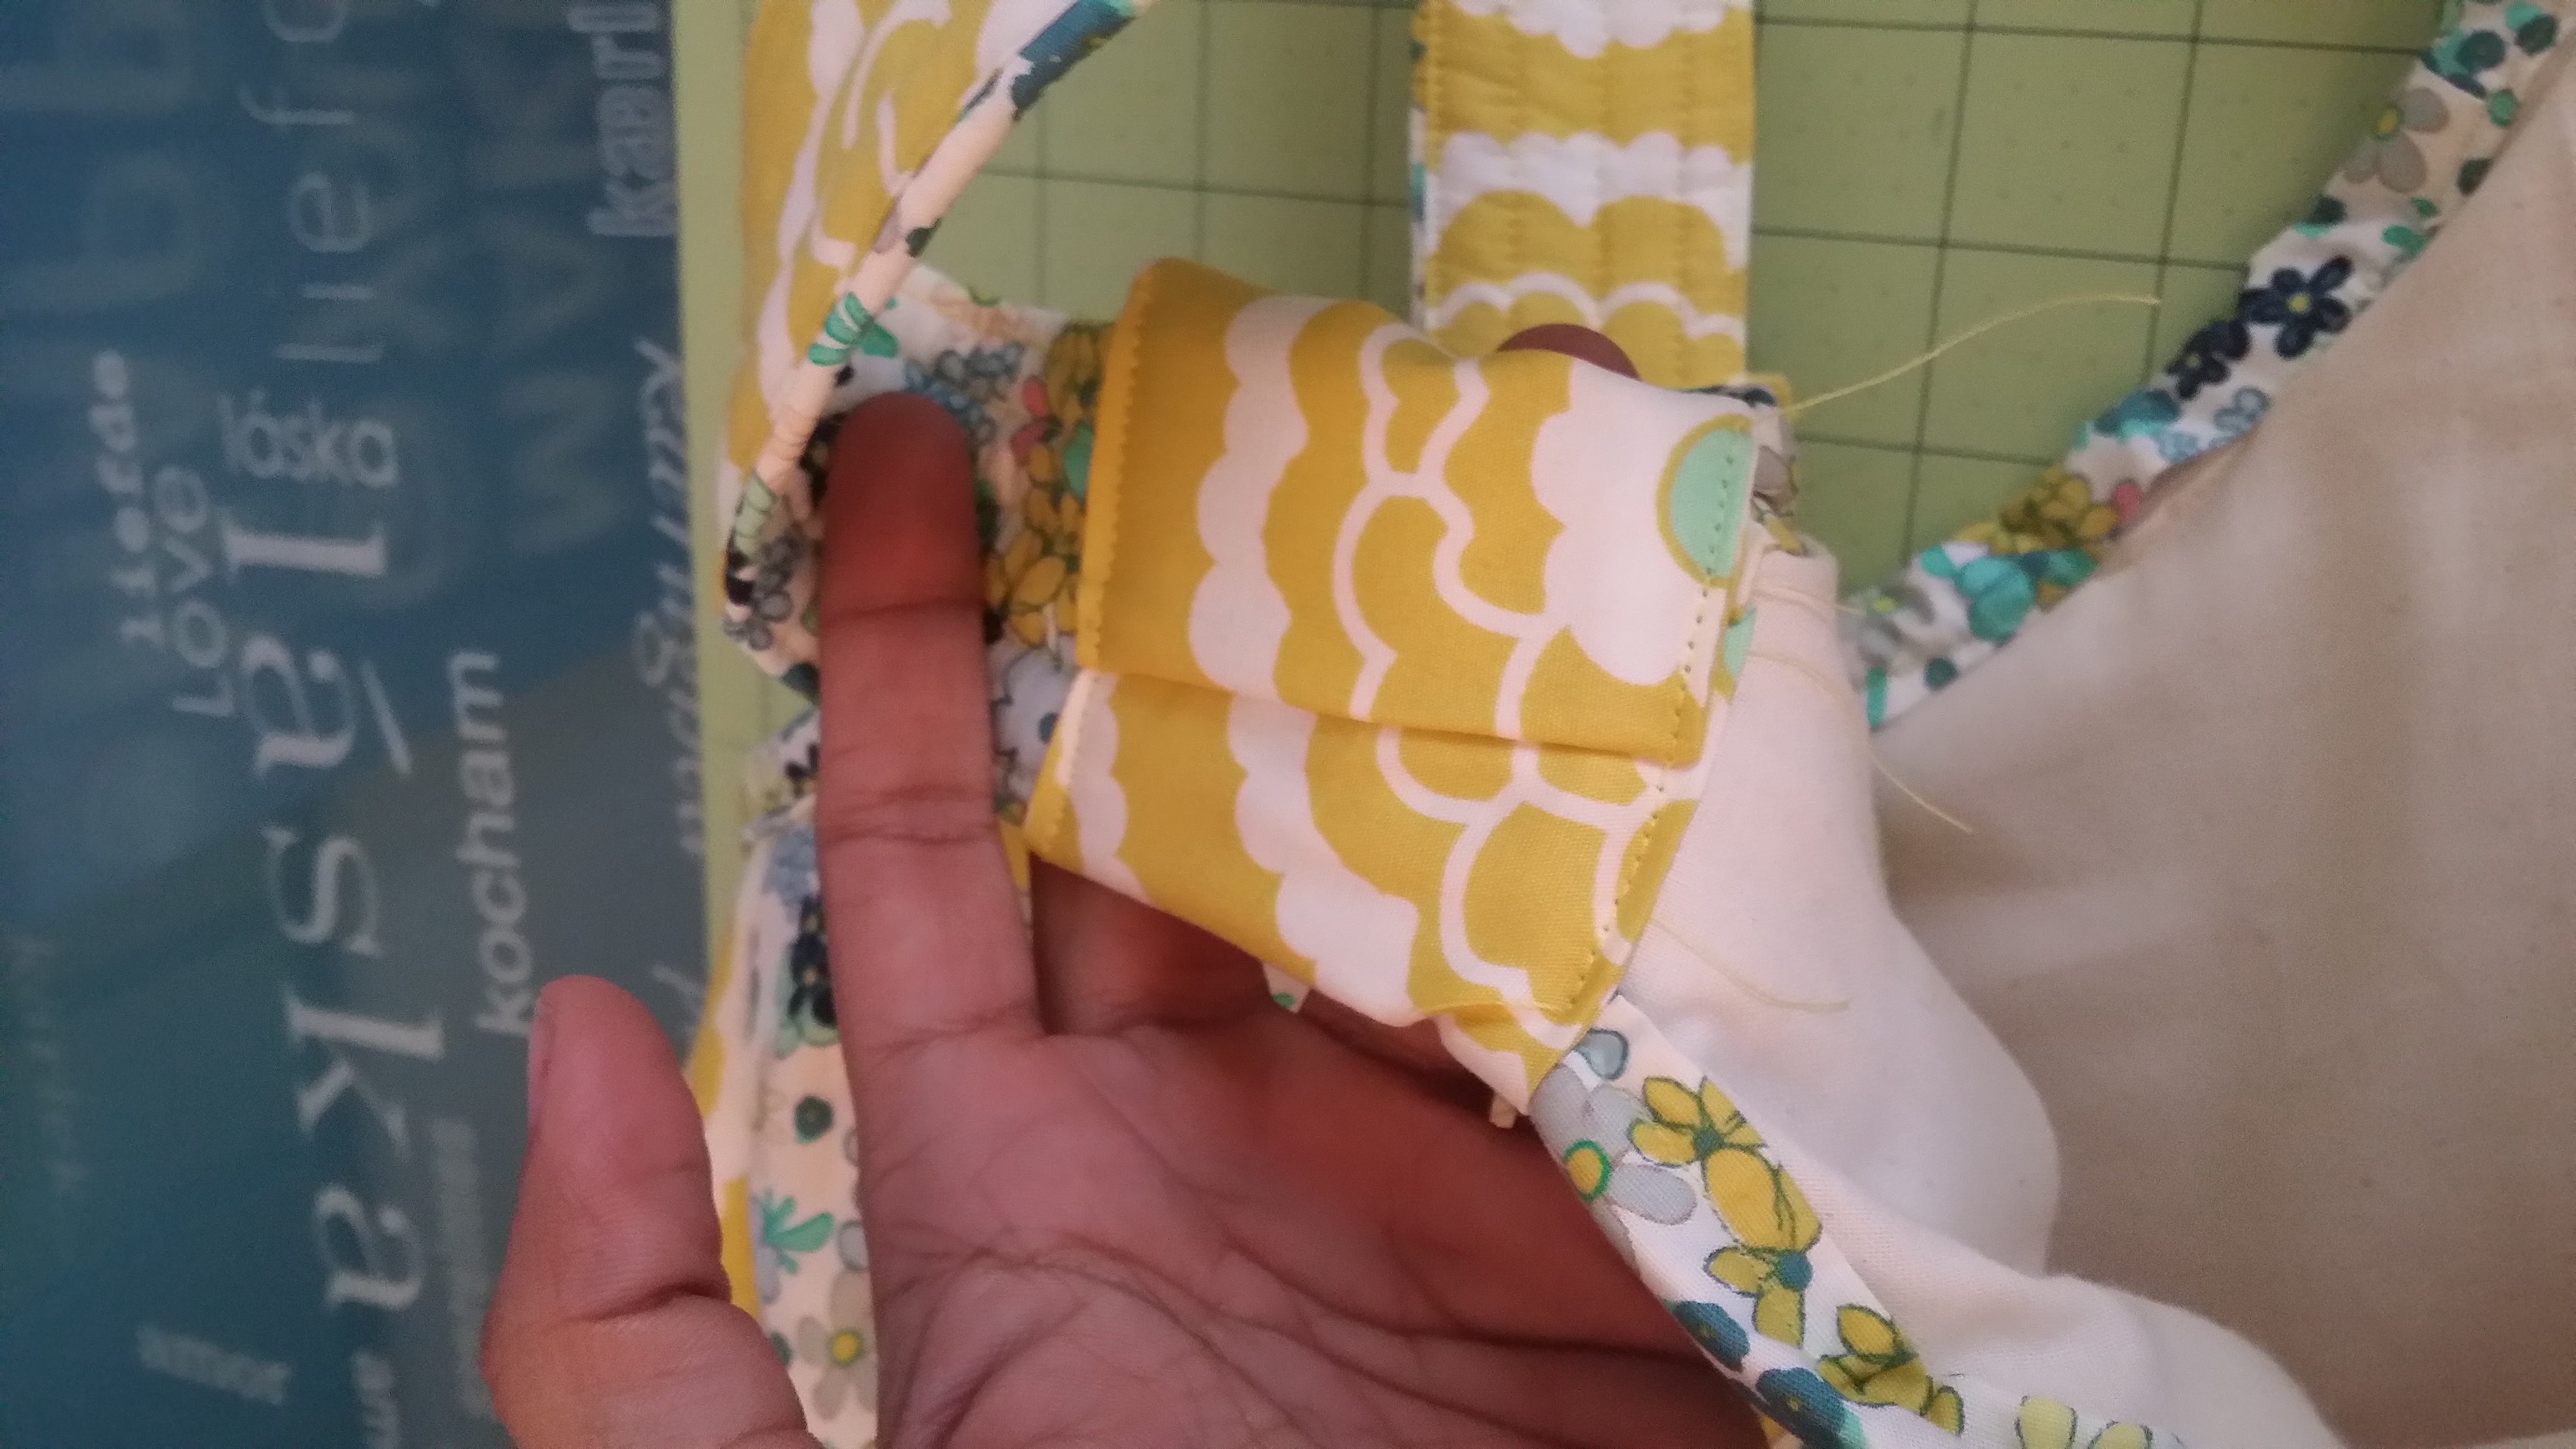
STEP 4 ~ ATTACH THE ACCENT PIECES
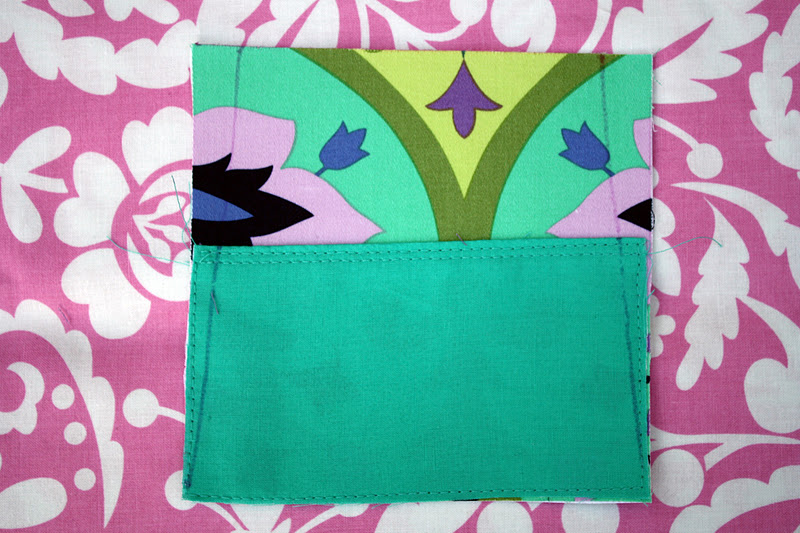
4a. Take one of your square Side Accent Pieces and press one 5-1/2″ edge down by 1/2″. Topstitch 1/4″ from the edge. Repeat for the other Side Accent Piece.
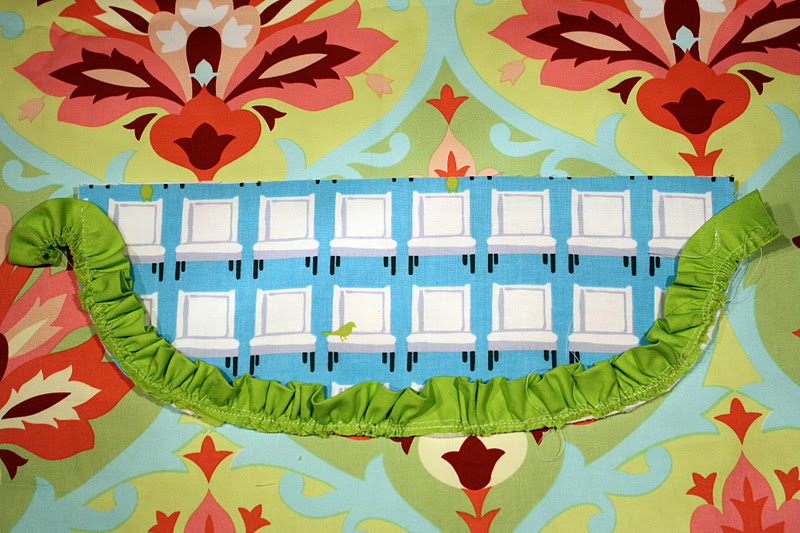
4b. Take 1 of the Side Accent Pieces and 1 of your Exterior Side Panels. Place the Side Accent Piece at the bottom of the Exterior Side Panel, so both bottom edges are even. Topstitch on top of the Side Accent Piece, 1/8″ from the finished edge of the Side Accent Piece. Then baste the remaining 3 edges of the Side Accent Piece in place.
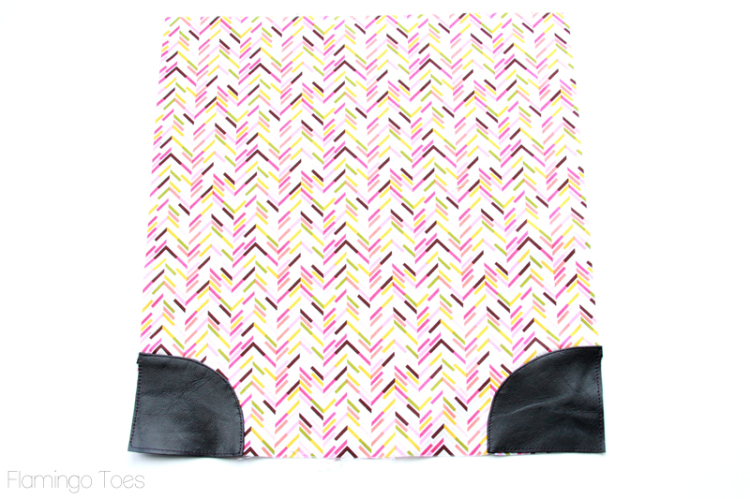
4c. Take 1 of your curved Side Accent Pieces. Topstitch on the curved edge only, 1/4″ from the edge.
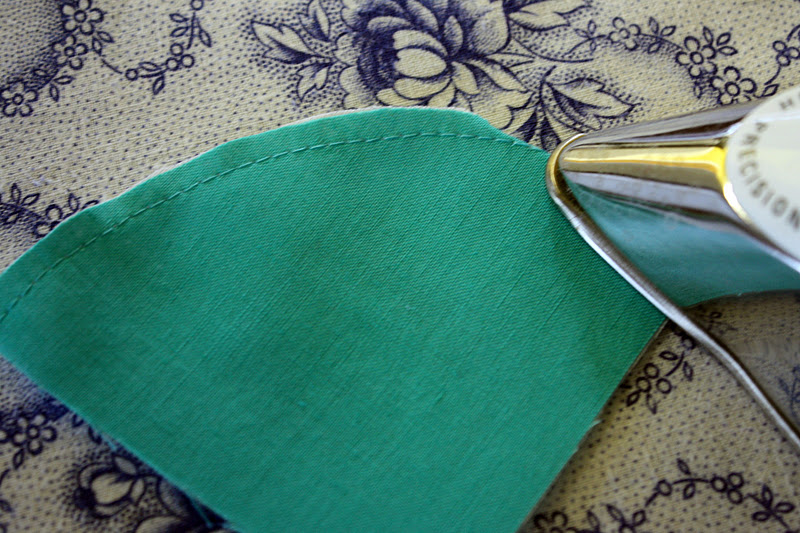
4d. Using your iron, turn the stitched edge under and press along the curve. It helps to slowly press the edge with your fingers and then inch along with the iron. Repeat Step 4c. and Step 4d. for the other 3 curved Side Accent Pieces.
4e. Place 1 curved Side Accent Piece in the bottom left-hand corner of the Exterior Main Panel (the piece fused to the 520F). Topstitch the Side Accent Piece, 1/8″ from the edge. Also topstitch again, 1/4″ from the edge. Baste the 2 straight edges of the Side Accent Piece in place. Repeat for 1 more curved Side Accent Piece and the right-hand edge of the Exterior Main Panel.
4f. Repeat Step 4e. for the remaining 2 curved Side Accent Pieces, and the Exterior Main Panel that you interfaced with the fusible fleece.
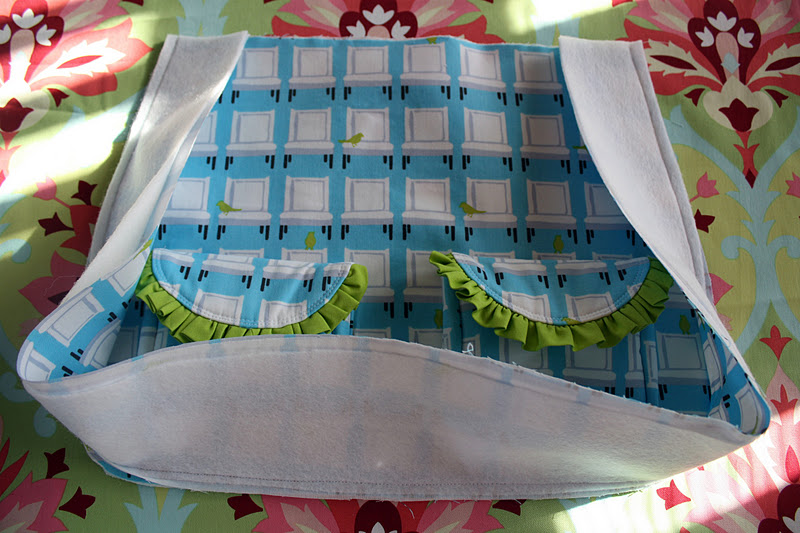
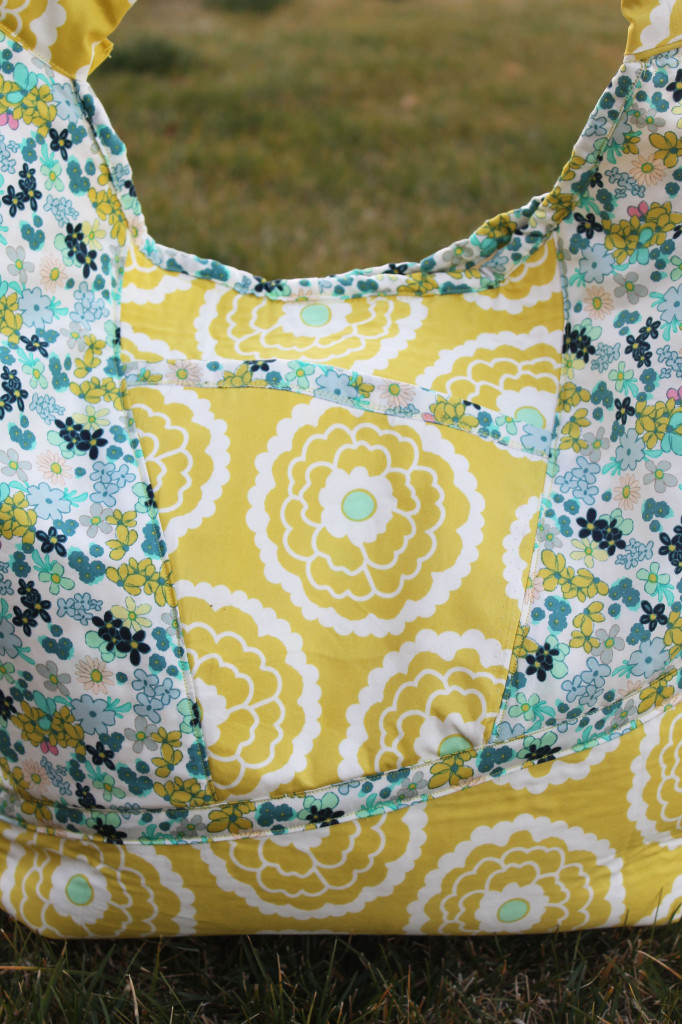
STEP 5 ~ ASSEMBLE THE OUTER POCKET
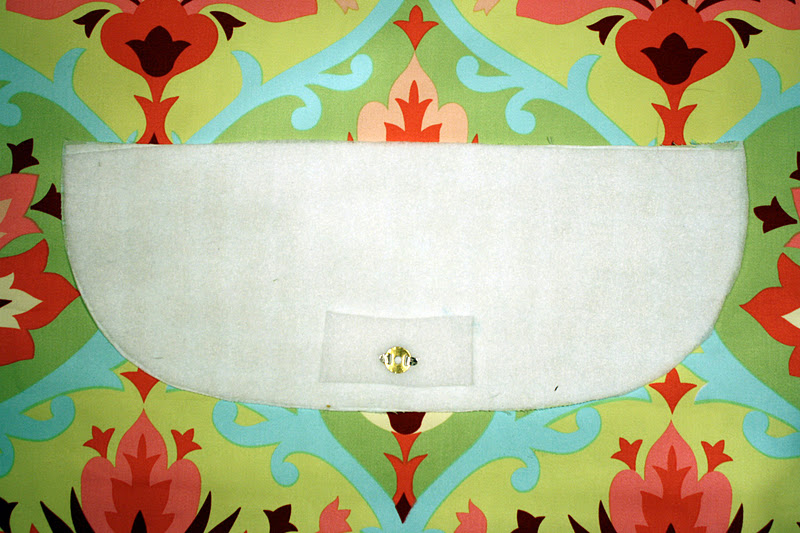
5a. Take the Exterior Main Panel piece that you interfaced with the fusible fleece, and the remaining half of the magnetic snap. Fold the Exterior Main Panel in half and finger press a crease to find the center. The measure up 7″ from the bottom of the Exterior Main Panel and make a mark intercepting the center point. Insert the other half of the snap, using the same method that you used for the Flap.
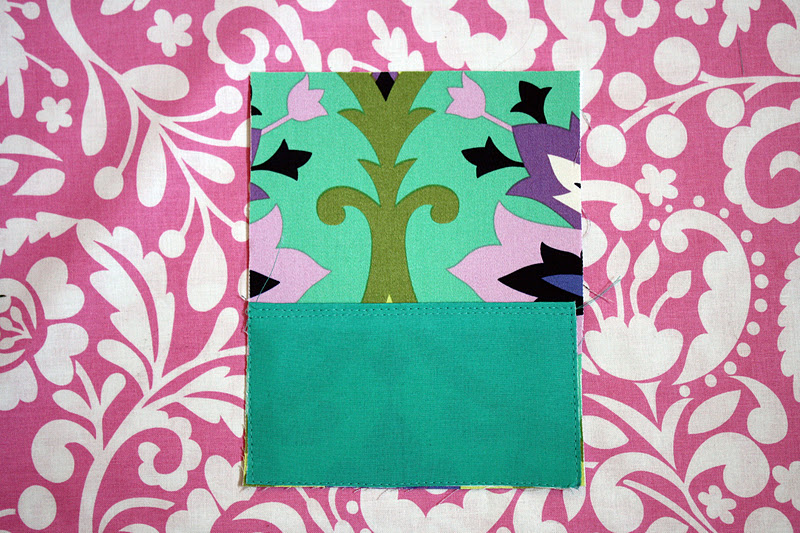
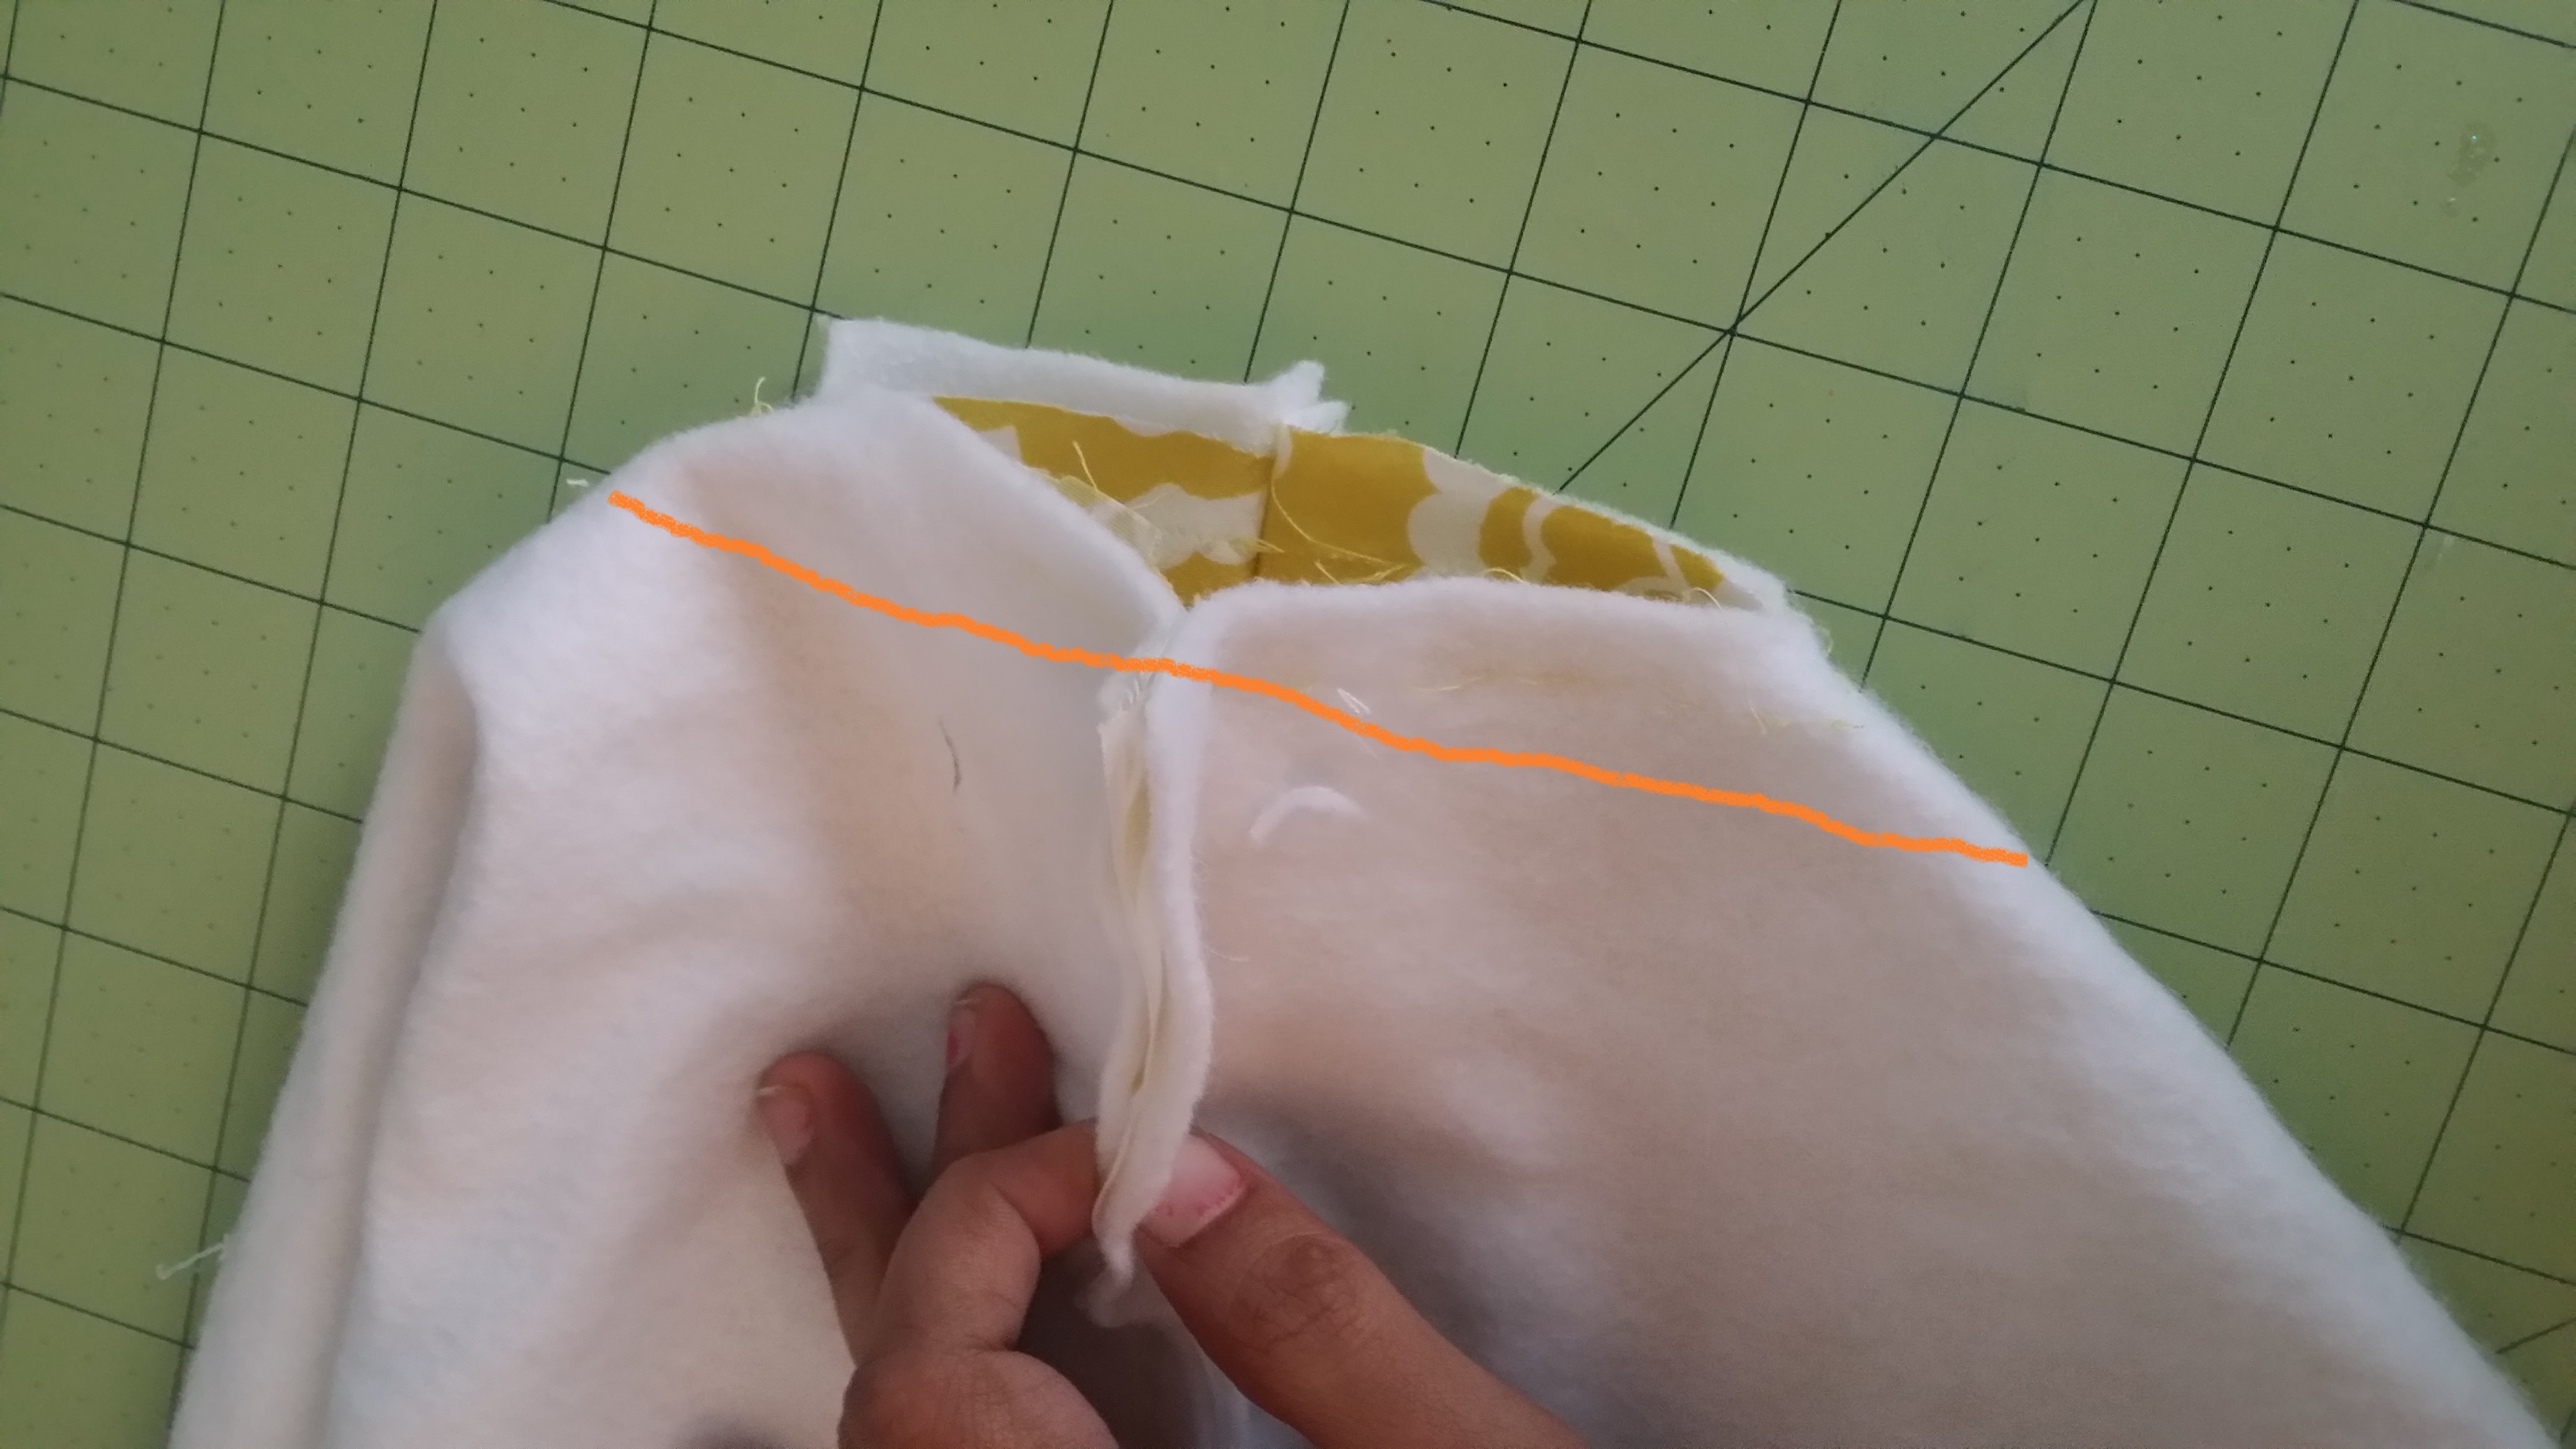
5b. Take the Exterior Main Panel piece from Step 5a., and 1 of your Interior Main Panels. Trim 1/2″ off the top of each piece (the top is the slightly shorter edge). With the 2 pieces right sides together, sew along the edge that you just trimmed.
5c. Turn your panels right sides out and press. Topstitch 1/4″ along the finished edge.
5d. Place the panels that you just sewed, against the right side of the Interior Main Panel that is interfaced with the 520F. The bottom, unfinished edge of the panels should be even with the bottom of the Interior Main Panel. Baste in place along both side edges and the bottom edge.

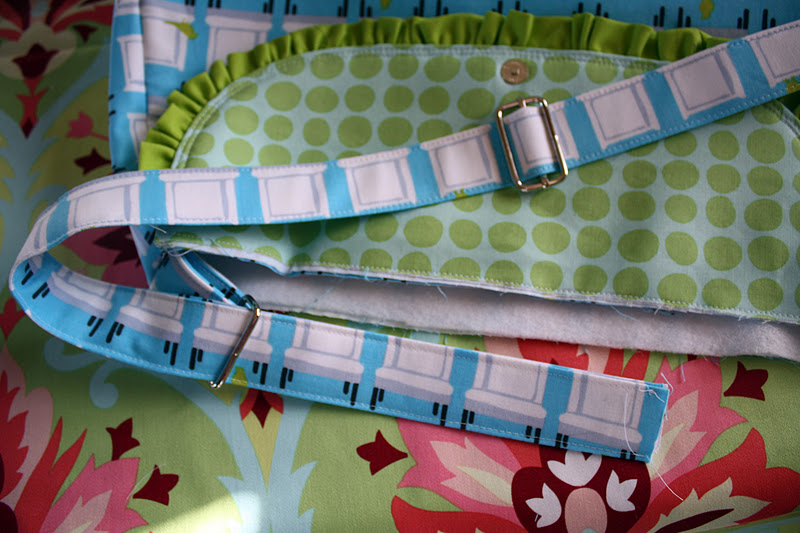
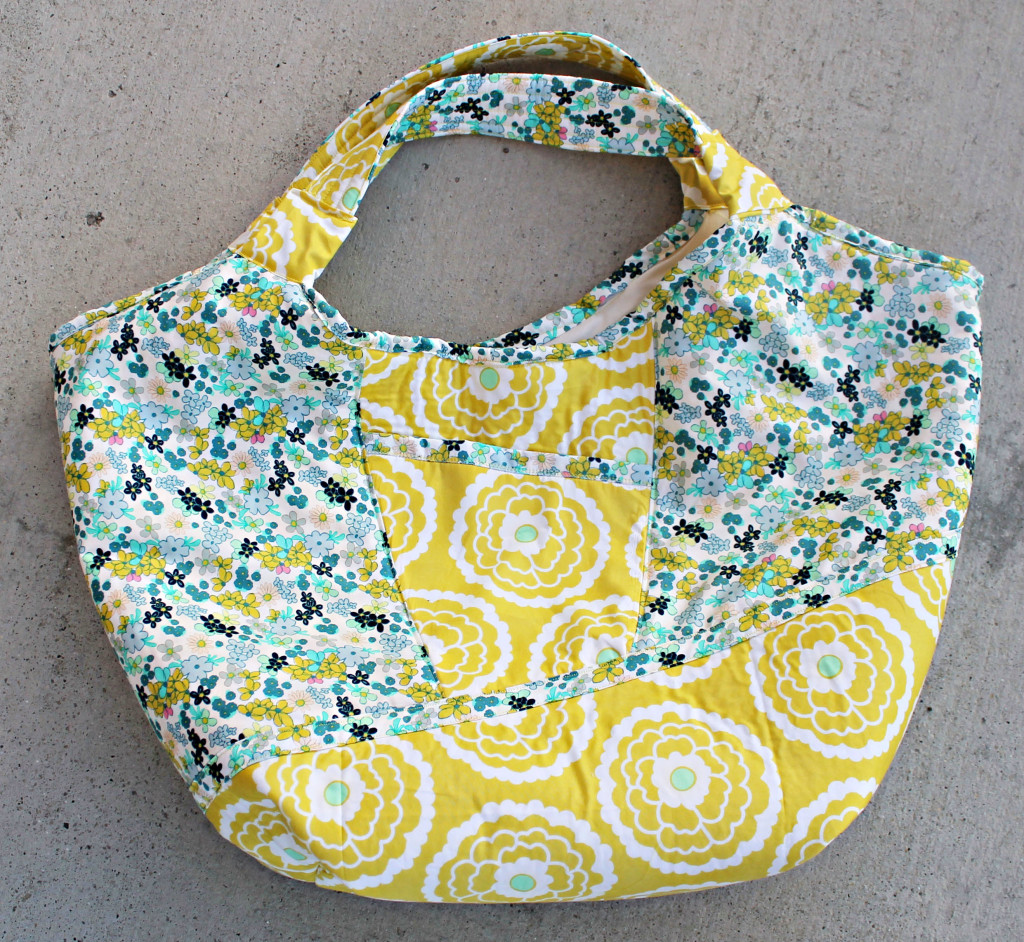
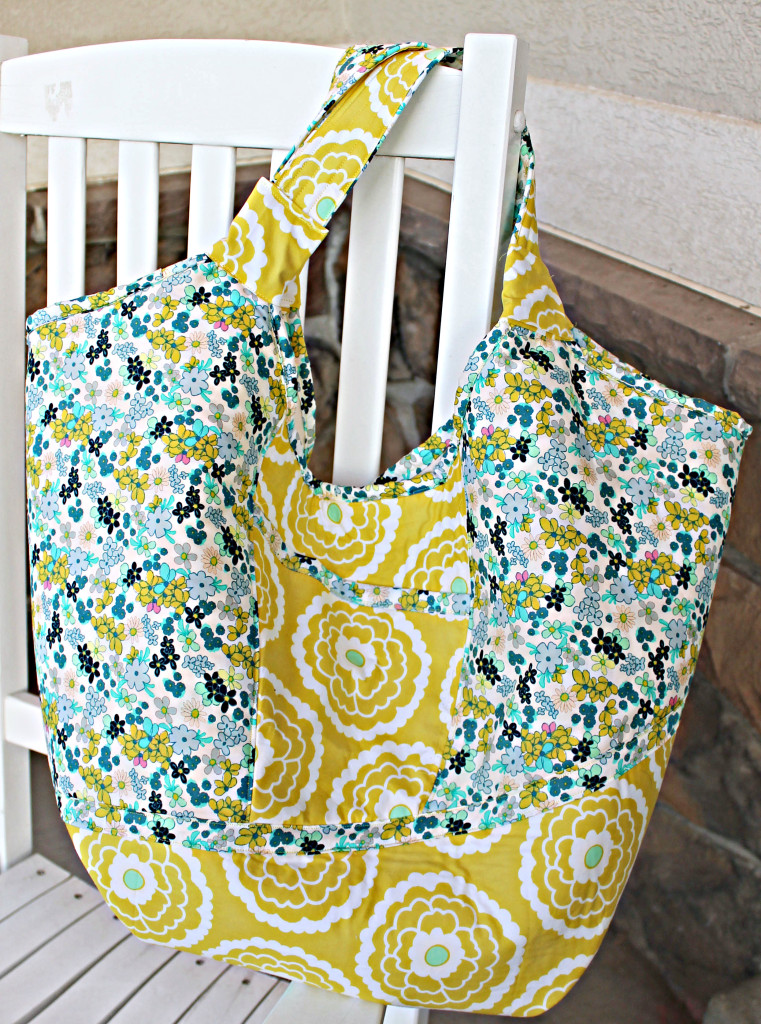
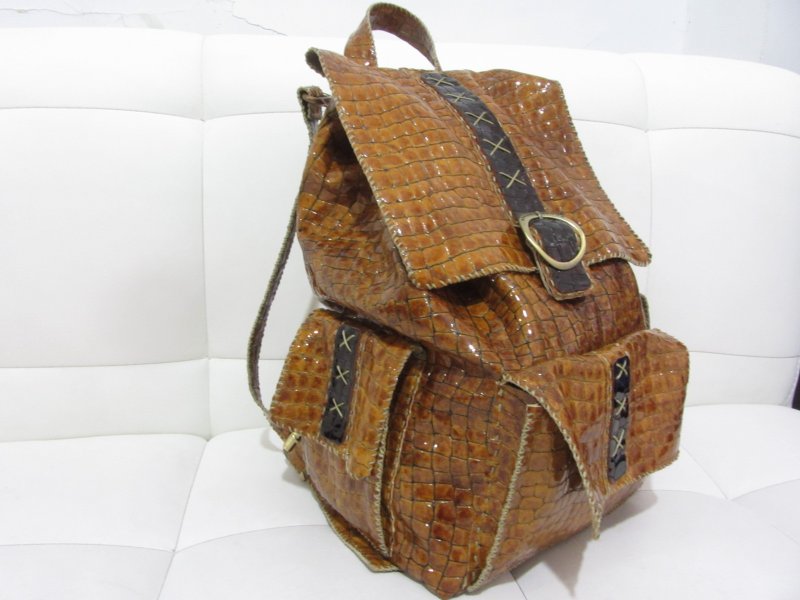
5e. With the exterior side of the Flap facing you, baste the long, unfinished edge of the flap (centered) with the top of the Interior Main Panel from Step 5c (close the snap first). This unit will now be referred to as one of the Exterior Main Panels.
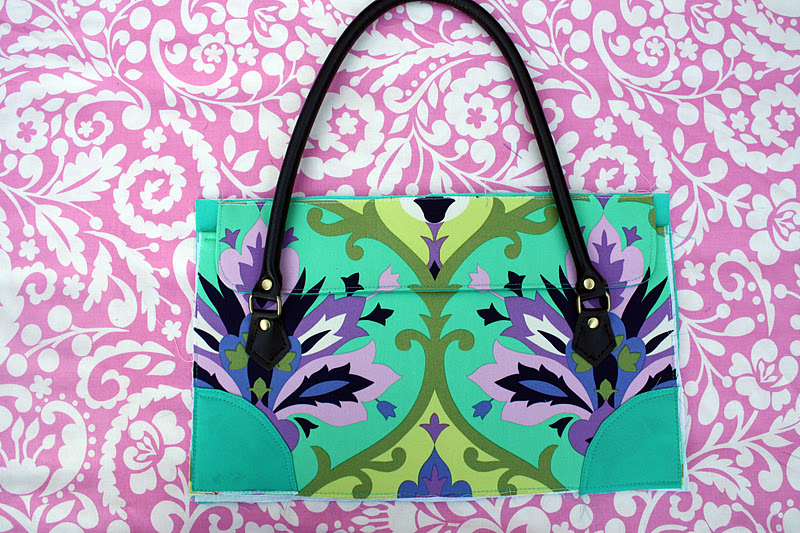
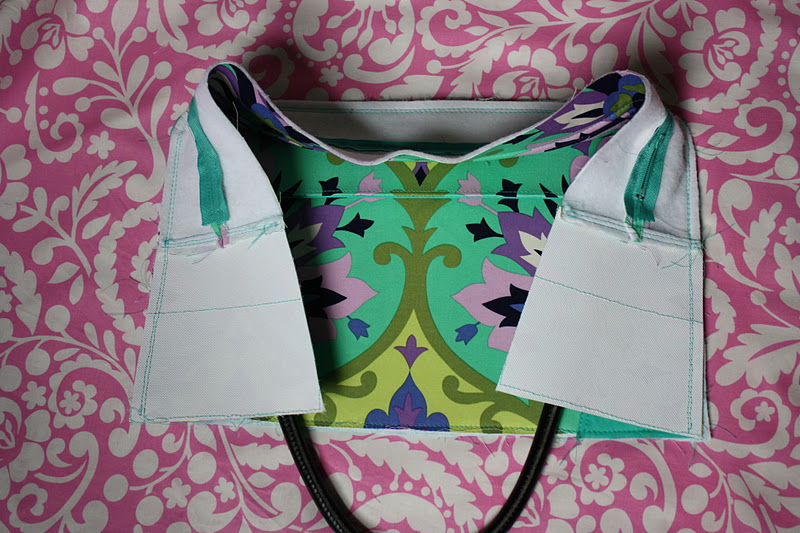
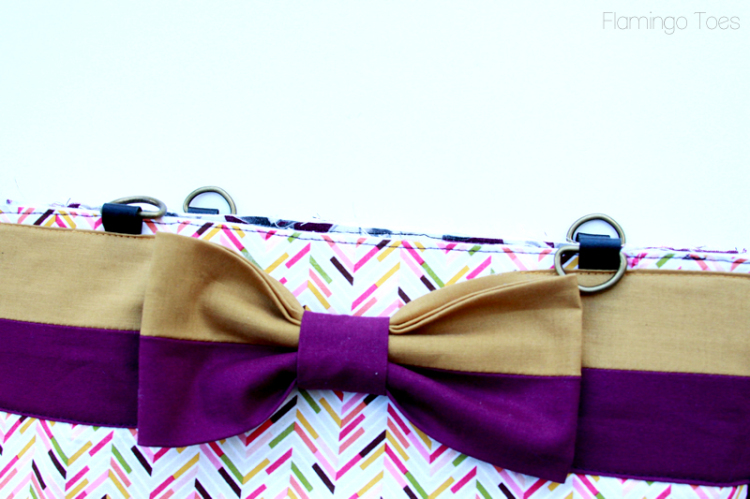
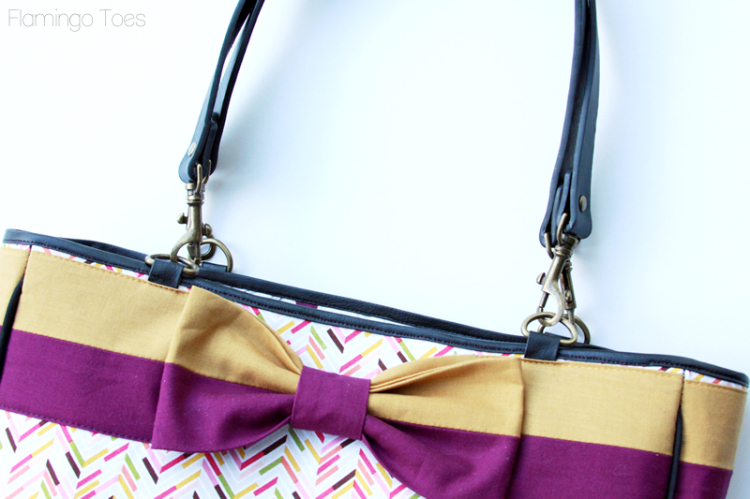
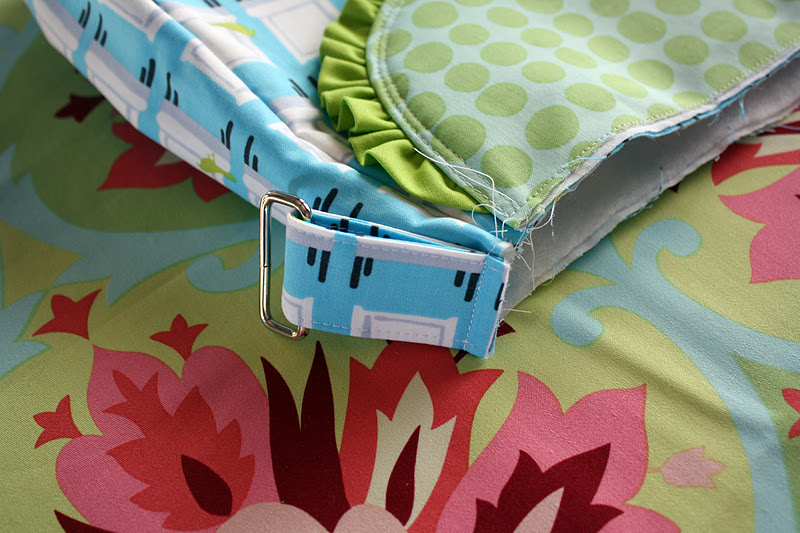
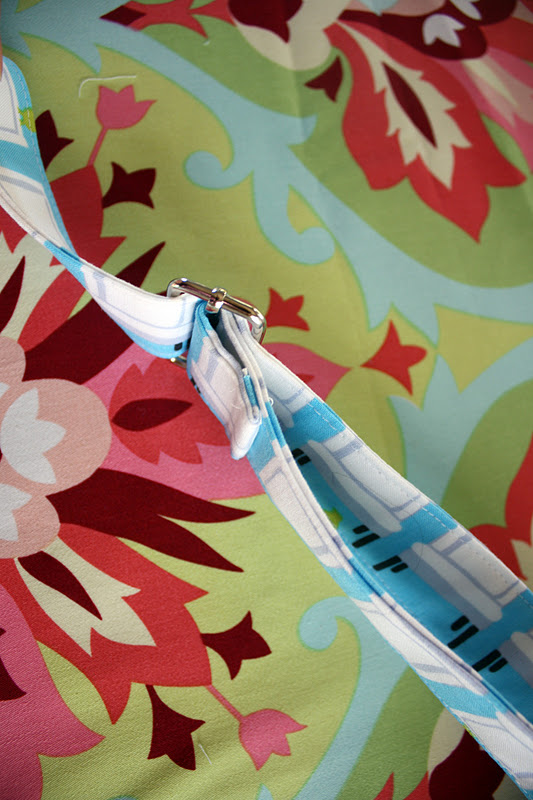
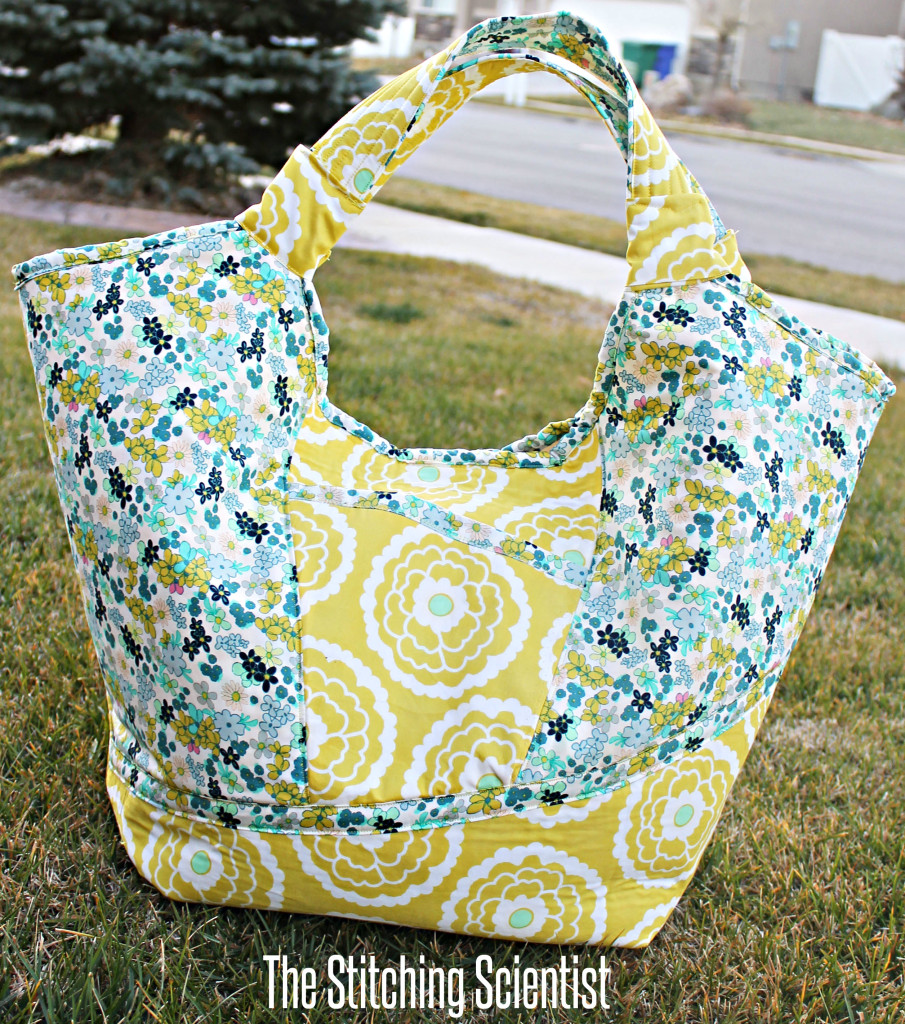
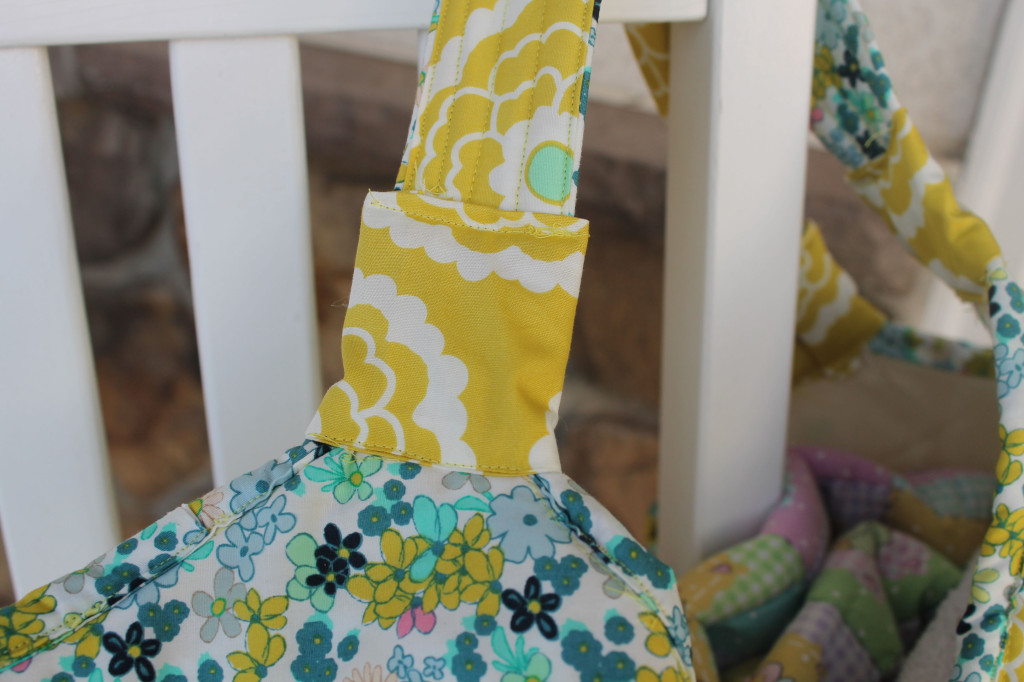
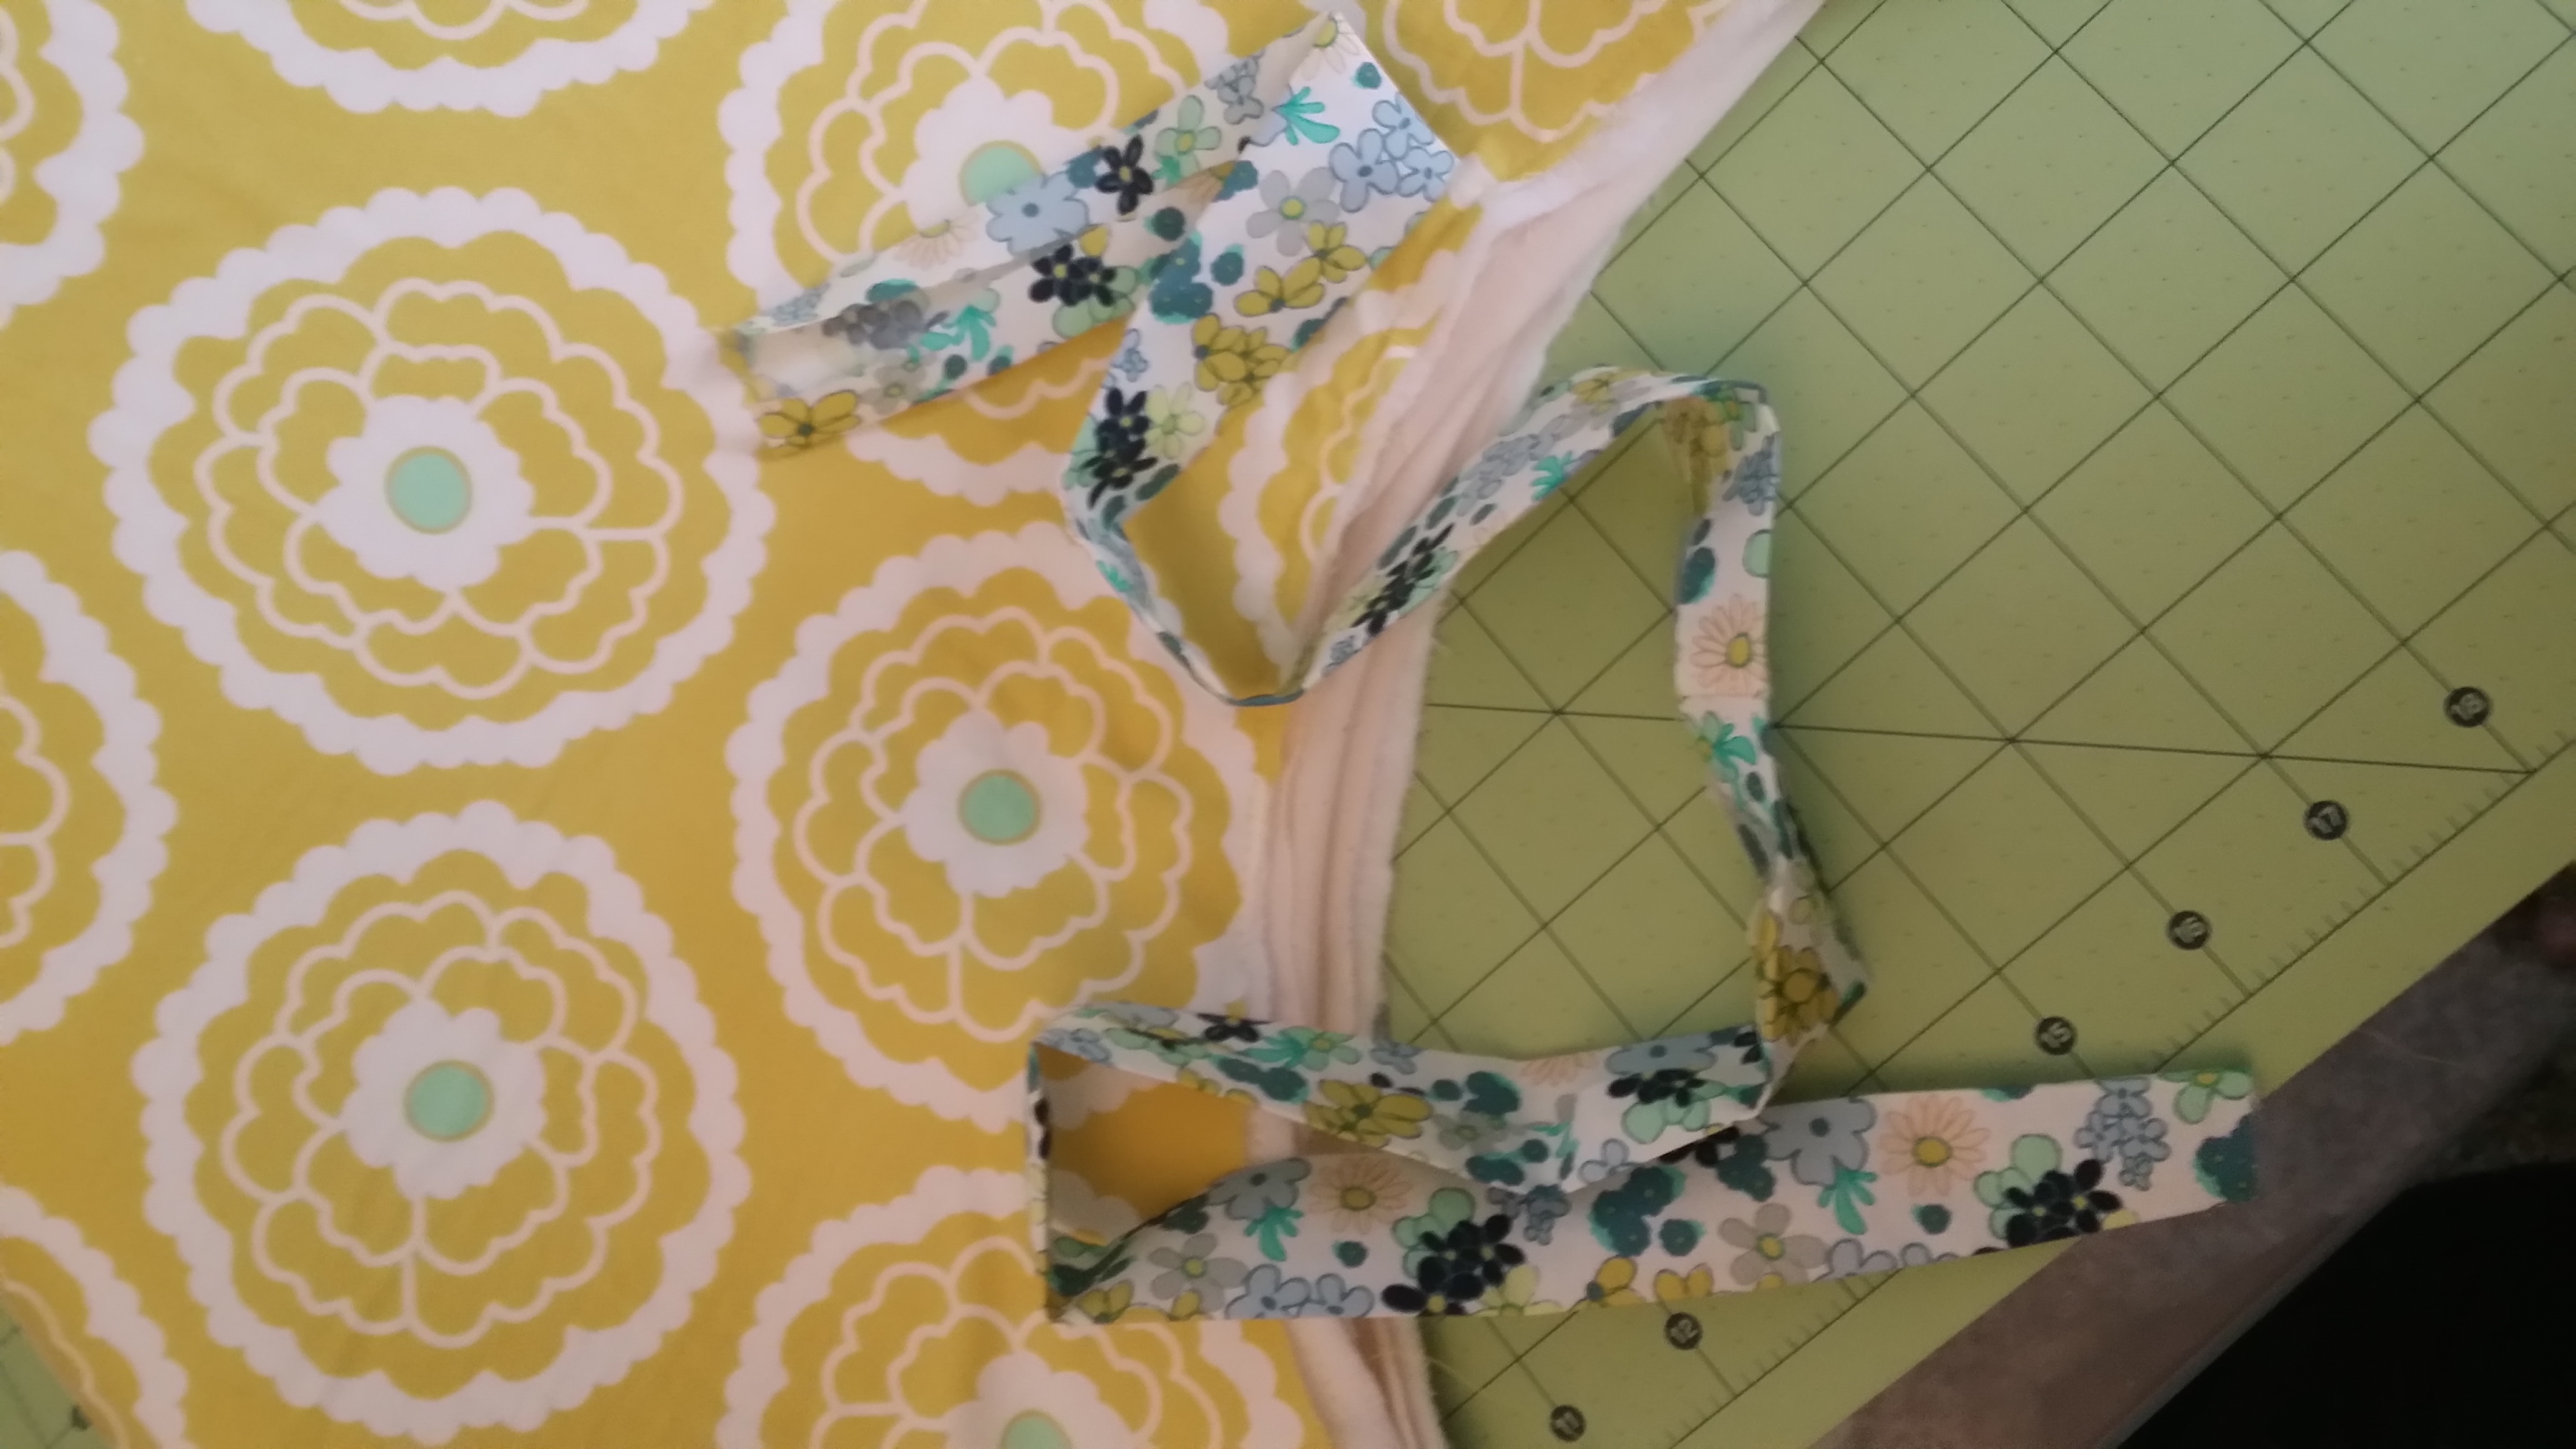
5f. Take the completed Exterior Main Panel with the flap, and one of your handles. Place the left end of the handle up 5″ from the bottom and over 2-1/2″ from the left. Make sure your handle tab is free of the flap so that you are able to open and close it (the strap will be on top of the flap while you are wearing the bag). You may need to adjust the placement depending on the handles you have chosen. Sew the handle tab in place. If your tabs are thick, you may need to hand-crank your needle, or even hand sew. Repeat to secure the right end of the handle. Follow this step to attach the other Handle to the remaining Exterior Main Panel.
The handles will be stitched through a small portion of the pocket; this is important so that the stitches go through the Pellon 520F to add stability to the area where the handle tabs are.
STEP 6 ~ INSERT THE ZIPPER
6a. Take your Exterior Zipper Panel and cut it in half, lengthwise.

6b. Place the resulting 2 pieces right sides together. With your fabric marker, measure and make a mark that is 1″ in from that left-hand edge. Do the same for the right-hand edge. Sew from the mark to the corresponding edge (each line of stitching will be only 1″ long), using a 5/8″ seam allowance.
6c. Set your machine to a basting stitch. Baste, using a 5/8″ seam allowance, in between the 2 lines of stitching from Step 6b. Press the seam open.
6d. The wrong side of your Exterior Zipper Panel should be facing you. Take your zipper and place it face down on top of the Zipper Panel. The zipper teeth should be approximately on top of the basting stitches. Pin in place.

6e. Put the zipper foot on your sewing machine, and sew along 1 long edge, pivot, sew the short edge, pivot, sew the remaining long edge, pivot, and finally sew the remaining short edge. You should sew approximately 1/4″ away from the zipper teeth.
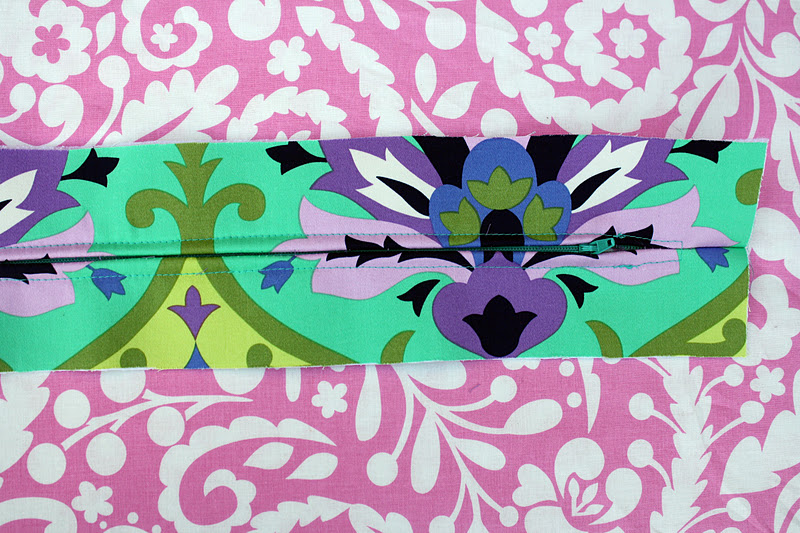
6f. With the right side of the Exterior Zipper Panel facing you, remove the basting stitches with your seam ripper.
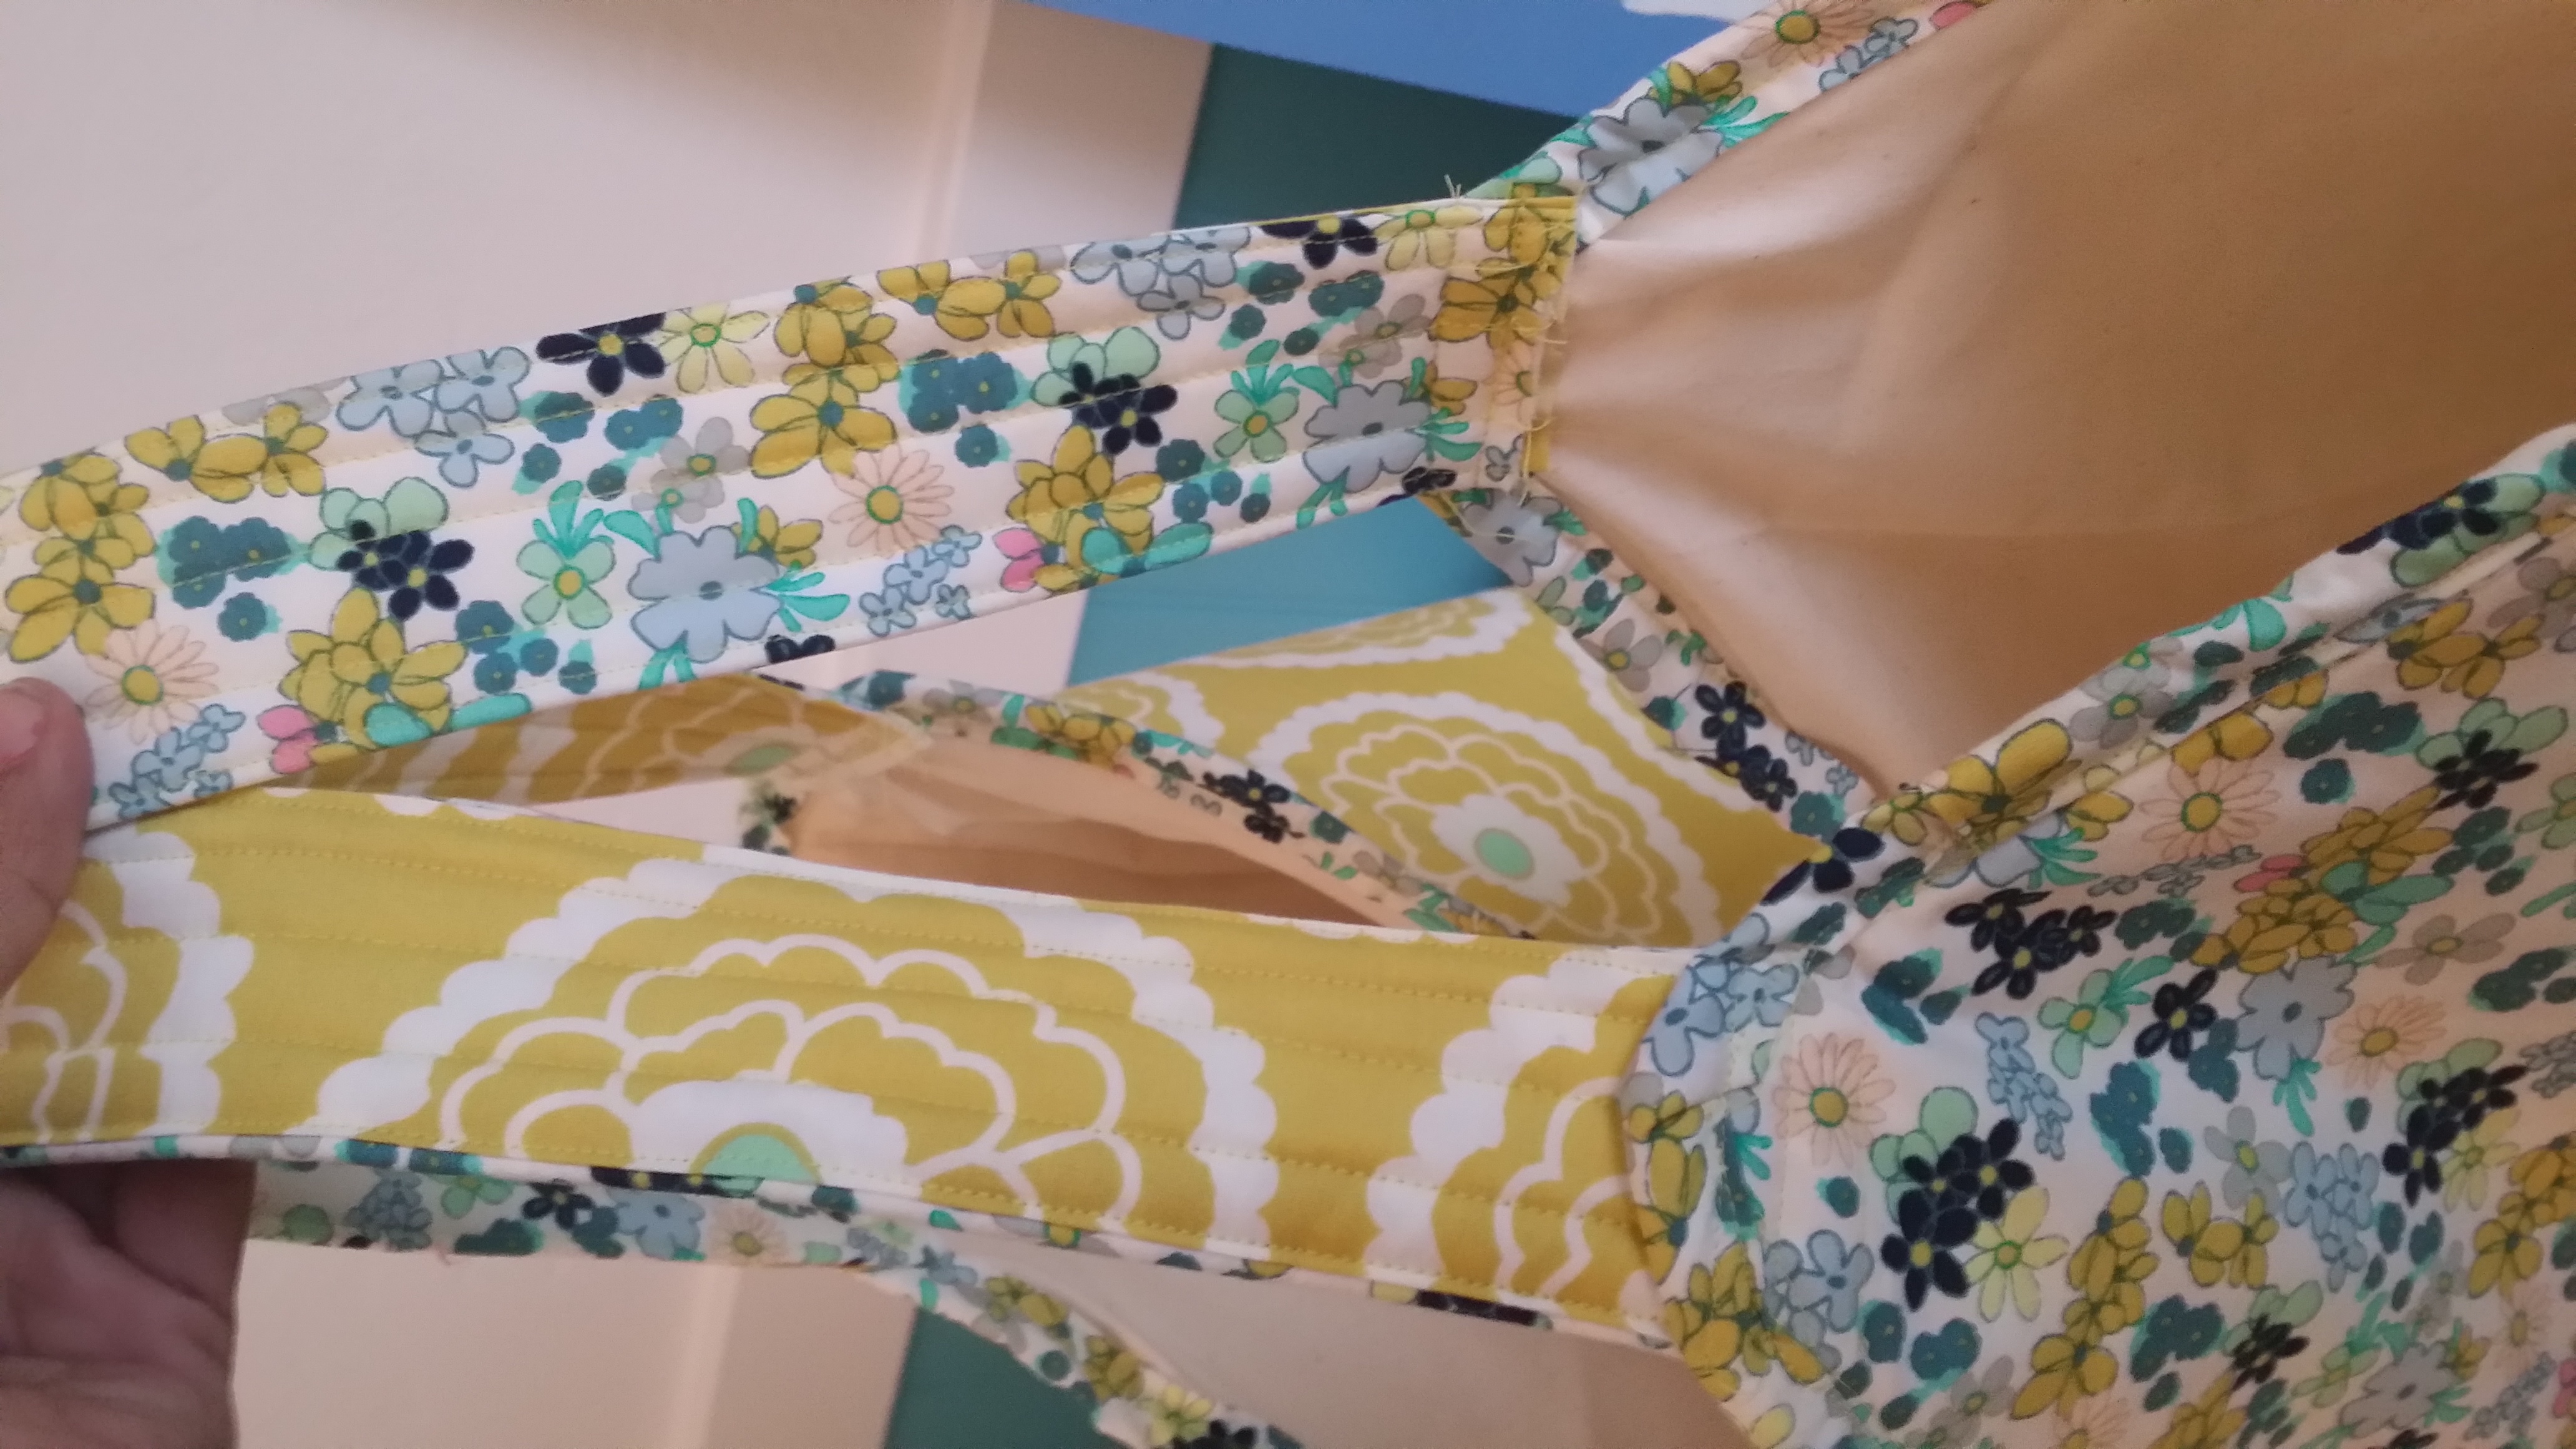
STEP 7 ~ ASSEMBLE THE EXTERIOR
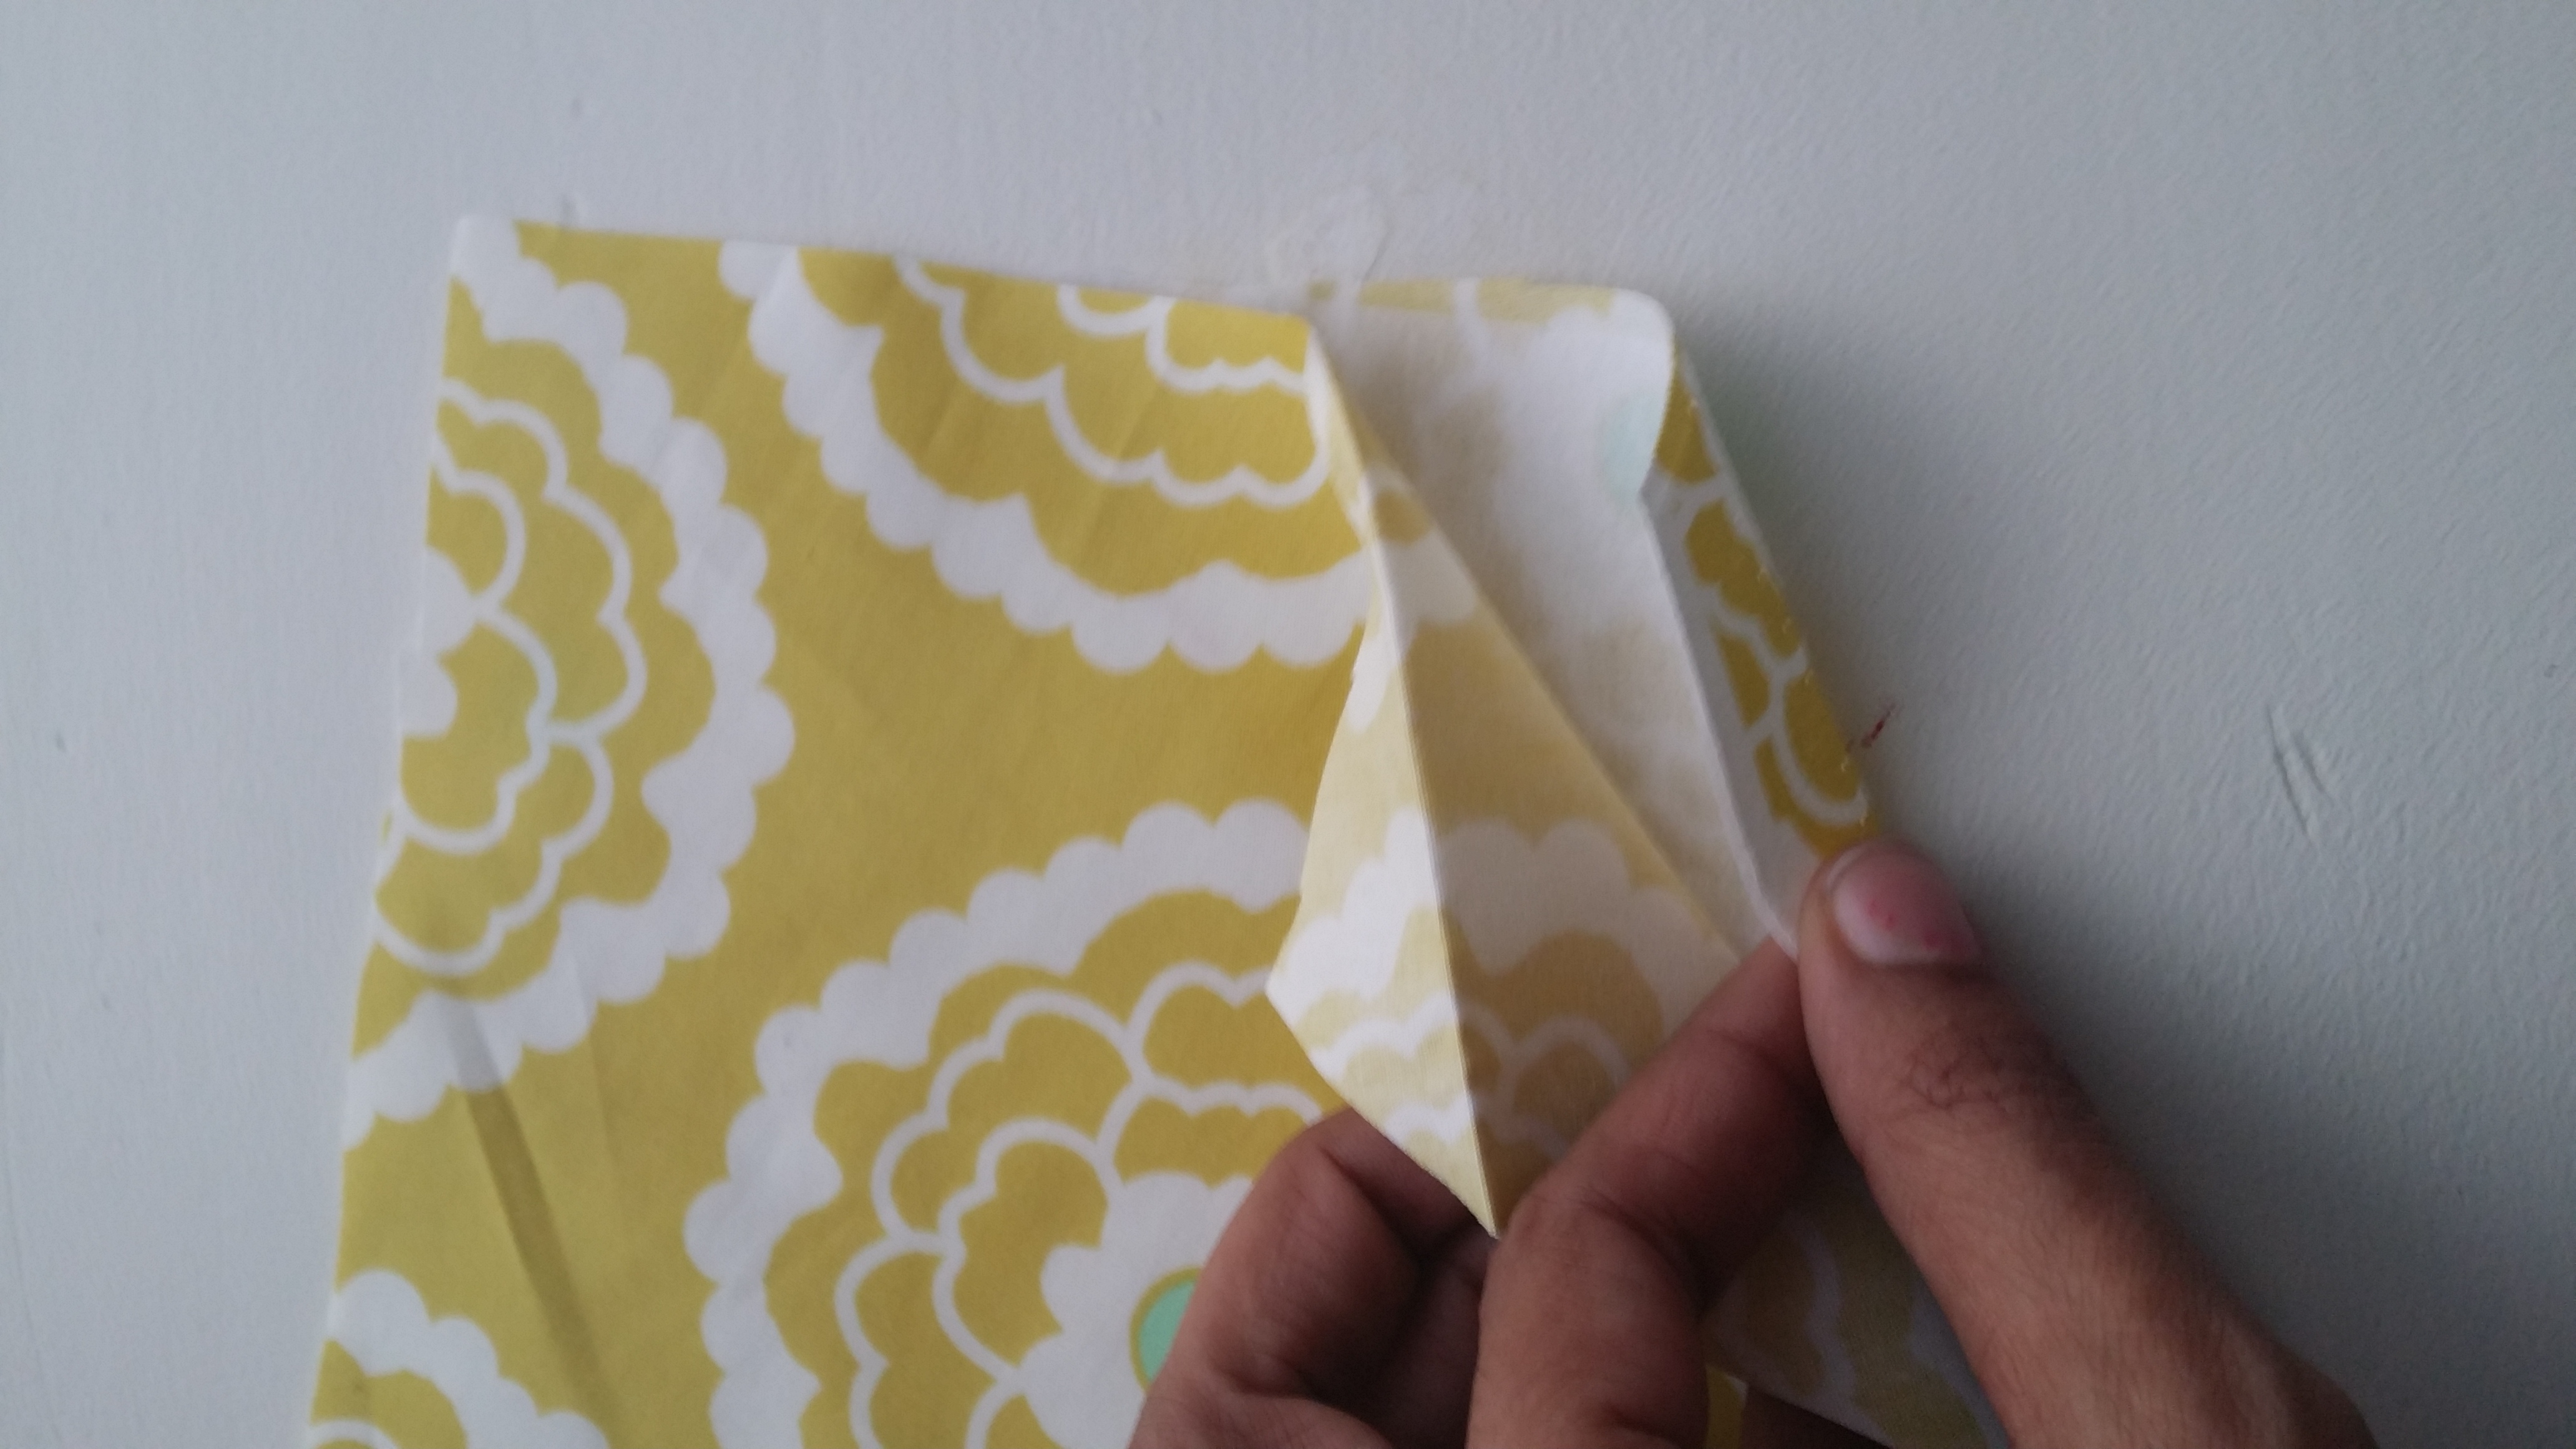
7a. Place 1 of your Exterior Side Panels in front of you, so that the Accent Piece is at the bottom. Make a mark at the top of your Exterior Side Panel, that is in 3/4″ from the top left-hand corner. Draw a line from the mark you made, down to the bottom left-hand corner of the Exterior Side Panel. Repeat for the right-hand side of the Exterior Side Panel. Cut along both lines and discard the slivers.
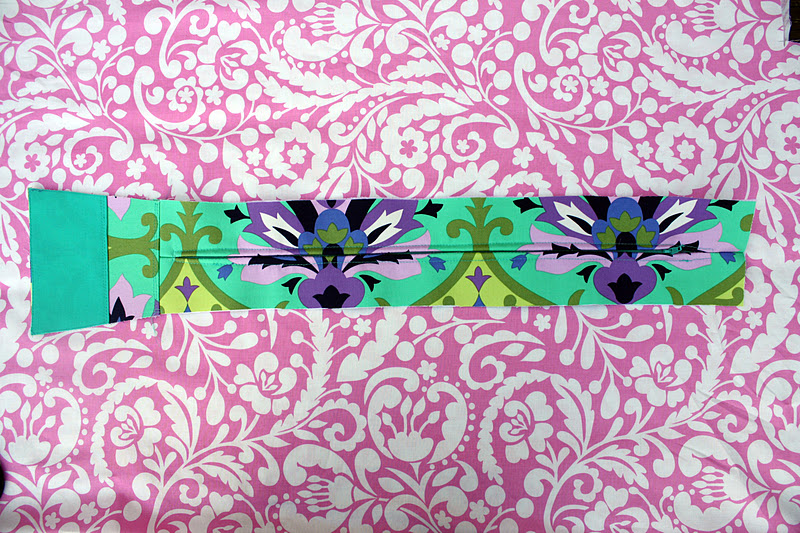
7b. Take 1 Exterior Side Panel and your Exterior Zipper Panel. Place them, right sides together. The short edge of the Exterior Side Panel should be even with the short edge of the Exterior Zipper Panel. Sew along the short edge, and press the seam toward the Exterior Side Panel. Topstitch on top of the Exterior Side Panel, both 1/4″ and 1/8″ from the seam that you sewed in this step.
7c. Repeat Step 7b. for the remaining Exterior Side Panel, and the other end of the Exterior Zipper Panel.
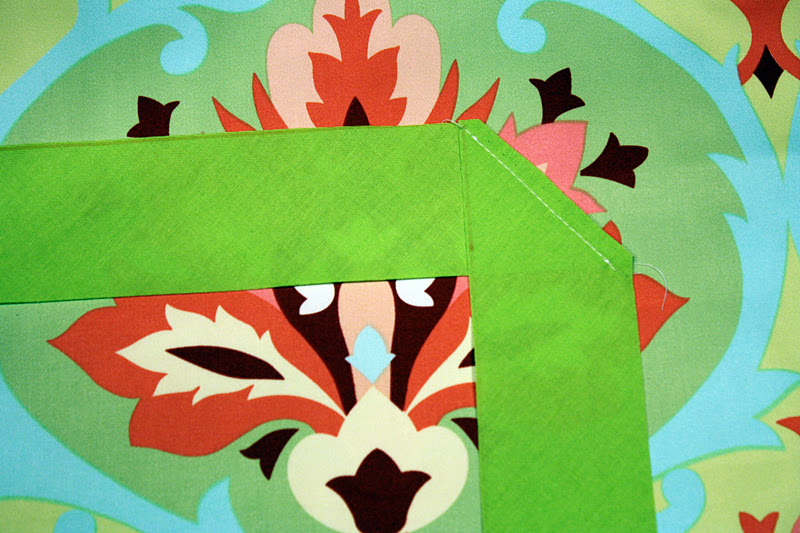
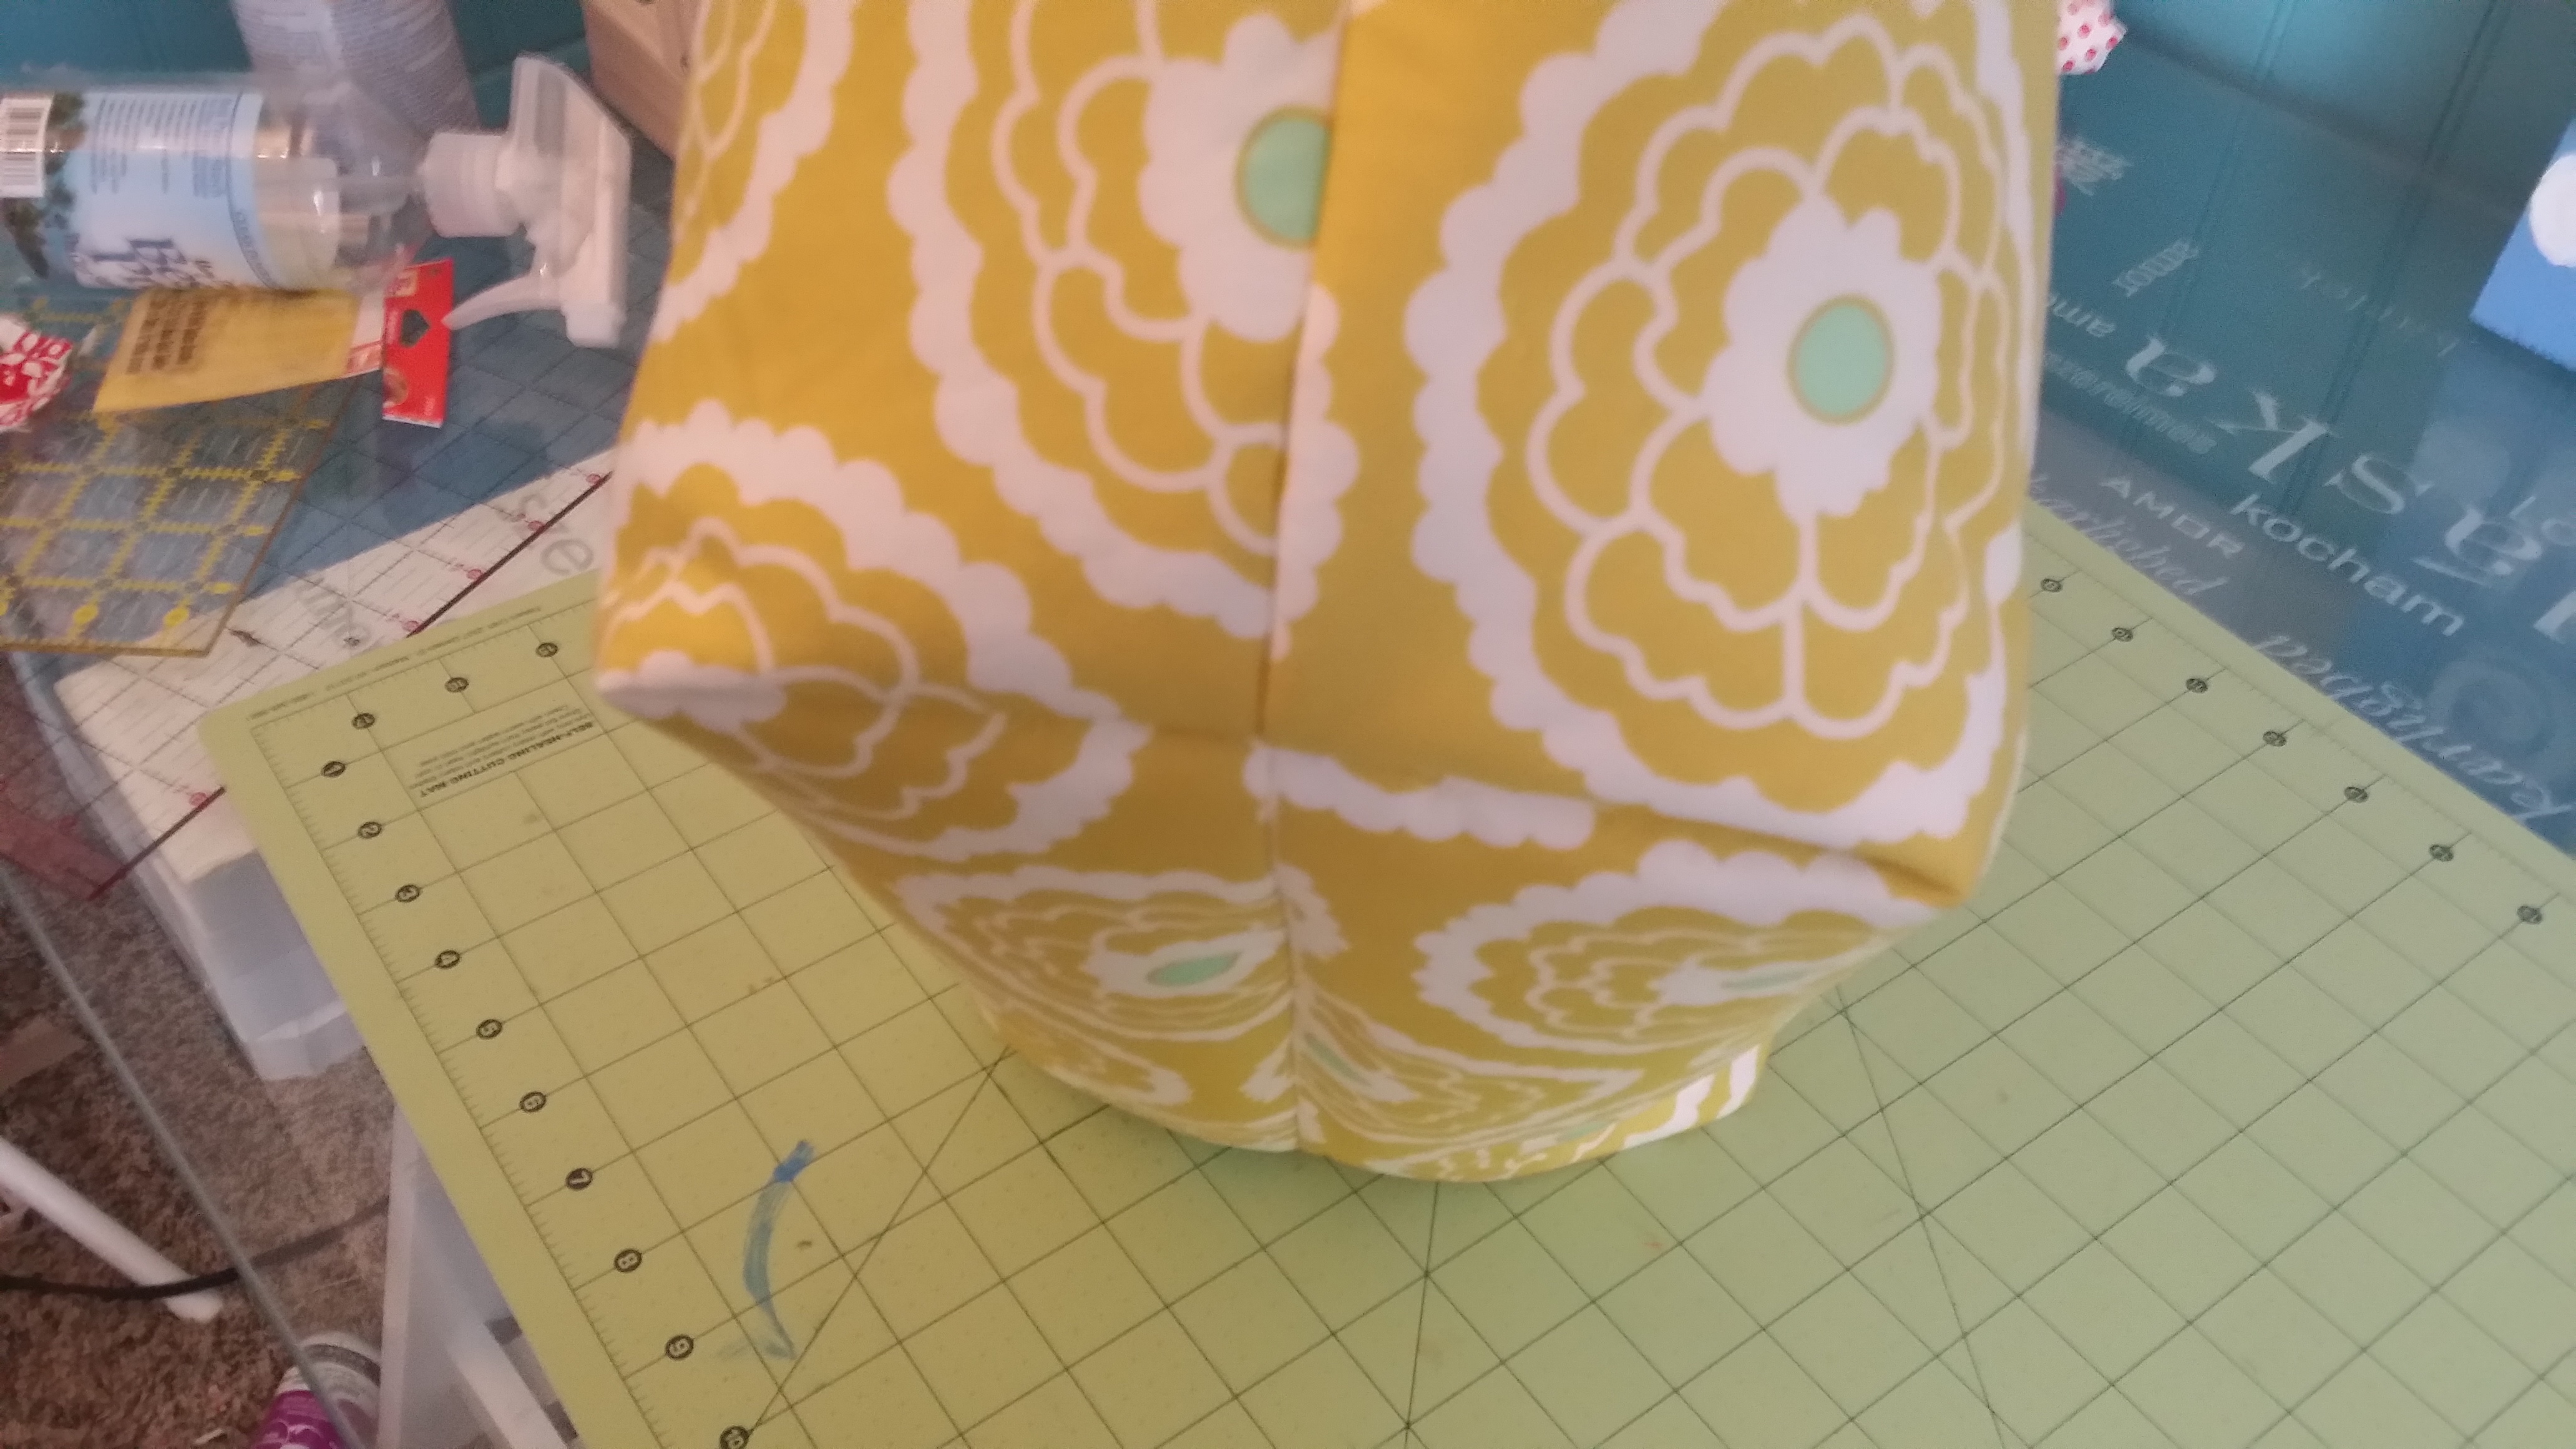
7d. Take one of your Exterior Main Panels and the assembled Side Panel. Place the long edge of the Side Panel flush with the outer edge of the Exterior Main Panel, starting at the bottom left-hand corner of the Exterior Main Panel. Pin in place, moving up the side of the Exterior Main Panel. When you get to the top left-hand corner of the Exterior Main Panel, ease the Side Panel around the corner, then continue across the top of the Exterior Main Panel. Ease through the top right-hand corner as well, and continue until you have reached the bottom right-hand corner of the Exterior Main Panel.
Helpful Hint: I found it easier to sew the sides first, then the top of the bag, leaving the corners for last. I was able to more evenly distribute the side panel when attaching it to the exterior panels.
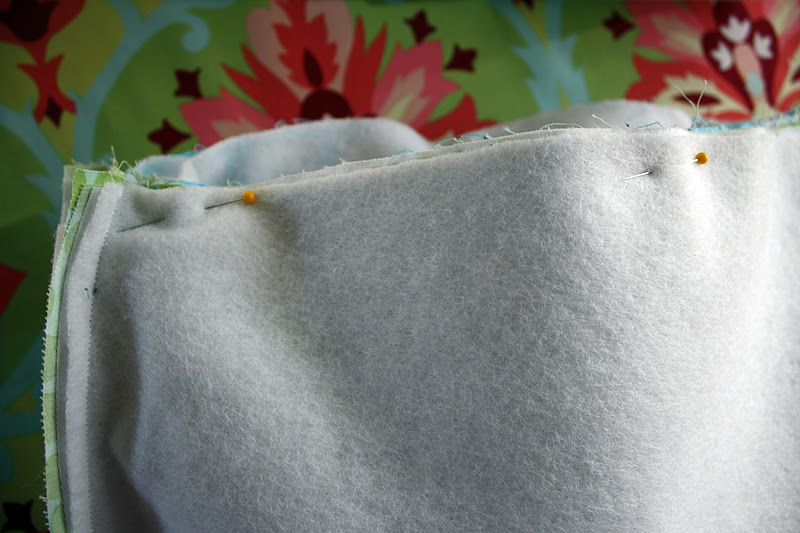
7e. Sew along the edges that you just pinned. Notch (cut small v’s) the seam allowance at both of the top corners. Press seams open.
7f. Repeat Steps 7d. and 7e. for the remaining Exterior Main Panel.
7g. Unzip your zipper (this is important so that you will be able to turn your exterior right sides out). Take your Exterior Bottom Panel and place it underneath your completed Exterior. Line up the raw edges of both, making sure the corners are even, and pin in place.
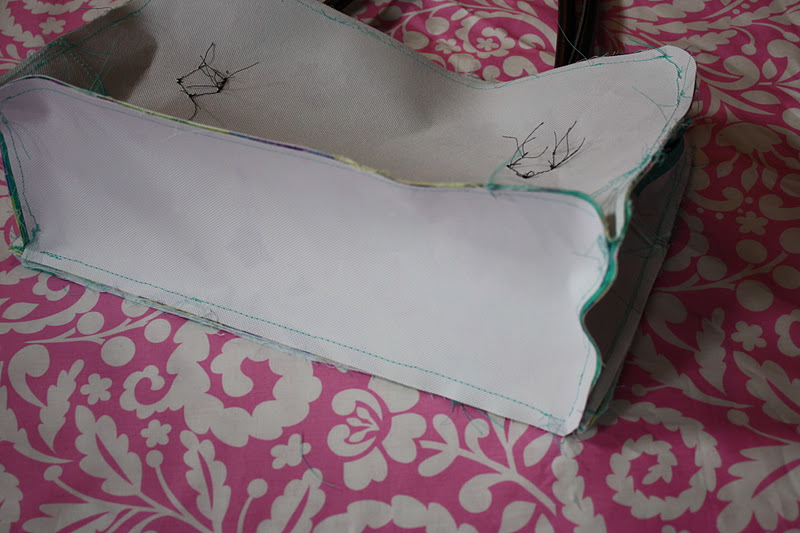
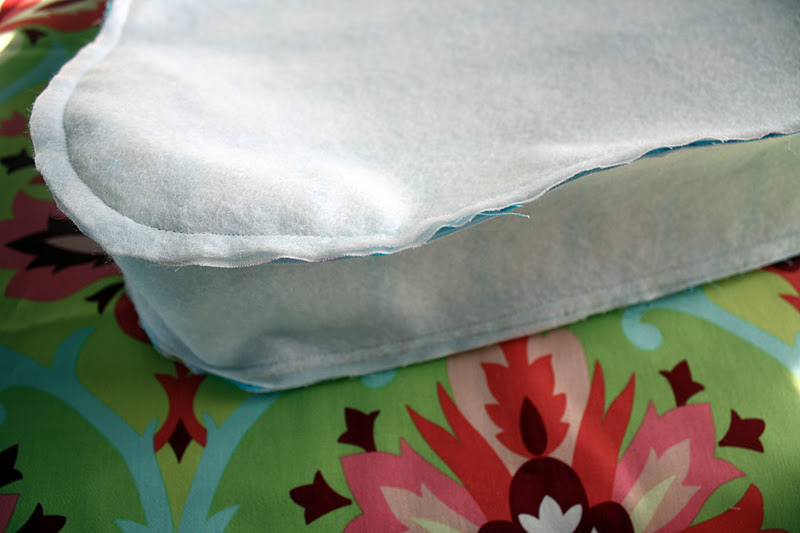
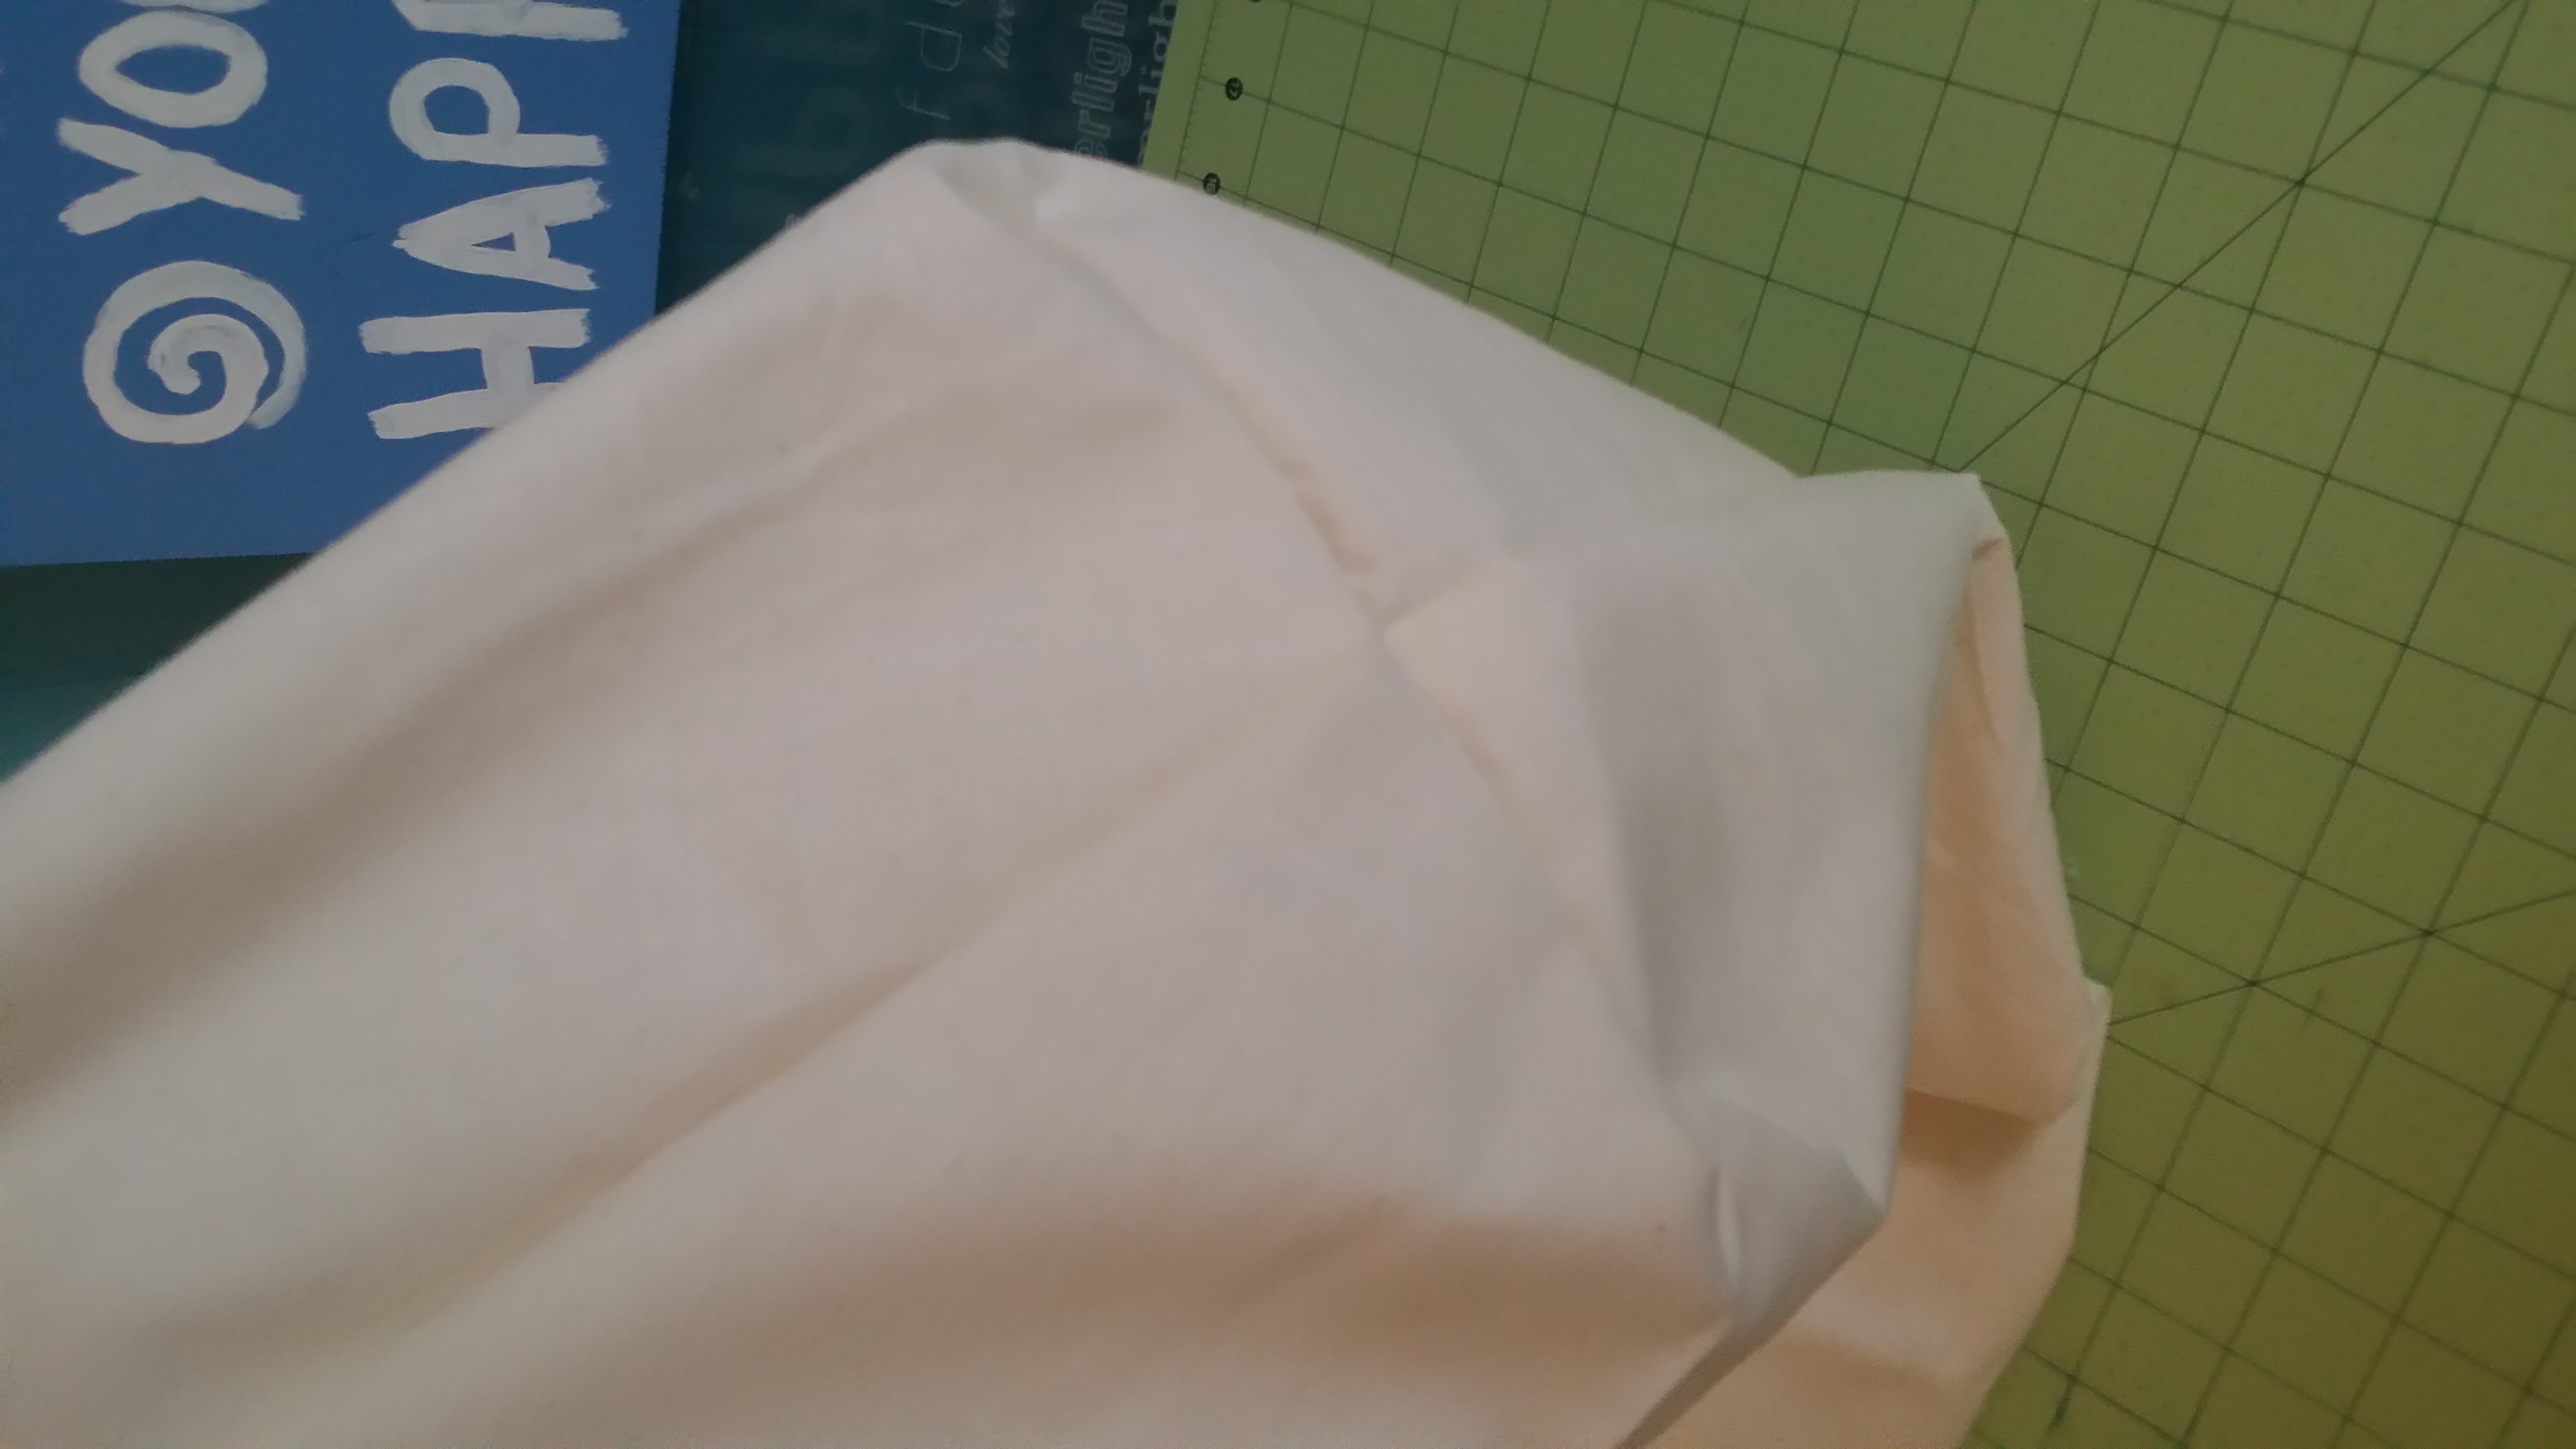
7h. Sew along one of the short edges, starting and stopping 1/2″ from the corner. Repeat for the other short edges and both long edges. Trim the bottom corners, being careful not to cut into your seam allowance.
STEP 8 ~ ASSEMBLE THE INTERIOR
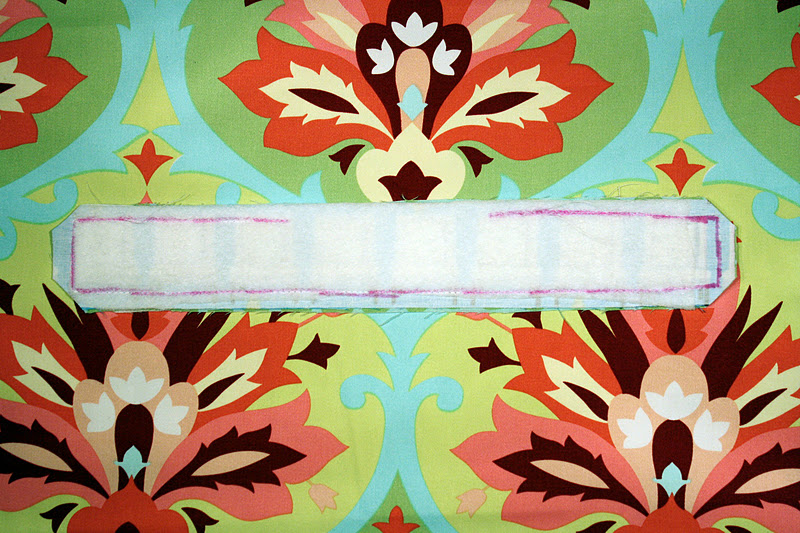
8a. Repeat Step 6a. and Step 6b. for the Interior Zipper Panel.
8b. Press the seam allowance of the long edge of the Interior Zipper Panel to 1/2″ (the center of the panel will be unsewn, but press the entire long edge anyway).
8c. Repeat Steps 7a. through 7h. with all of the interior pieces, except you will be using a 5/8″ seam allowance. This is important so that your interior will sit more snug inside the exterior of the bag.
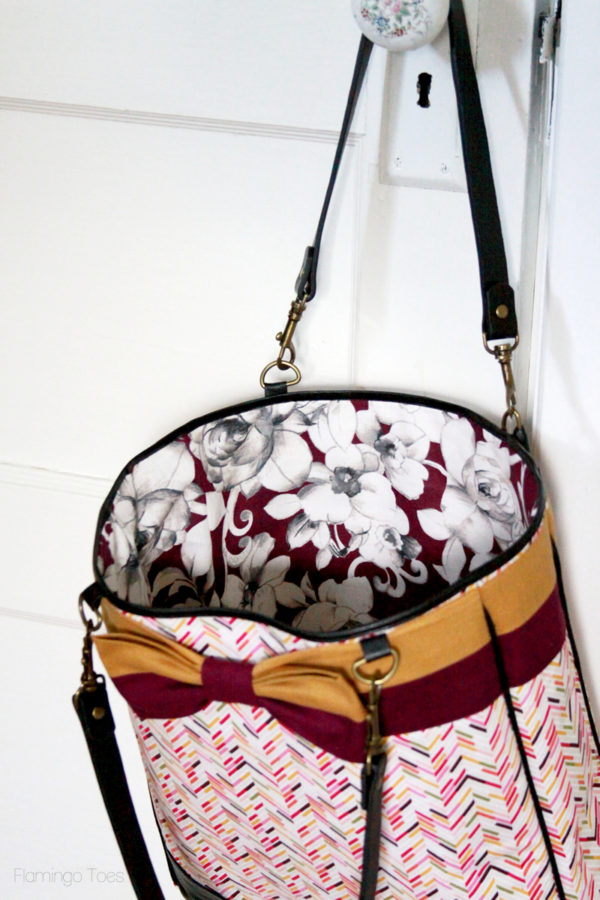
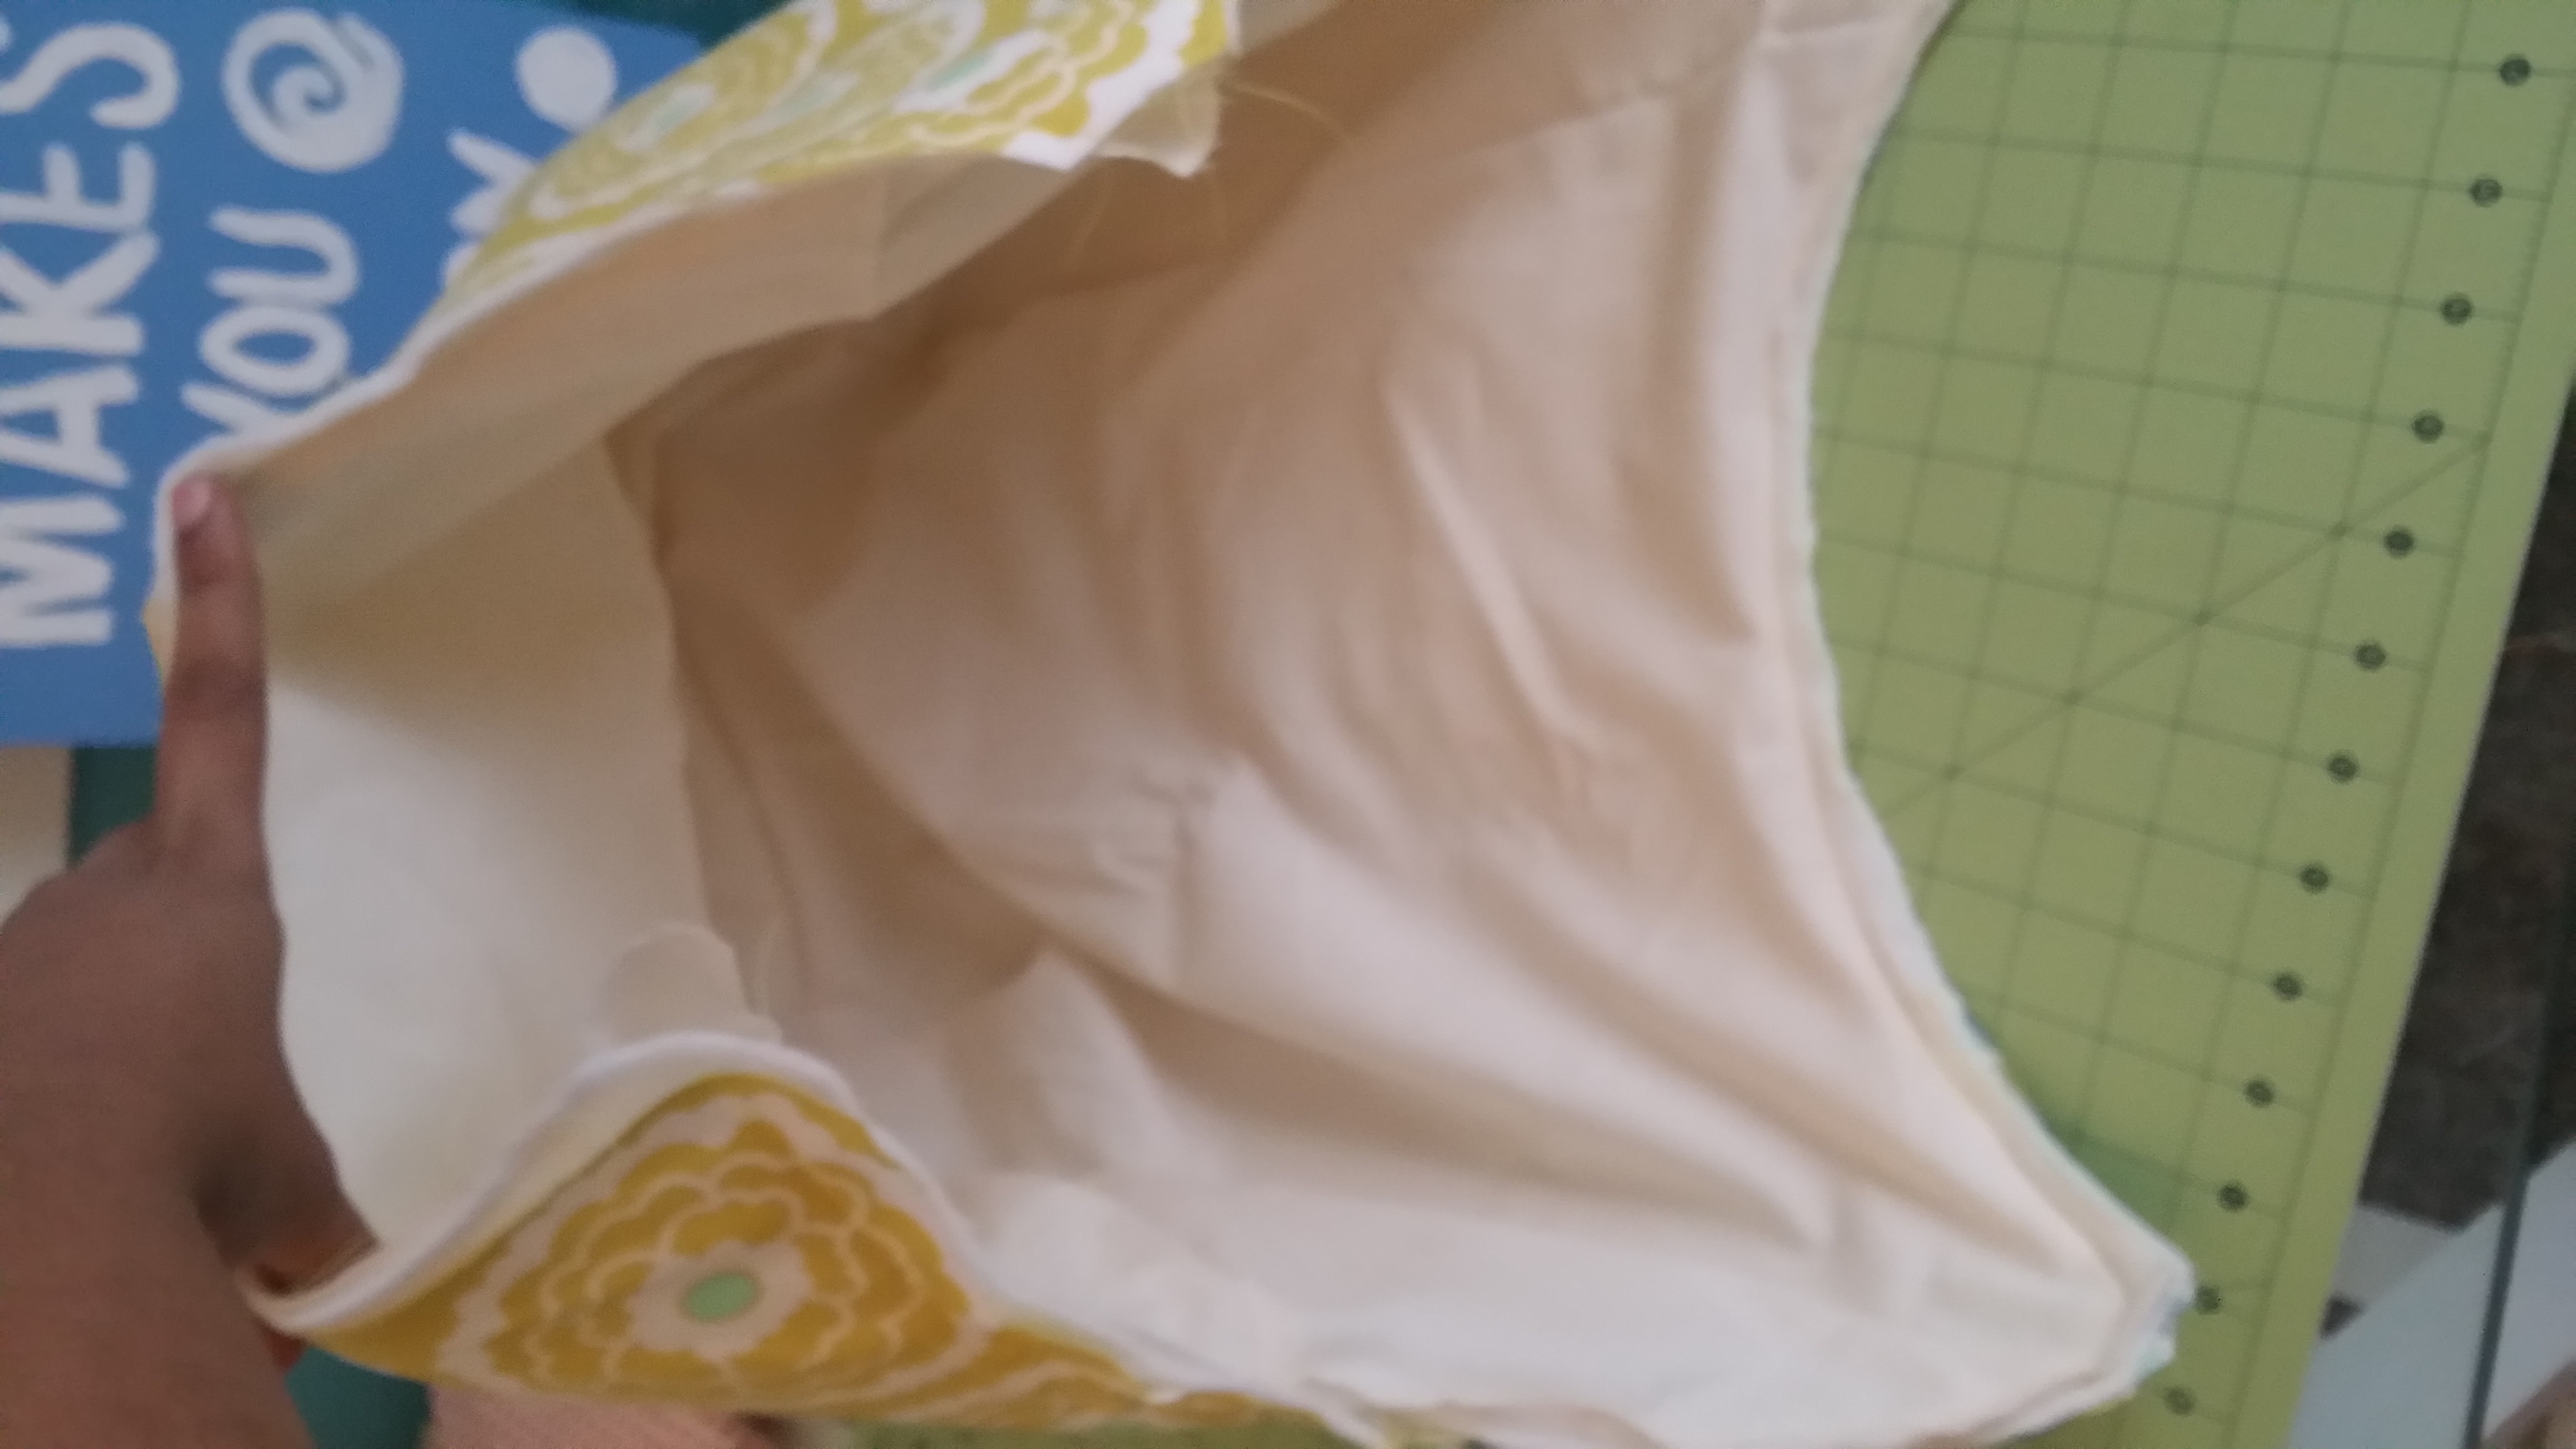
8d. Turn your exterior right side out and your interior wrong side out. Place the interior inside of the exterior (so that wrong sides will be touching). Pin in place in several randomly-chosen areas, and also pin the pressed edges of the Interior Zipper Panel against the wrong side of your zipper.
8d. With your hand sewing needle and coordinating thread, hand sew the pressed edge of the Interior Zipper Panel from Step 8b., to the wrong side of your zipper. You may also wish to hand sew a few stitches on the right side and the left side of the bag to hold the interior in place.
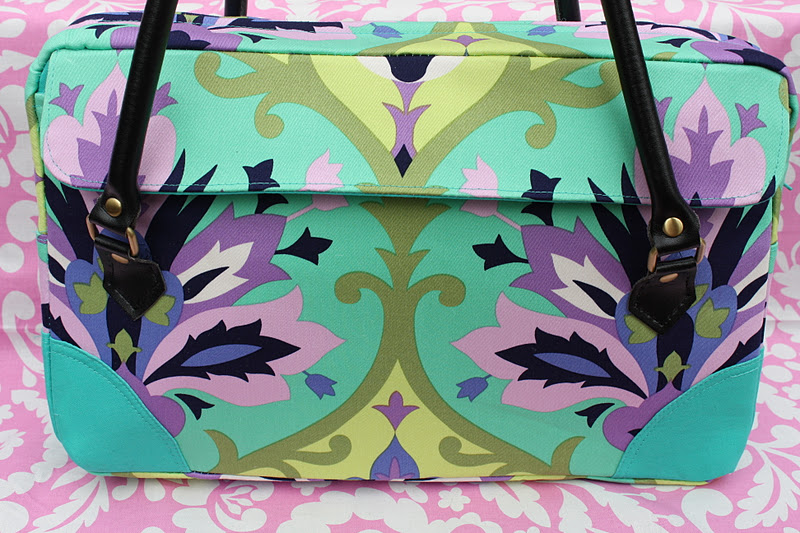
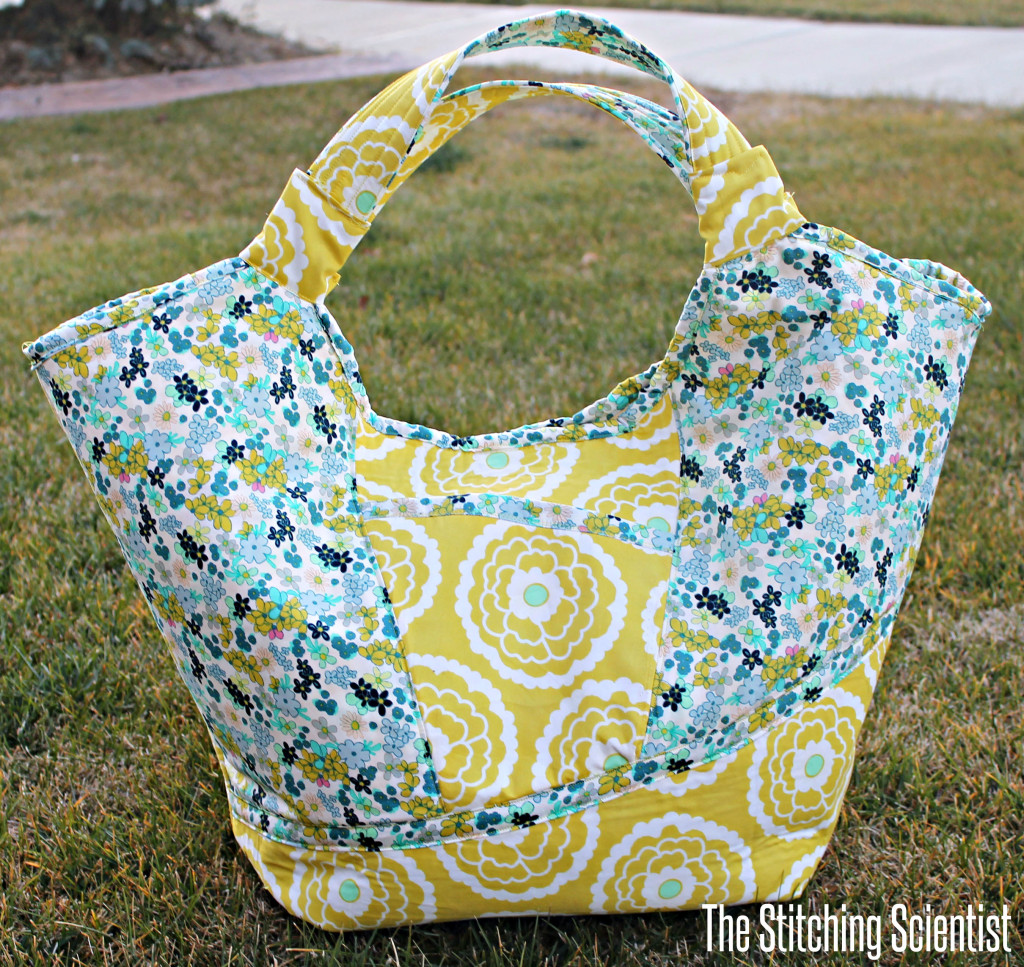
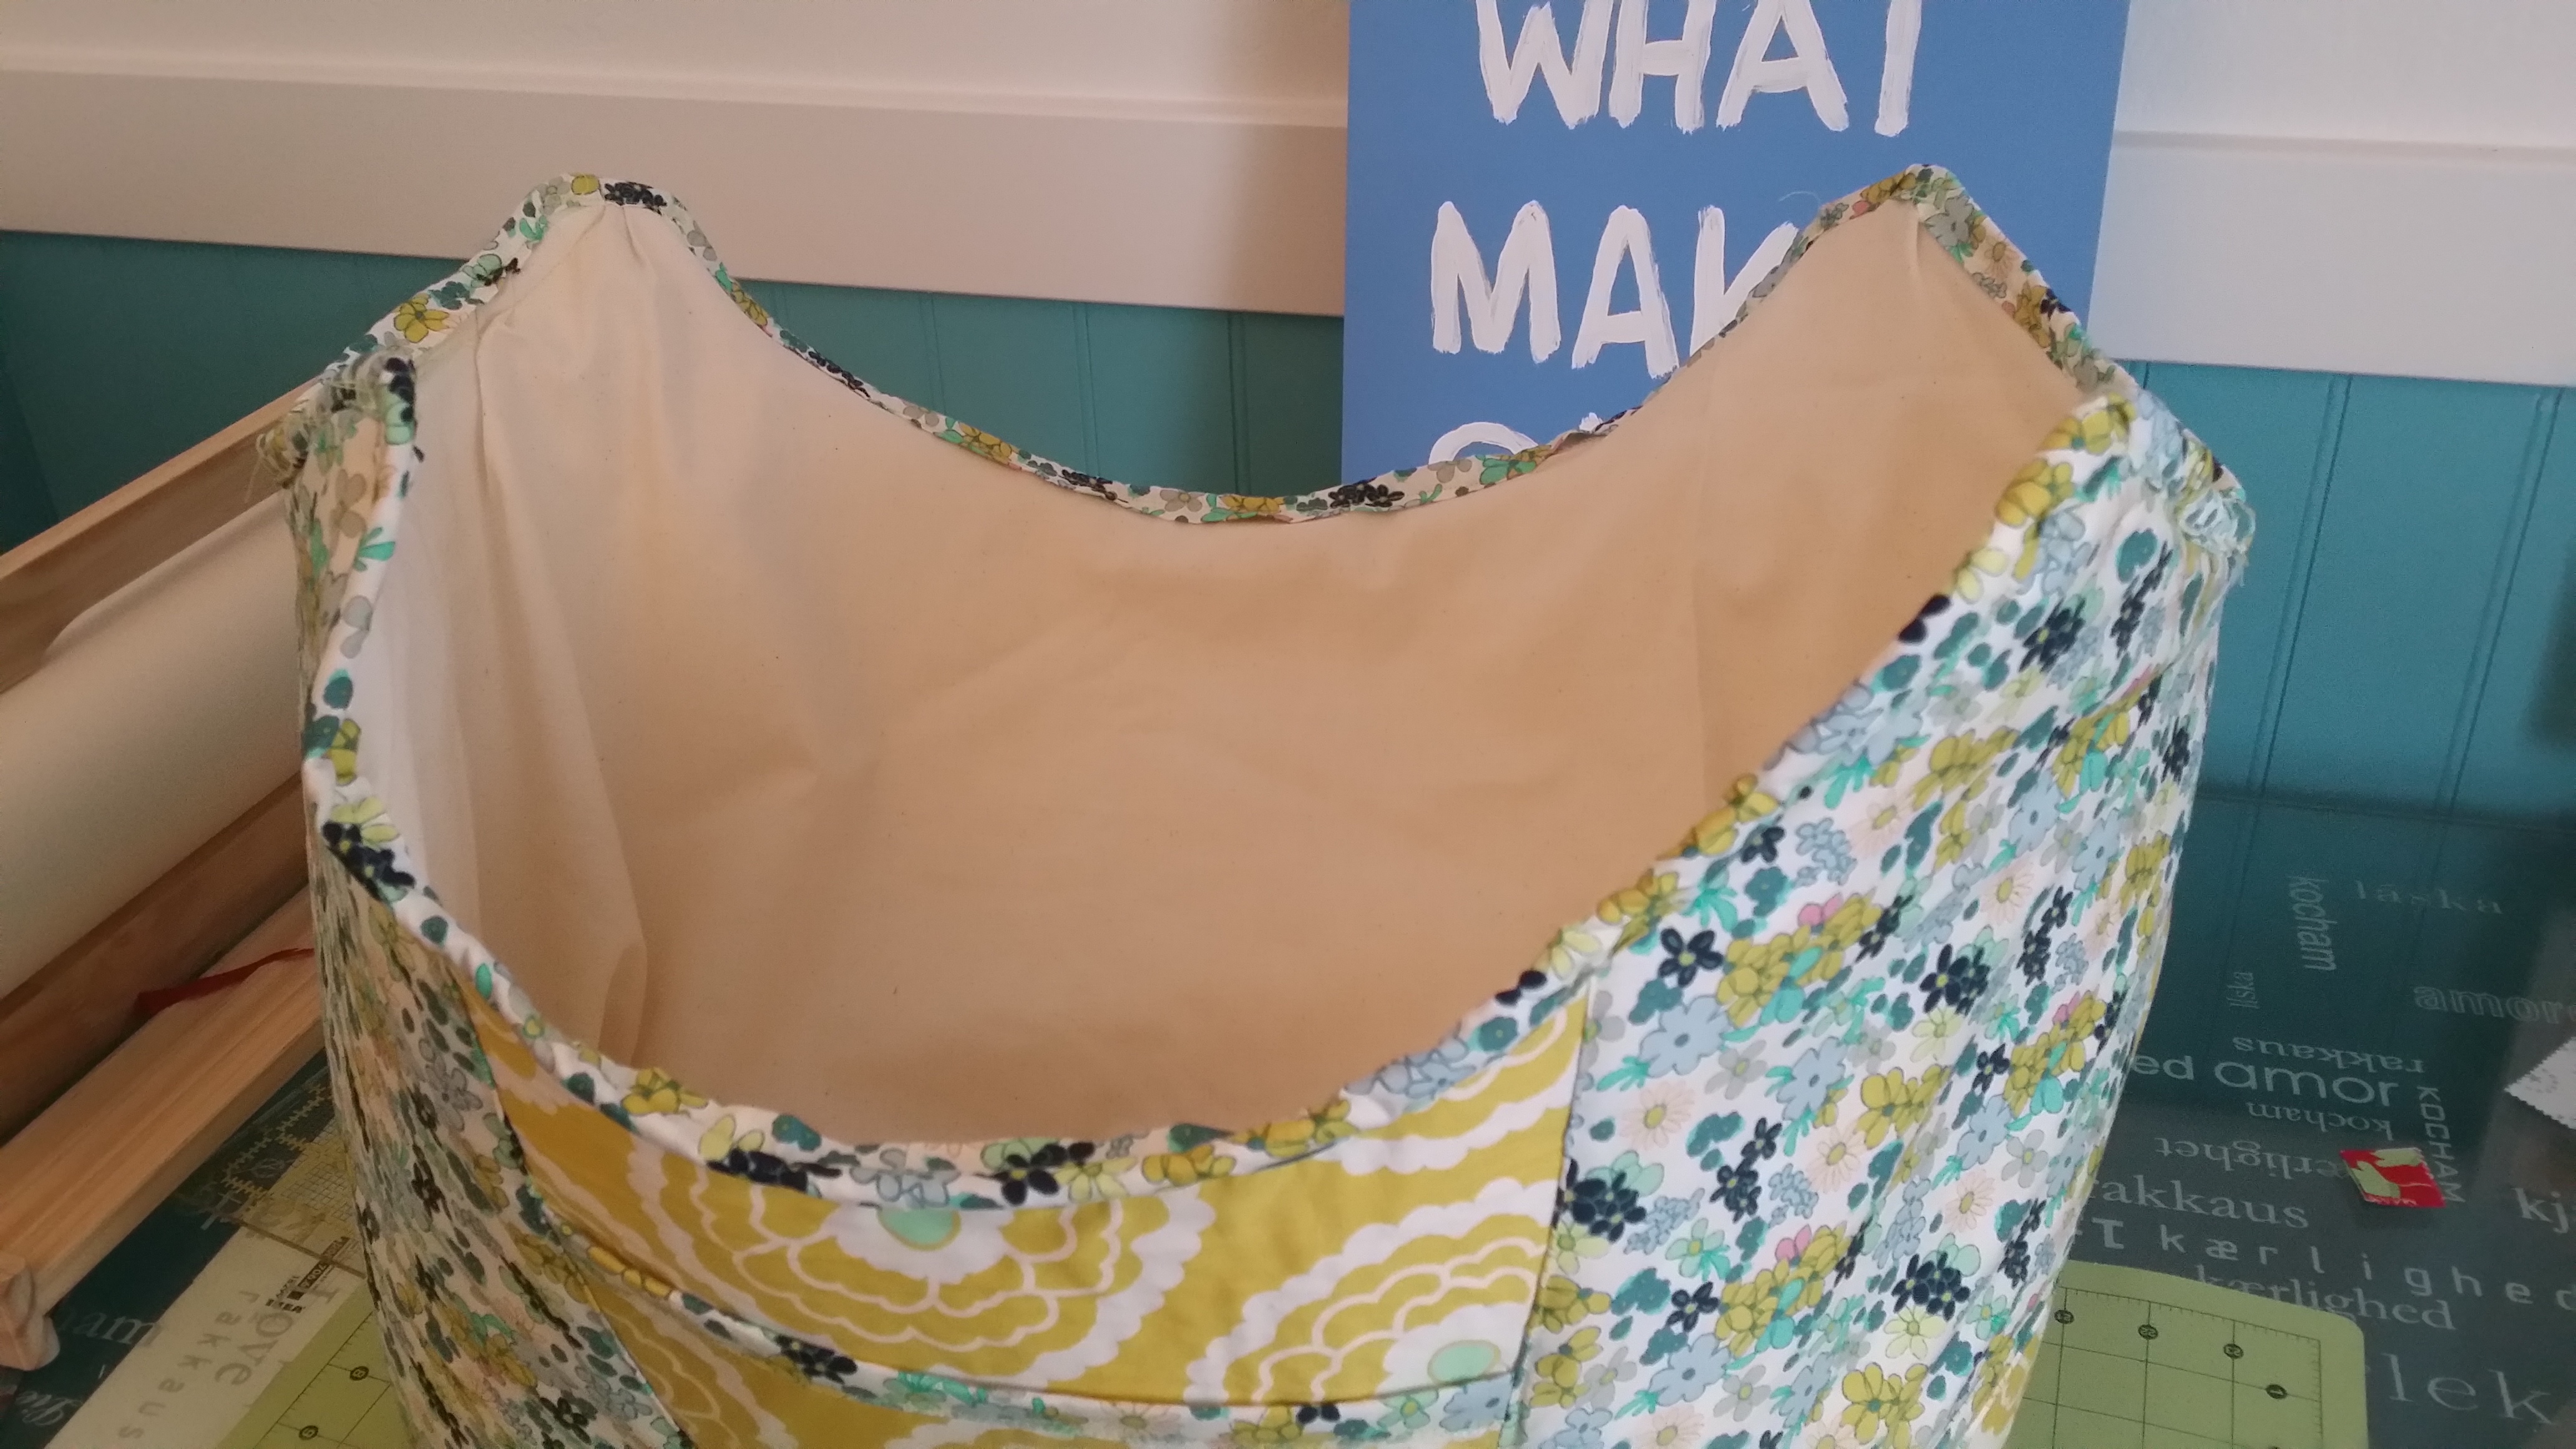
Congratulations, you’ve finished!!


