SEAM ALLOWANCES ARE 1/2″ UNLESS OTHERWISE NOTED.

– ruler
– fabric marker or chalk*if you have difficulty locating the metal slider and rectangle ring, you can find them here.

3c. Repeat Steps 3a. and 3b. for the Strap Extender.
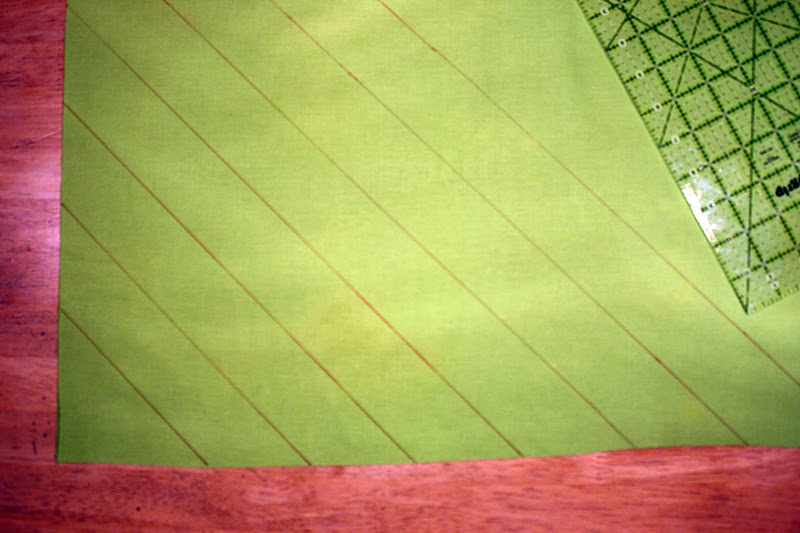
4a. Lay your fat quarter out in front of you. You are going to cut bias strips from the fabric, so use your ruler to cut 2″ strips at a 45 degree angle, across the entire fat quarter.
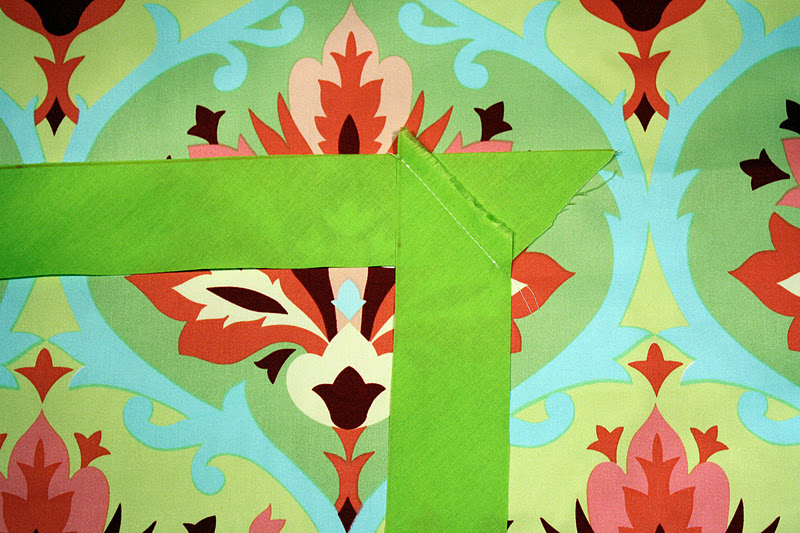
4b. Now you will sew all of your strips together. First attach 2 strips, right sides together, at a 90 degree angle. Draw a diagonal line (at 45 degrees) connecting the top left and bottom right corners, then stitch on the line.
4c. Trim the ‘tail’ from the strip. Trim your fabric down to a 1/4″ seam allowance, then press seam open. Continue adding strips until you’ve used them all.
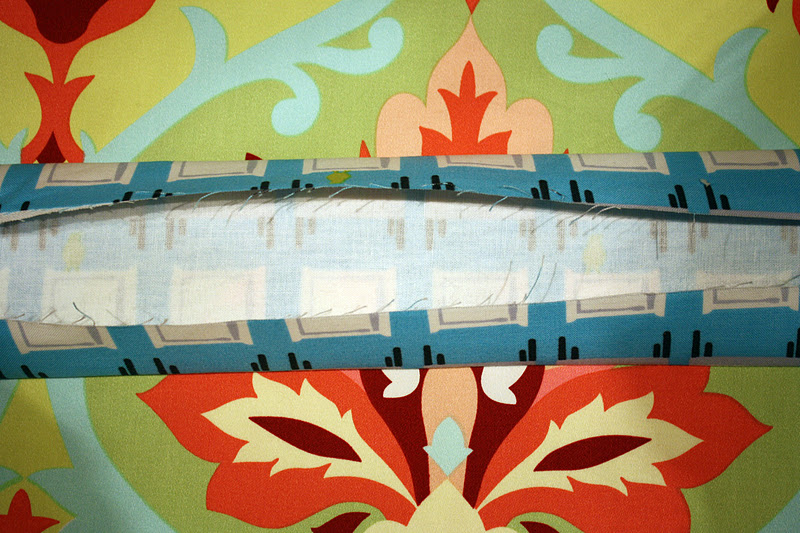
4d. Press your newly-made bias strip in half length-wise. Trim your bias into one 46″ strip and two strips that are each 24″ long. Now you are going to gather the fabric to create the ruffles. Sew a row of basting stitches that are 1/8″ from the raw edge, and another row of basting stitches that are 1/4″ from the raw edge.

4e. Gently pull the thread on each side to gather your fabric. Gather the fabric until the longer strip now measures 23″, and the shorter strips should now measure 12″. Evenly distribute the gathers. Set aside.
4g. You will be using the smaller half of the magnetic snap. Take out the washer and place it on the mark that you made on the Interior Flap. Make a mark, using the washer, where the slits are to go. Use your scissors and cut small slits where the marks are. Repeat this for the center of one of your 2″x2″ scraps of fleece. The reason that you are using the fleece is that it will help to reinforce your fabric against the pull from the magnetic snap every time you open and shut the flap.
Helpful Hint: I like to put a dab of Fray Check on the slits that were cut. I feel this helps the fabric hold up a bit better under the stress of the magnetic snap.
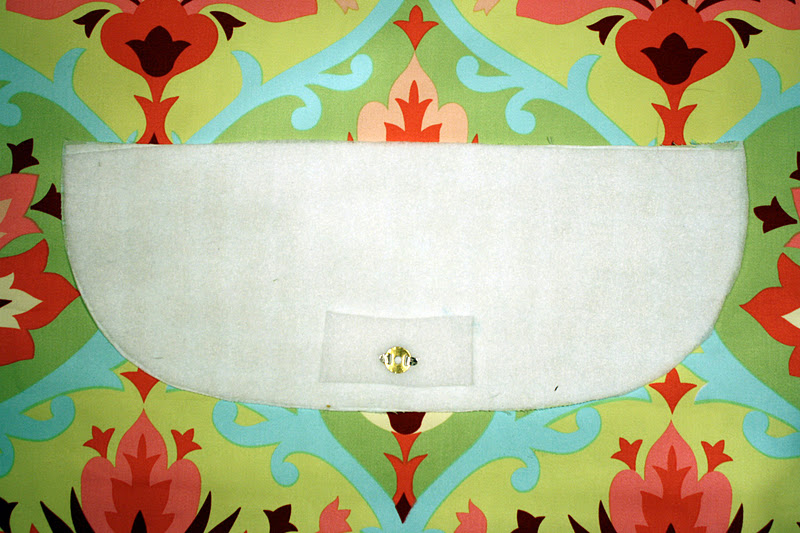
4h. Slide the prongs of the snap through the right side of the Interior Large Flap. Place the fleece square, then the washer, over the prongs. Close the prongs outward (use pliers with a piece of scrap fabric over the metal, if you need to), making sure they lie flat.
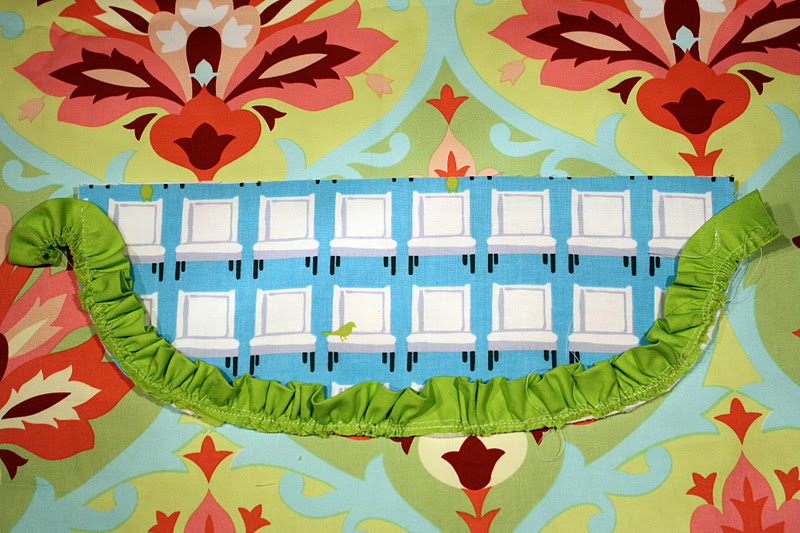
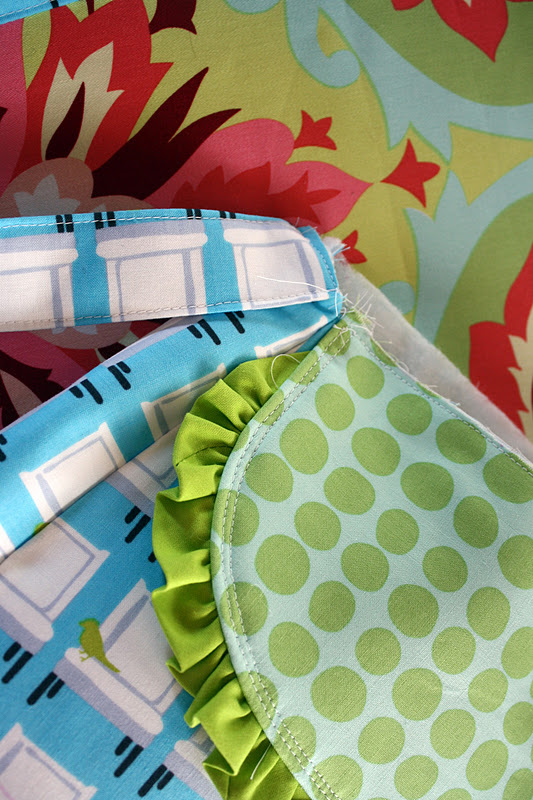
4i. Take the long ruffle and pin it along the curved edge of the Exterior Main Panel. Begin the short edge of the ruffle 1/2″ from the corner of the Exterior Main Panel. The raw edge of the ruffle should be even with the curved edge. You will also want to “fade” each short edge of the ruffle toward the outer corner of the flap so that you will have no raw edges from the ruffles showing once both flap pieces are sewn together. Stitch along the curved edge using a 1/4″ seam allowance. Trim excess ruffles.
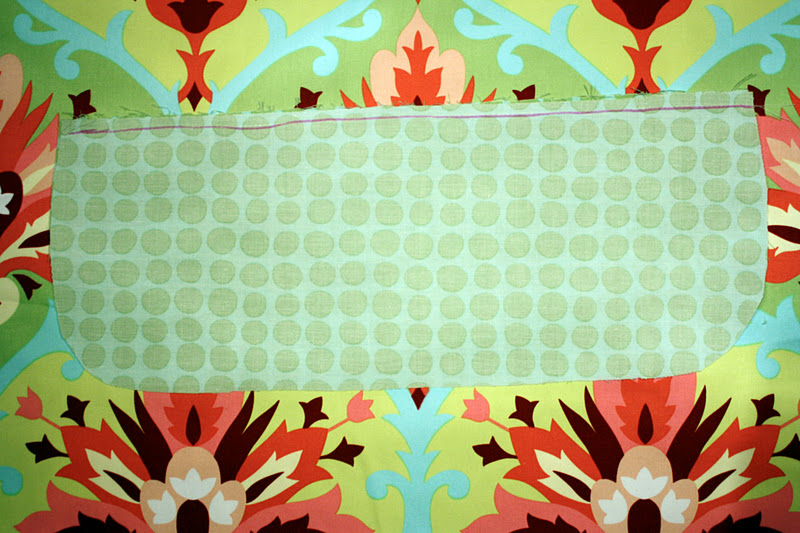
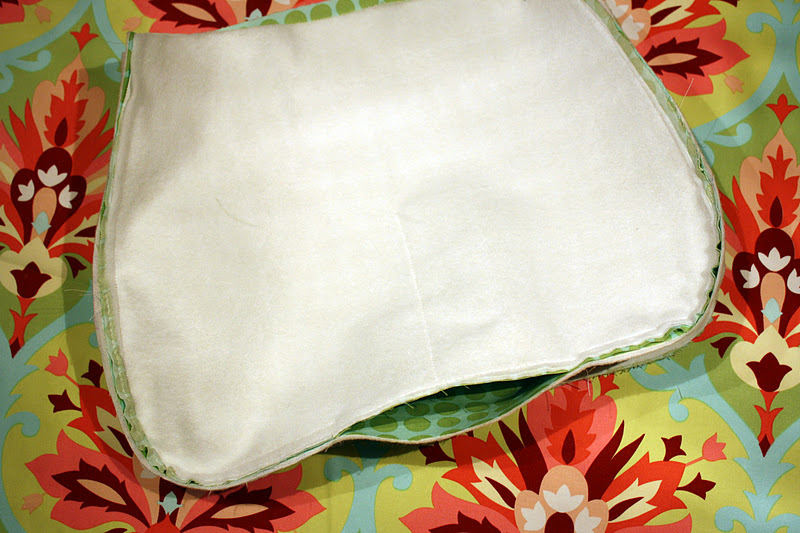
4j. Take your Exterior Large Flap and your Interior Large Flap, and place them right sides together. Sew along the curved edge, slightly to the left of the line of stitches from step 4j. in order to hide the previous stitch (do not sew the straight edge). Notch your seam (cutting small v’s every 1/2″), being careful not to cut into the stitching. Turn your fabric right side out and press.

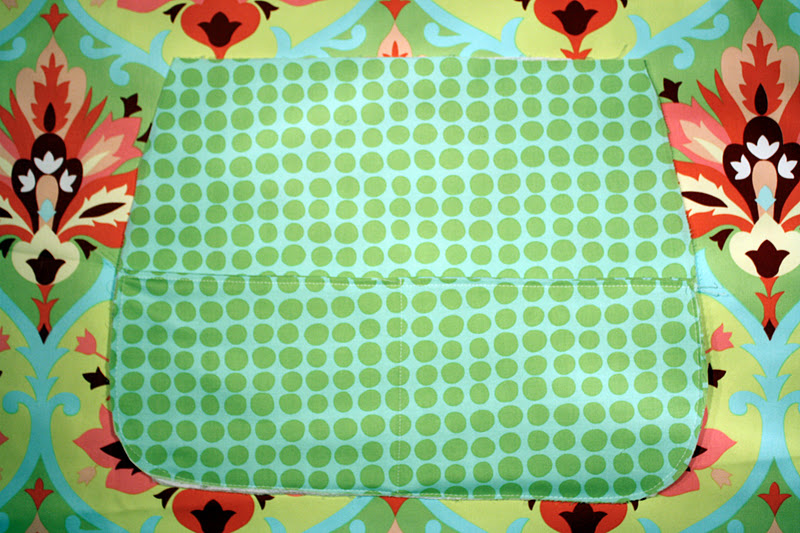
4k. Topstitch the Flap, 1/4″ from the edge, along the edge that you sewed in Step 4j.

4m. Turn your fabric right side out and press. Also press the opening in by 1/2″. Topstitch both Small Flaps on the curved edge, 1/4″ from the edge.

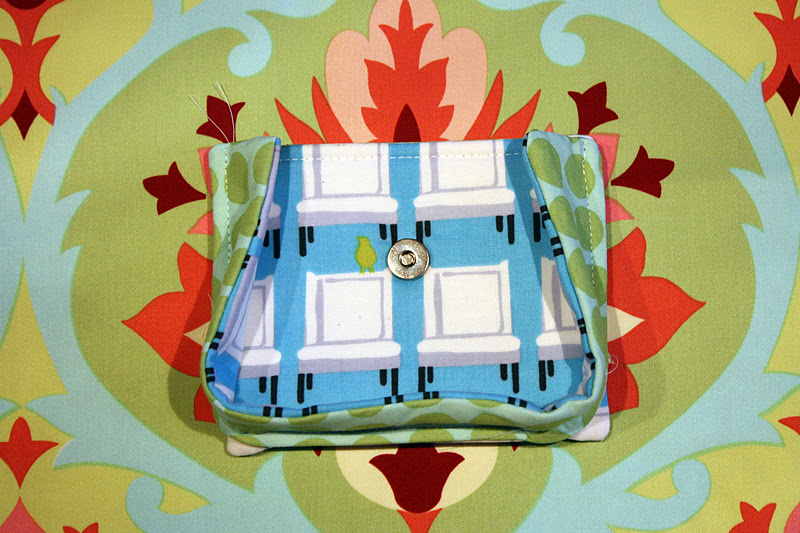
5a. Take 1 of your Exterior Small Pocket pieces and the larger half of the magnetic snap. Fold the Exterior Small Pocket in half along the 6″ edge. Measure down 2″ from the top and insert the snap using the same method that you did for the flaps. Repeat for the other Exterior Small Pocket.
5b. Take 1 Exterior Small Pocket and 1 Interior Small Pocket and place them, right sides together. Beginning on the 6″ side (the side with the snap closest to it), about 1″ from the corner, start your stitching. Pivot at the corners, sewing 3 sides. Pivot at the last corner, then sew up about 1″. You will be leaving one 6″ edge open about 4″. Trim all 4 corners.

5c. Turn your fabrics right side out. Press, making sure to also press the opening in by 1/2″. Topstitch along the 6″ edge with the opening, with a 1/4″ seam allowance. This will seal your opening closed.
5d. Repeat Steps 5b. and 5c. for the other Small Pocket pieces.
5e. Take 1 Exterior Pocket Panel and 1 Interior Pocket Panel and place them, right sides together. Beginning on the 13-1/2″ side, about 5″ from the corner, start your stitching. Pivot at the corners, sewing 3 sides. Pivot at the last corner, then sew up about 5″. You will be leaving one 13-1/2″ edge open about 3-1/2″. Trim all 4 corners.
5f. Turn your fabrics right side out. Press, making sure to also press the opening in by 1/2″.
5g. Take 1 Small Pocket and 1 Pocket Panel. Place them, exterior sides facing. You will be sewing the long edge of the Pocket Panel flush with the 3 edges of the Pocket (the edge with the topstitching will be at the top, and you will leave this edge alone). Also, sew the side of the Pocket Panel so that you will sew the opening closed in this step. Sew using a 1/4″ seam allowance. Press seam toward the Small Pocket. Repeat for the remaining Small Pocket and Pocket Panel.
Helpful Hint: I recommend sewing both of the sides of the pocket first, then the bottom and corners, in order to distribute the Pocket Panel evenly.

5h. Now take out 1 Exterior Main Panel and 1 assembled Small Pocket. Measure on the Exterior Main Panel that is 1-1/4″ up from the bottom, and over 2″. Draw a rectangle that is 4″ high x 5″ long, with the bottom left corner at your point. Flip your Pocket Panel exterior side out. Place the Small Pocket between these lines and pin.

5i. Sew along the unsewn long edge of the Pocket Panel using a 1/8″ seam allowance (you will be sewing the interior of the Pocket Panel against the Exterior Main Panel). This will attach the Pocket to the Exterior Main Panel. When finished, the Pocket should stand away from the Exterior Main Panel (it should not be completely flat).
5j. Repeat Steps 5h. and 5i. for the remaining Pocket Panel and the right edge of the Exterior Main Panel.
STEP 6 ~ ATTACHING THE FLAPS
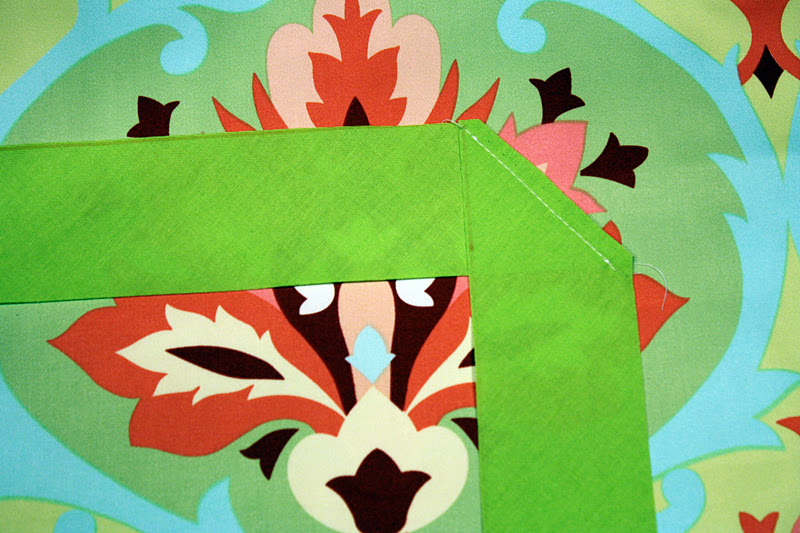
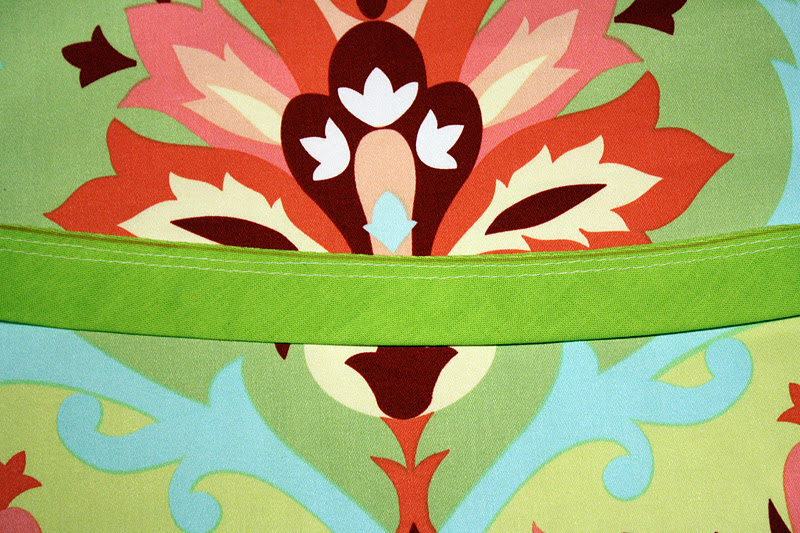
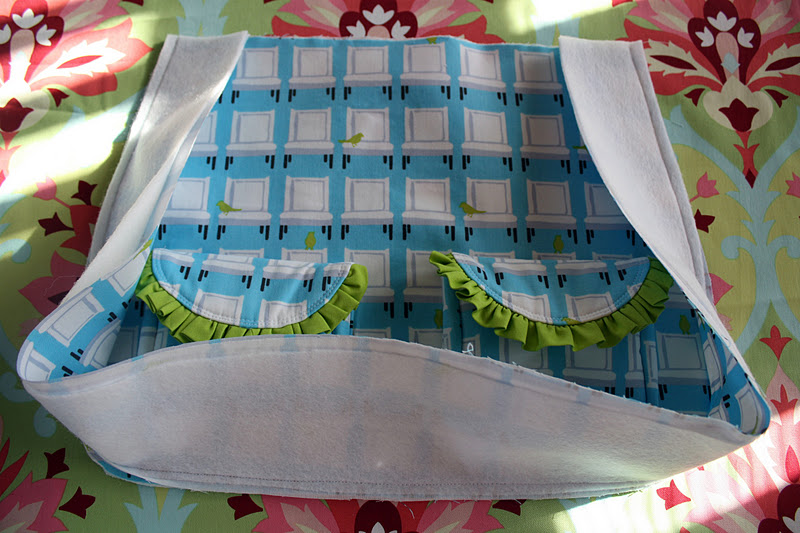
6a. Take your Large Flap and the Exterior Main Panel that doesn’t have the pockets. Place the raw edge of the Large Flap against the top edge of the Exterior Main Panel, with the exterior fabrics touching. The Large Flap should be centered. Pin. Sew along the pinned edge with a 1/4″ seam allowance.
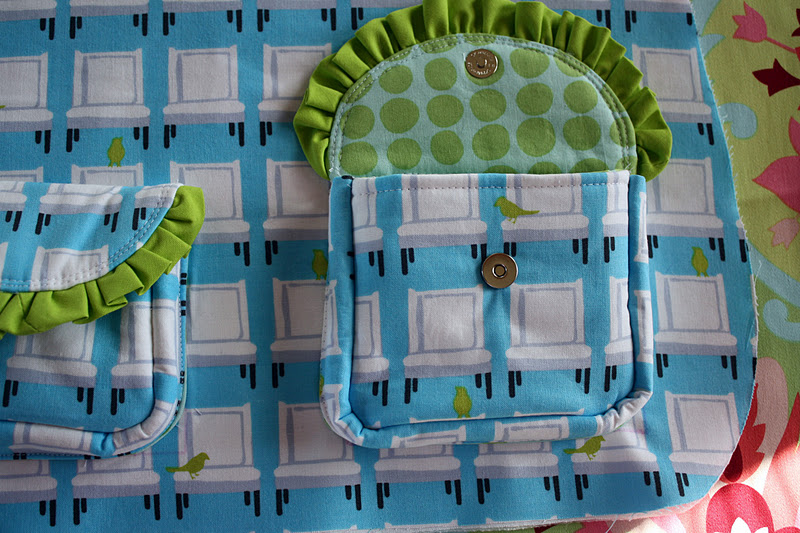
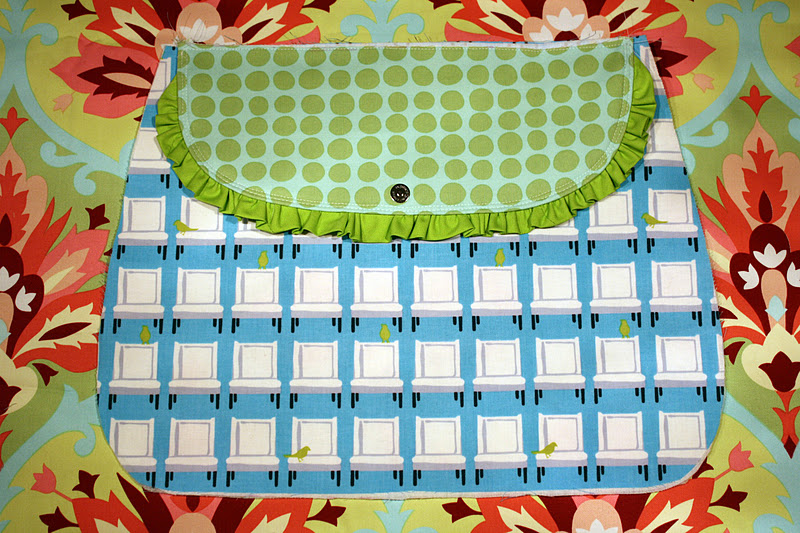
6b. Now take 1 of your Small Flaps and the Exterior Main Panel with the pockets. Pin the Small Flap at the top of the Small Pocket, with the straight edge of the Flap flush with the top of the Small Pocket. The exterior fabric of the Small Flap should be facing the Exterior Main Panel (in other words, the magnetic snap should be facing you). Before you begin to sew, make sure that your flap looks straight after the magnetic snaps have closed; if not, make an adjustment. Topstitch the straight edge of the Small Flap 1/4″ from the edge. Repeat for the other Small Flap and Small Pocket.
STEP 7 ~ ASSEMBLE THE EXTERIOR
7a. Take the Exterior Main Panel with the pockets on it. Fold the Exterior Main Panel in half, pressing a finger crease to find the center point. Then measure down from the top 3-3/4″. Make a mark intersecting that point and the center point. Insert the large half of a magnetic snap using the technique that you used earlier.

7b. Take the Exterior Side Panel. Fold in half along the short edge. On the right side, make a mark 9″ down from the short raw edges, and a mark in 3/4″ from that raw edge. Connect the two marks that you made with a line. Repeat for the left edge.
7c. Take 1 of the Exterior Main Panels and place it, right side facing you. Place the short edge of the Exterior Side Panel at the top of the Exterior Main Panel, right sides facing.
Helpful Hint: If you have difficulty pinning along the curve, try leaving it unpinned and just easing it along slowly with your fingers.
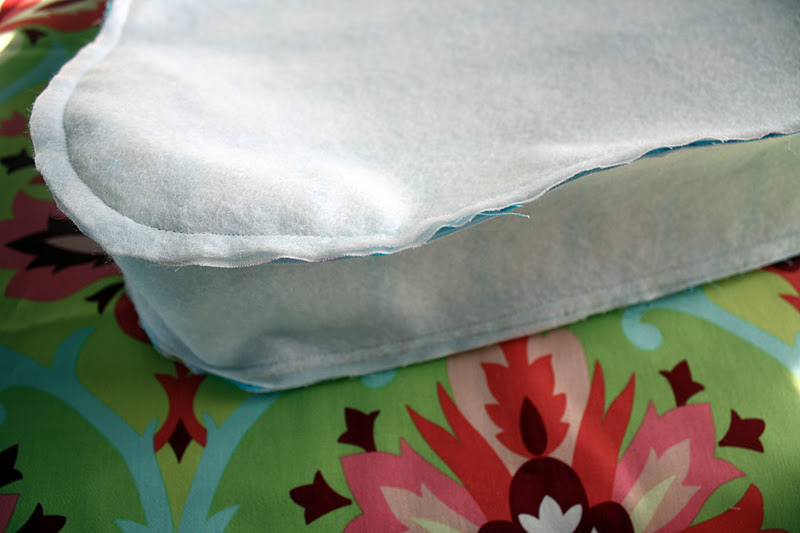
7e. Sew along the pinned edge. Notch along the curved edge (cut small v’s), every 1/2″. Be careful not to cut into the seam allowance. Press the seam open.
7f. Repeat Steps 6a. through 6c. to attach the remaining Exterior Main Panel to the other long edge of the Exterior Side Panel.
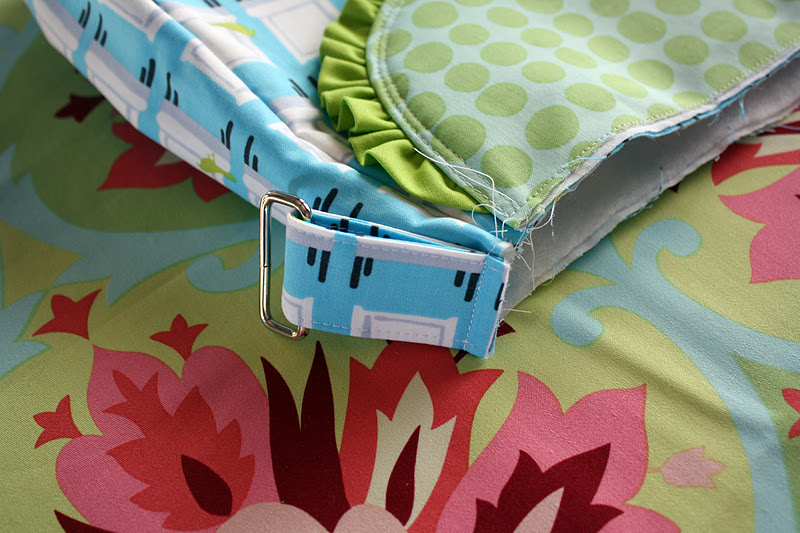
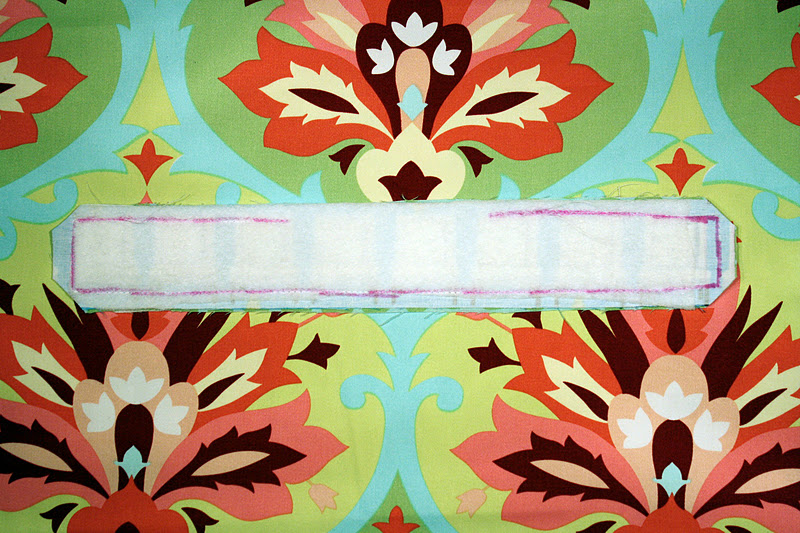
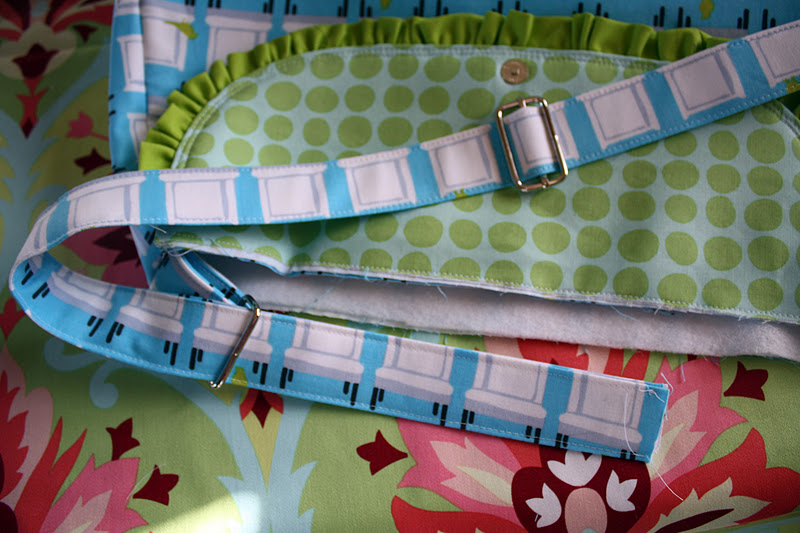
7g. These next few steps will help you install your metal slide and rectangle, which will make your strap adjustable! If you have never done this before, after today, you will want to use this every single time, it’s that easy! First take the metal rectangle and slide it onto the middle of your Strap Extender. Place the Strap Extender against the Exterior Side Panel (I started with the left side of my bag, but either is fine). Baste in place using a 1/4″ seam allowance.
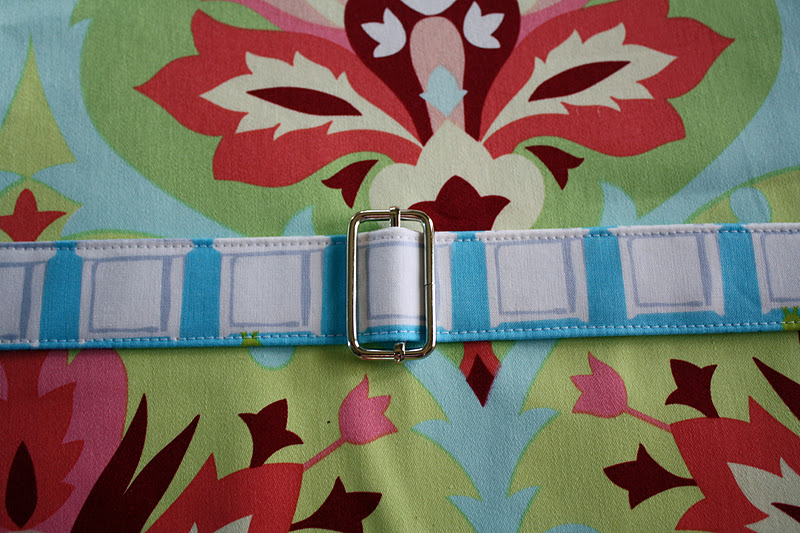
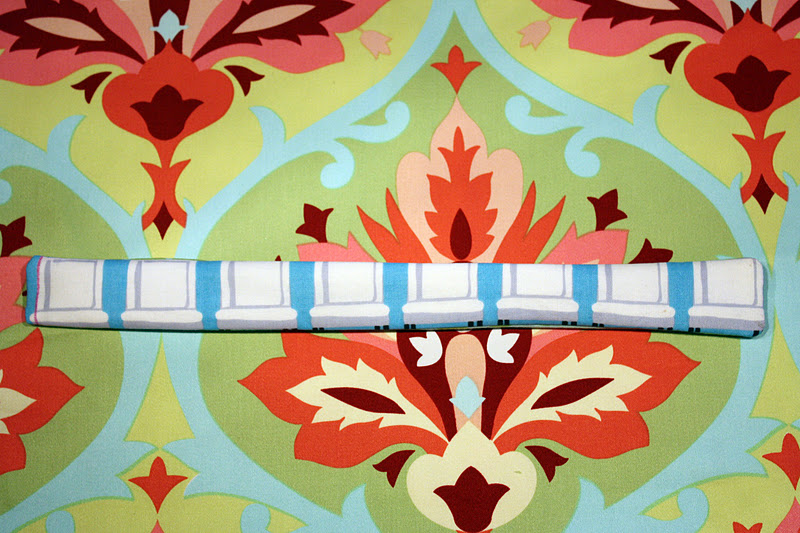
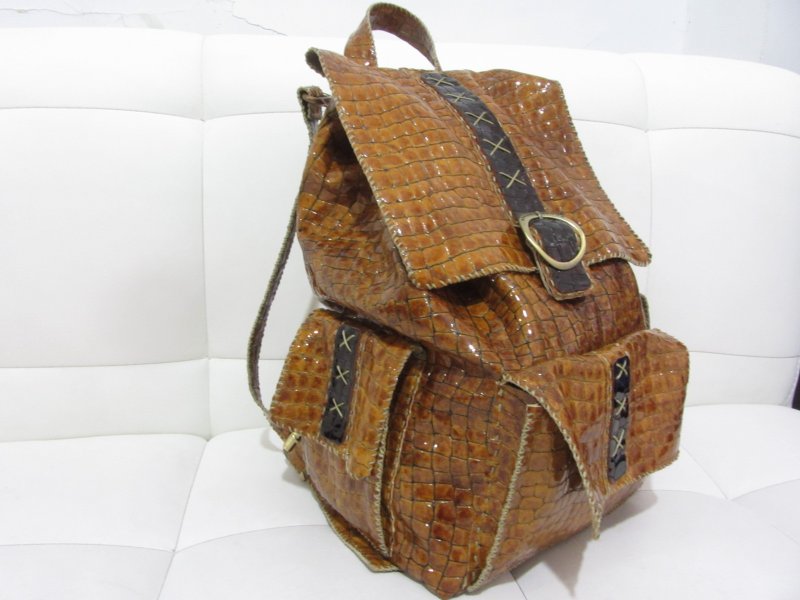
7h. Next, take your Strap and slide it through the metal slide. The strap should go over and under the metal bar in the middle, as pictured.
7i. Baste one end of the Strap to the other Exterior Side Panel (this time I did the right side), using a 1/4″ seam allowance.
7j. Slide the loose part of your Strap through the metal rectangle (that’s the part attached to the Strap Extender).
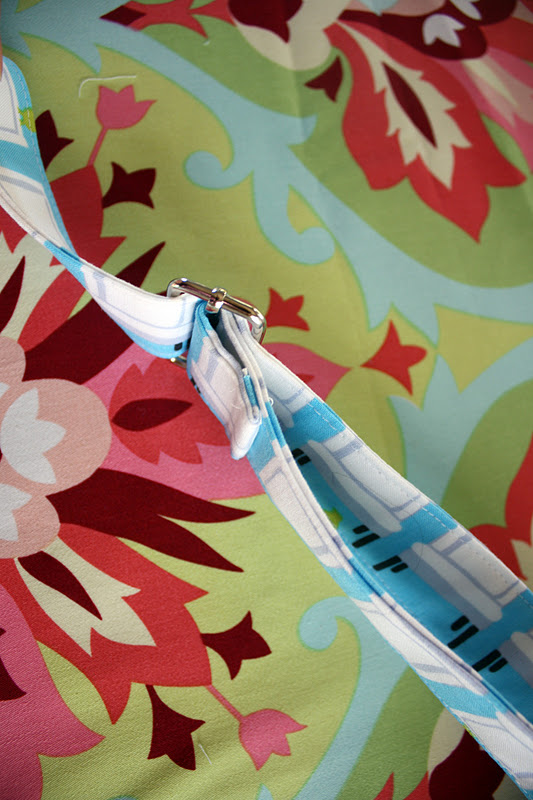
7k. Now slide that loose part of the strap over and under the metal bar on your slide. It is going to go underneath the part of the strap that you had placed through the slide previously. Fold about 1/2″ of the very end of the strap under and topstitch that end. Hopefully you can see by the photo which part to sew where. If you can’t adjust your strap, then you’ve sewn something on to the wrong place.
STEP 8 ~ ASSEMBLE THE INTERIOR
8a. Take 2 of your Inner Pocket pieces and place them, right sides together. Sew along the straight edge only.

8b. Press the seam open. Turn the fabrics so that they are wrong sides together, press again, and topstitch the straight edge, 1/4″ from the edge.
8c. Take 1 Interior Main Panel, and place the Inner Pocket that you just sewed, with the bottom edges of both even. Baste the Inner Pocket to the Interior Main Panel using a 1/4″ seam allowance. Finger press a crease down the center of your Interior Main Panel. Sew on top of the Inner Pocket only, down that center crease (this will divide your pocket into 2 sections).
8d. Repeat Steps 8a. through 8c. for the remaining Inner Pocket and Interior Main Panel.
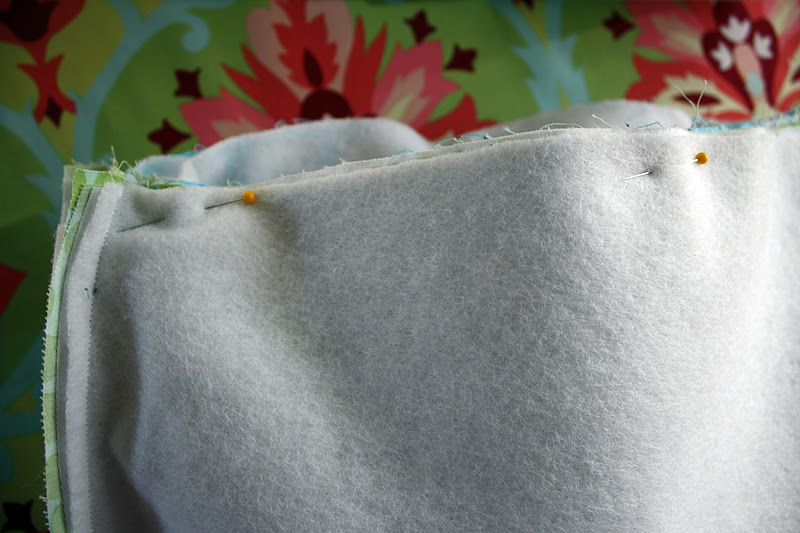
8e. USING A 5/8″ SEAM ALLOWANCE (this will help the interior sit snuggly in the exterior), repeat Steps 7a. through 7f. to attach the Interior Main Panels to the Interior Side Panel. HOWEVER, make sure to leave a 6″ opening when attaching one of the Interior Main Panels to the Interior Side Panel (it is best to leave the opening at the bottom of the bag). This will help you turn your bag right-side out later.
STEP 9 ~ FINISHING THE BAG
9a. With the Exterior right sides out and the Interior wrong sides out, place the Exterior inside the Interior. Be sure to push the Strap and Flap inside between the layers.
CONGRATULATIONS! You’ve finished!!

