آدرس سایت اصلی
http://www.flamingotoes.com/2014/09/kate-spade-inspired-bow-tote/
So let’s get started on the tutorial!
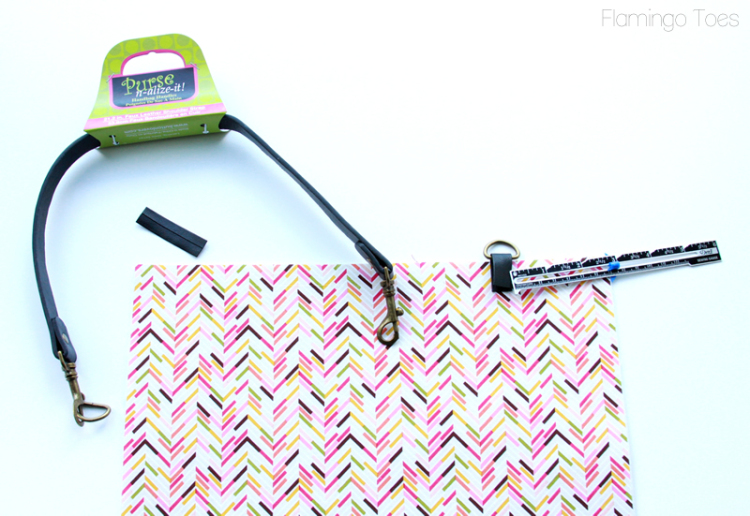
Here’s your materials list. All my supplies came from Jo-Ann Fabric and Crafts.
- Outside Fabric: 1/2 yd
- Lining Fabric: 1/2 yd
- First Contrast Bow Stripe: 1/4 yd
- Second Contrast Bow Stripe: 1/4 yd
- Heavy Craft weight Interfacing: 1 1/4 yd
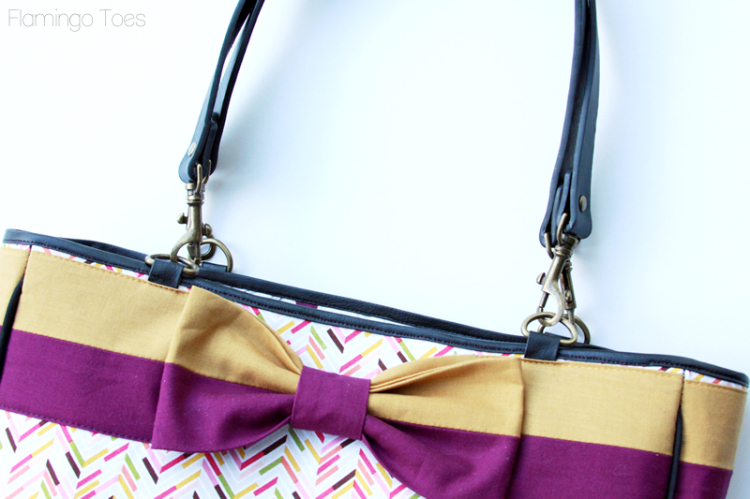
- 2 Purse Handles
- 1 Pkg Piping
- 1 1/2 yds leather bias tape
- Leather scraps for corner pieces
Cut out your fabrics in the following amounts:
- Outside Fabric: 2 pieces 14″ x 13″, 2 pieces 14″ x 4″, 1 piece 13″ x 4″
- Lining Fabric: 2 pieces 14″ x 13″, 2 pieces 14″ x 4″, 1 piece 13″ x 4″
- First Contrast Bow Stripe: 2 pieces 13″ x 2 1/2″, 2 pieces 4″ x 2 1/2″, 2 pieces 13 1/4″ x 3 1/2″
- Second Contrast Bow Stripe: 2 pieces 13″ x 2 1/2″, 2 pieces 4″ x 2 1/2″, 2 pieces 13 1/4″ x 3 1/2″, 1 piece 2″ x 4″
- Interfacing: 2 pieces 14″ x 13″, 2 pieces 14″ x 4″, 1 piece 13″ x 4″
Ok, now we can start with the fun stuff!
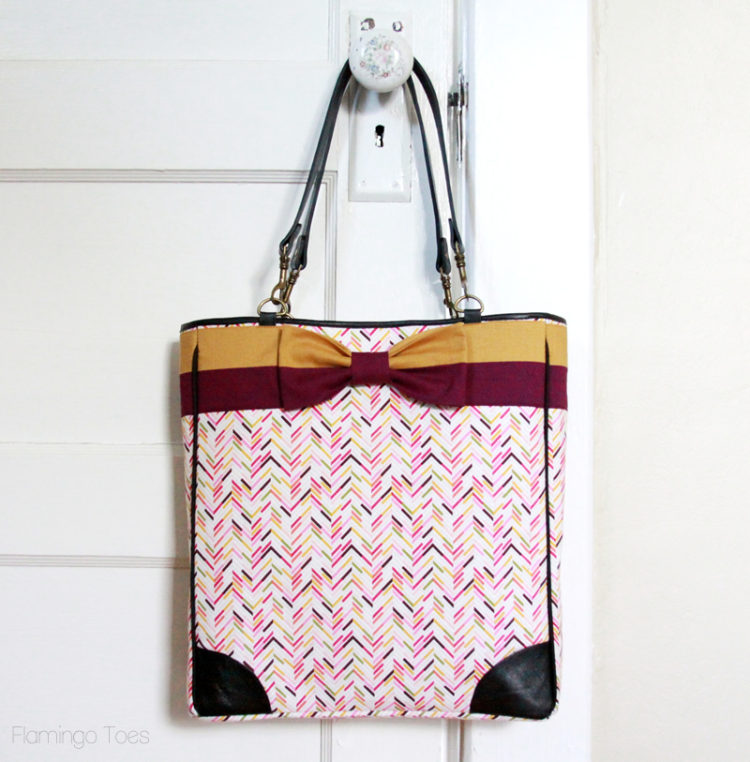
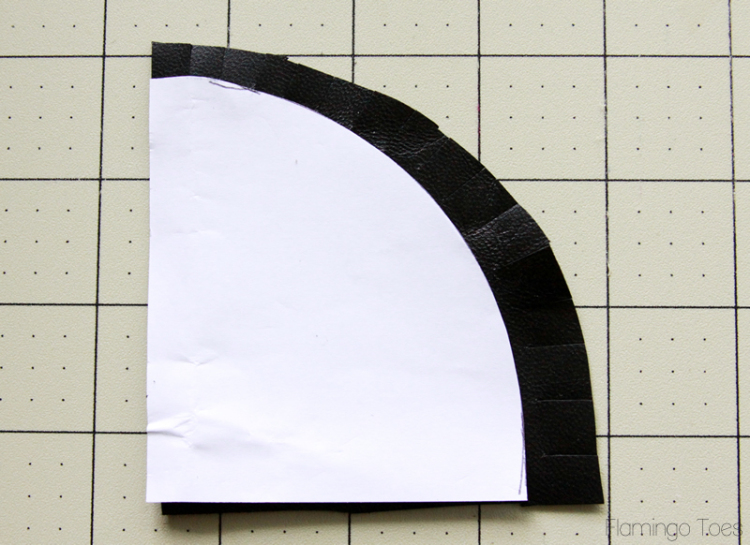
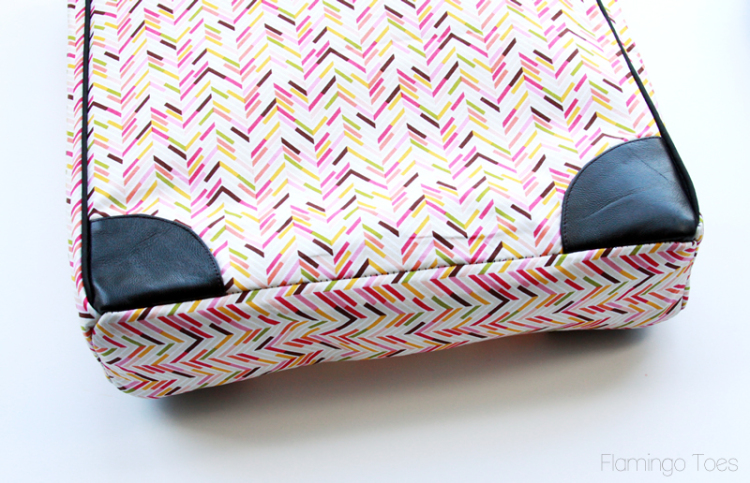
Use a small round bowl to create a pattern for the curve of your corner pieces. Trace the pattern onto paper and cut out four corner pieces from the leather. Make sure you flip the pattern for two of the pieces so the corners will face the correct way. Clip the curved edge of the leather piece so you can fold the edge over.
Line the side and edges of the corner pieces up with the bottom corner of the front piece. Fold the curved edge under and sew along the fold. Sew the other two sides down as well, to keep everything in place.
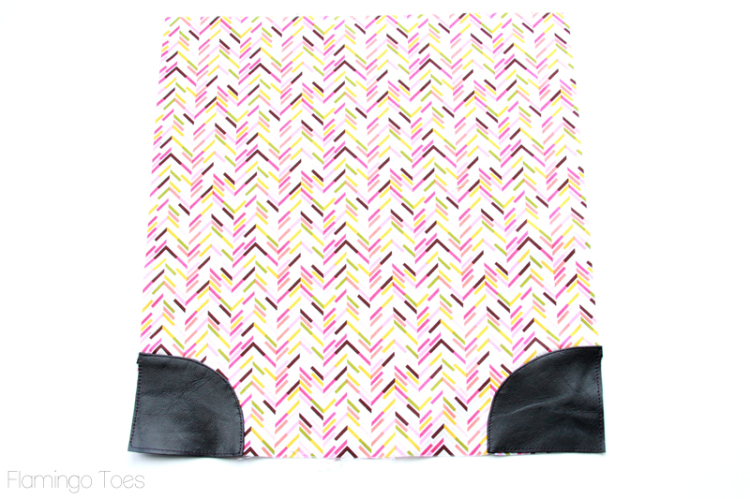
Repeat for the back of the bag.
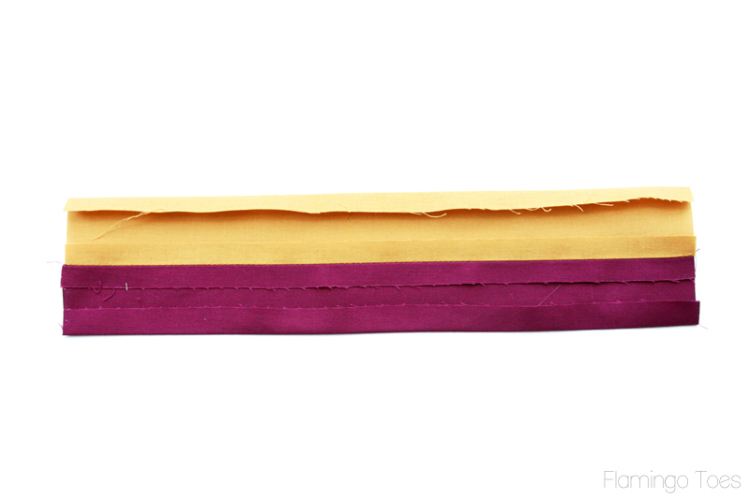
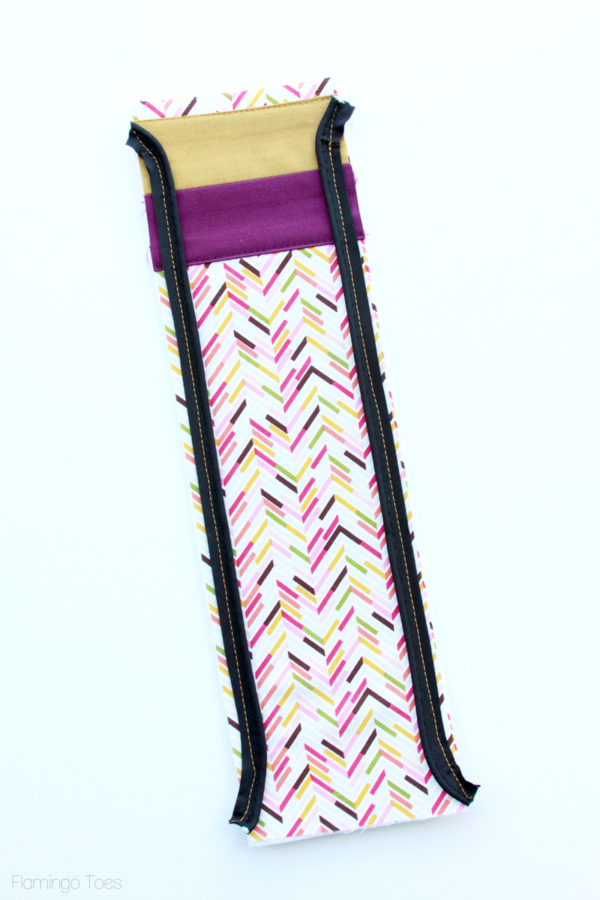
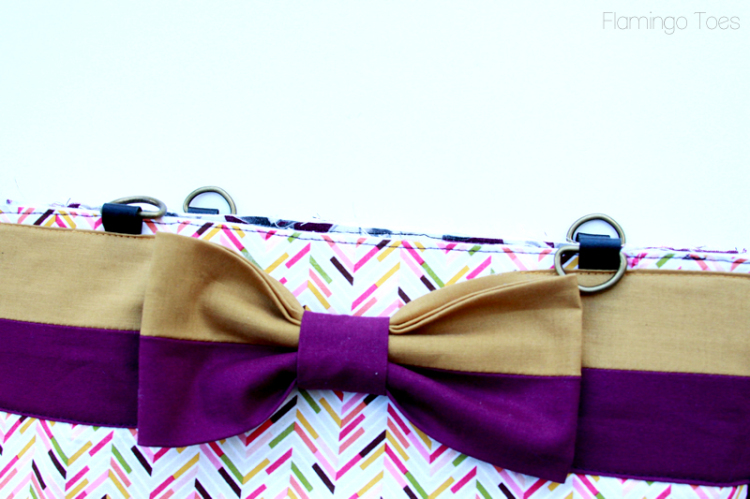
Sew the contrast bow pieces together for the back and sides. Press the top and bottom edges of the bow pieces to the back side, 1/2″ on each side. Sew the bow piece should measure 3″ tall.
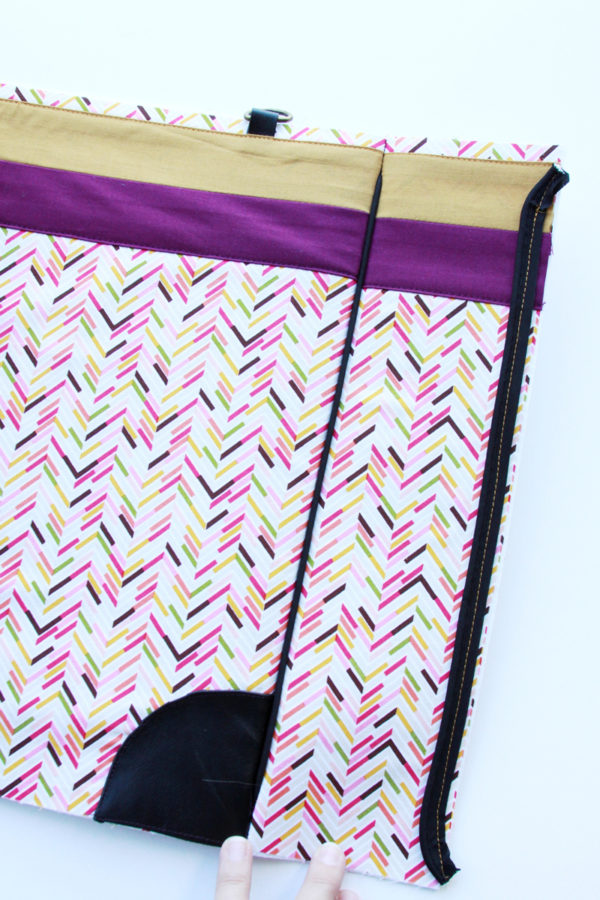
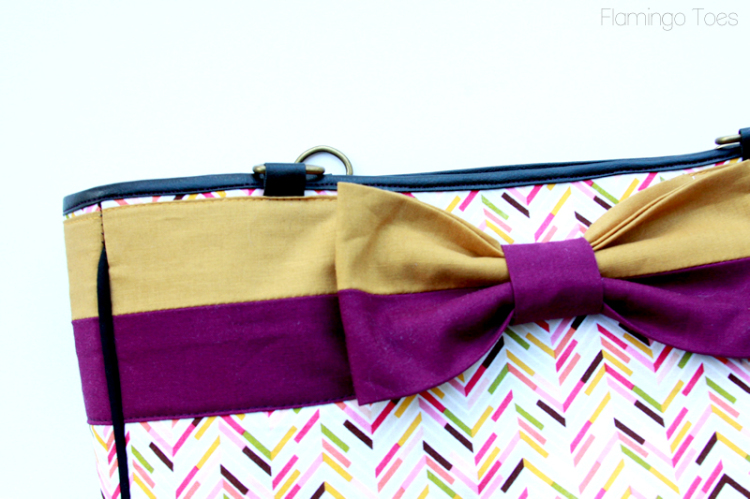
Cut two pieces of leather bias tape 2″ long each. Take the D ring off the purse handle end. Fold one of the bias tape pieces over the straight side of a d ring. Measure 2 7/8″ from each side and place the bias tape so that the d ring sits just above the edge of the fabric. Sew in place along the bottom of the bias tape. Repeat for the the other d ring, and for the back piece of the bag as well.
For all the outside assembly, place the heavy-weight interfacing on the wrong side outside fabric pieces.
On the back of the bag, place the bow piece 1/4″ below the top edge of the fabric. Sew the piece down along the top and bottom. Use coordinating thread to make it more subtle.
Sew the bow pieces on the sides as well, 1/4″ below the top. Lay the piping right side down along the edge of the side piece so the piping seam is 1/2″ from the side edge. Sew the piping in place with a 3/8″ seam, curving the piping in at the top and bottom. Repeat for the other side.
For the front bow piece, sew the 3 1/2″ bow pieces together. Press the long raw edges of one of the pieces to the wrong side, so the bow piece measures 3″. Repeat with the other piece then fold the short ends to the back. For the bow center fold the long sides in 3/8″ and press.
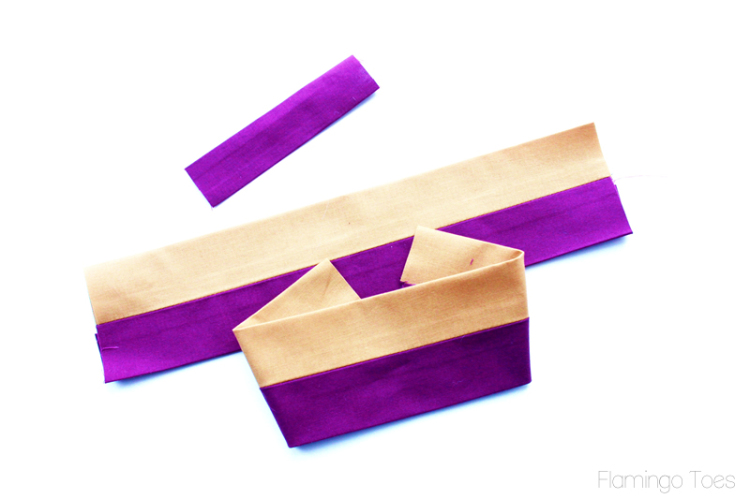
Place the bow piece in the center of the long strip, then fold the bow center around both pieces. Hand sew the center of the bow in place.
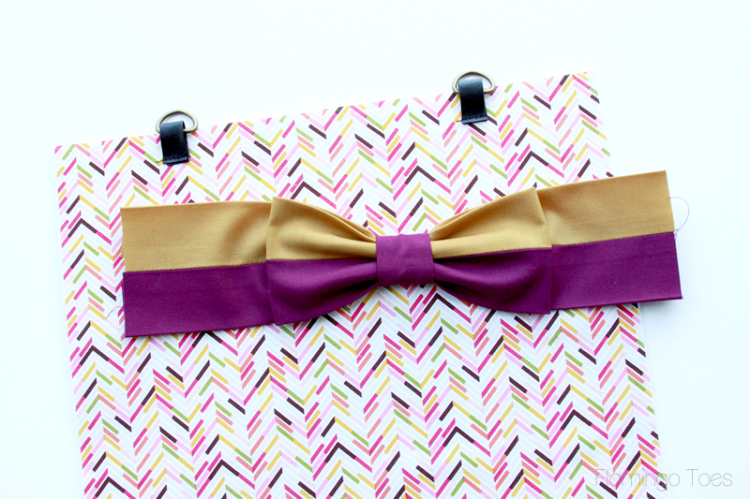
Place the bow piece 1/4″ below the top edge and sew the sides down 4″ from the side. Leave the center unsewn.
Sew the side pieces to the back, making sure the bow sections line up.
Repeat with the front, sewing the sides to the front. Place the bottom of the bag along the base and pin in place. Sew the bottom in place, easing around the corners.
Turn right side out.
You should now have the entire outside of the bag sewn together, with the interfacing inside.
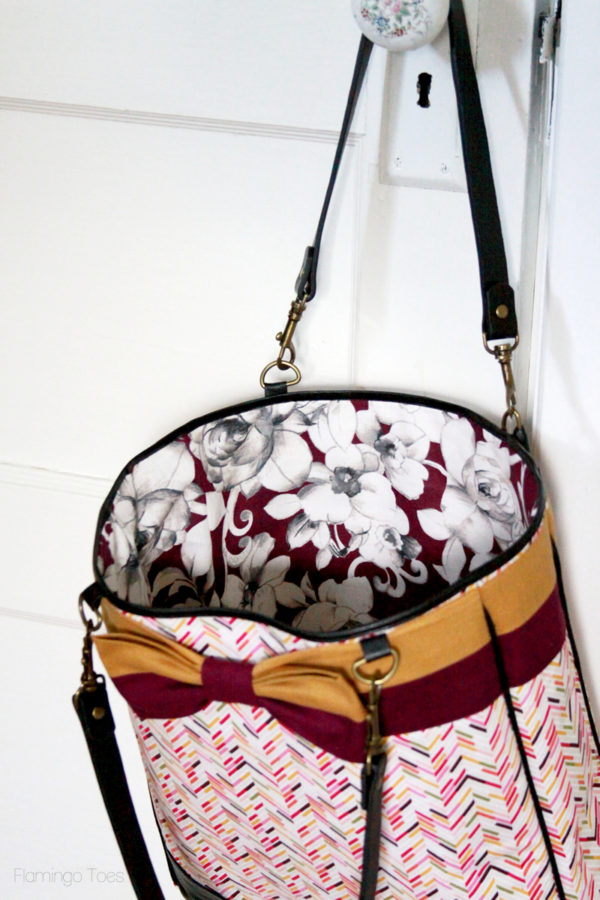
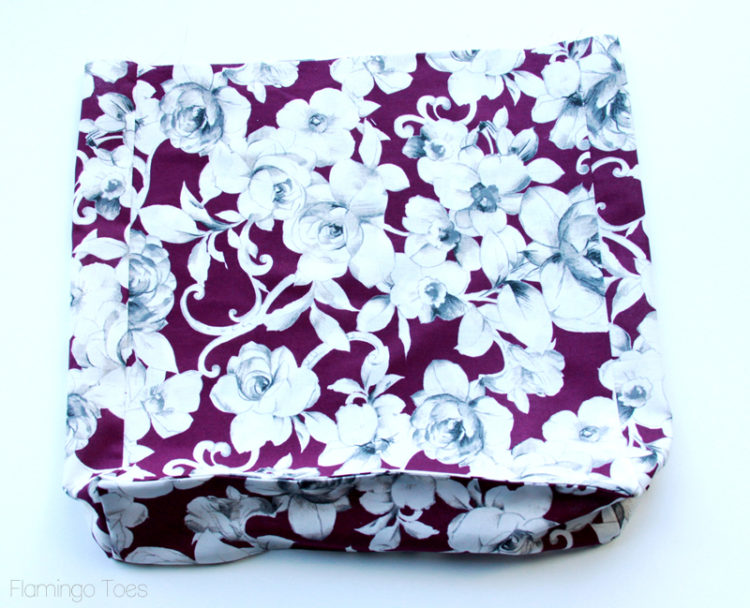
Sew your lining together by sewing the sides to the front and back, then sewing the bottom in place.
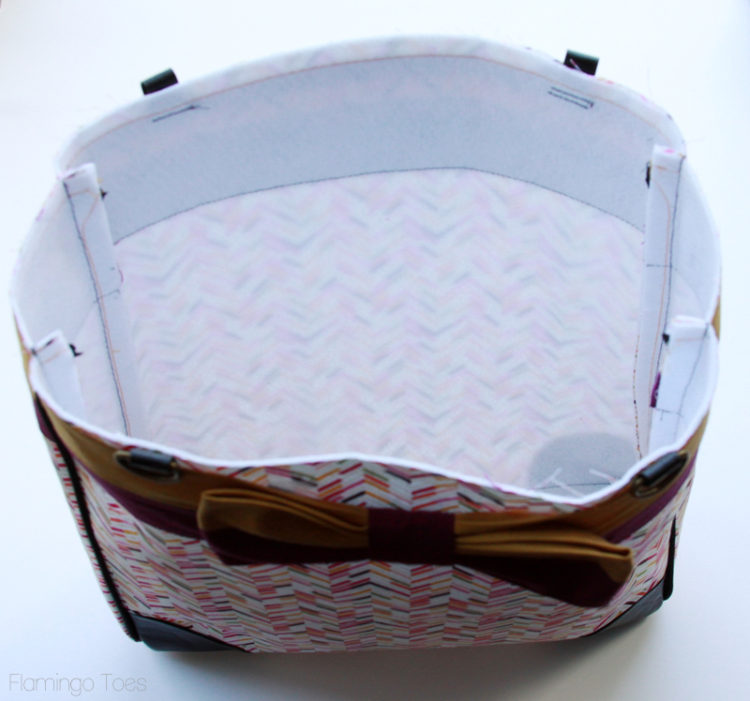
Turn the lining so the right side of the fabric is on the inside. Tuck the lining inside and line it up with the top edge of the outside of the bag. Sew around the top, 1/8″ from the edge. Trim just to the edge of the sewing.
Fold the leather bias tape over the top edge of the bag. Sew the tape in place, moving the straps with the d rings out of the way as you sew. Overlap the tape at the back of the bag.
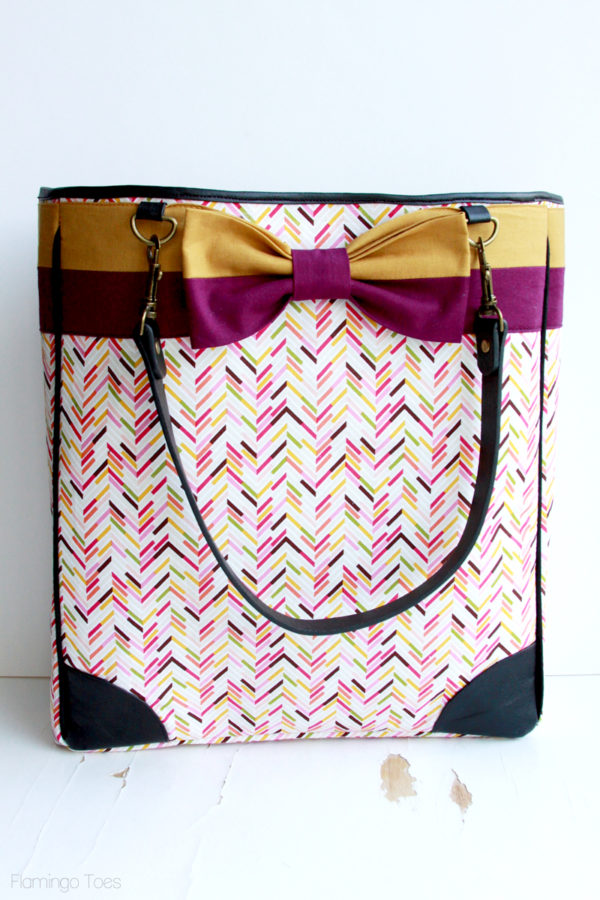
Clip the purse handles in place and you’re all finished!
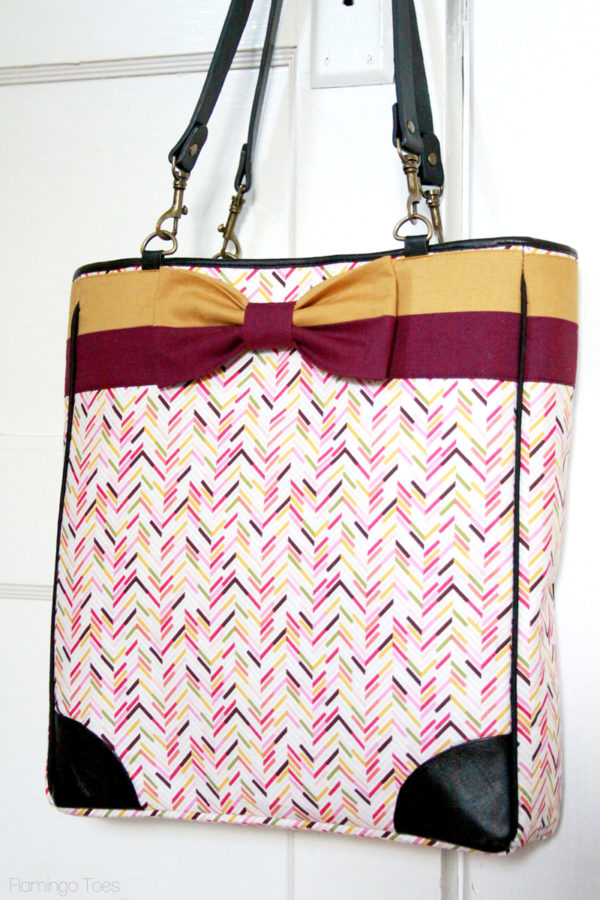
I love how roomy the bag is – this will hold all kinds of fun stuff!