الگوهایی جدید برای دوخت کیفهای چرمدوزی

مدل کفش چرمی نوزادی

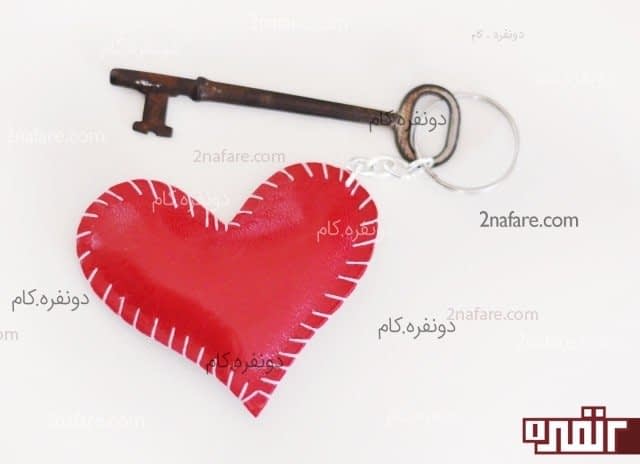
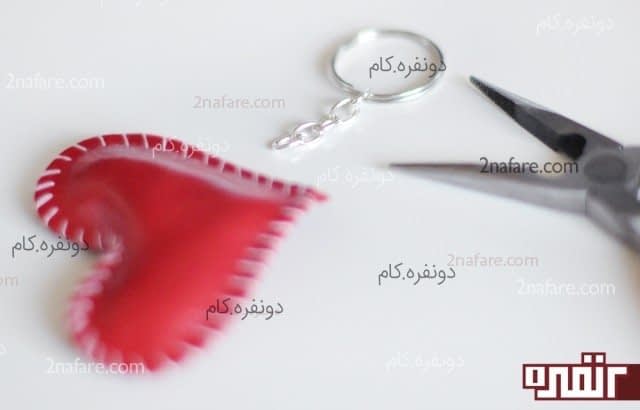
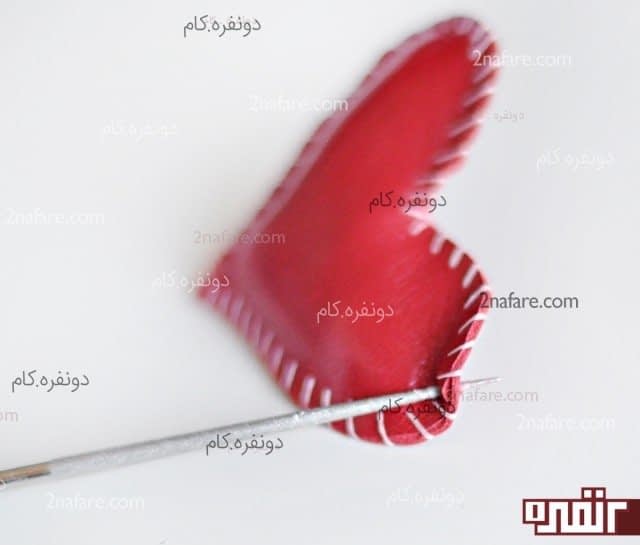
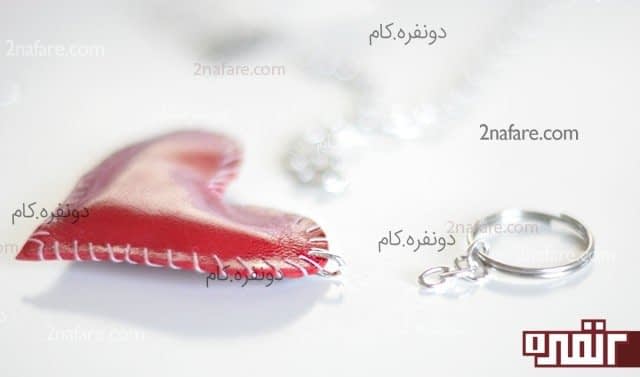
این کفش یک کادوی زیبا و ماندنی است

آدرس سایت اصلی

http://shwinandshwin.com/2015/07/free-leather-sandals-pattern.html


those as well) but also I love giving them ridiculous things like new born sandals.

DIY Leather Sandals || FREE PDF Pattern || Shwin&Shwin

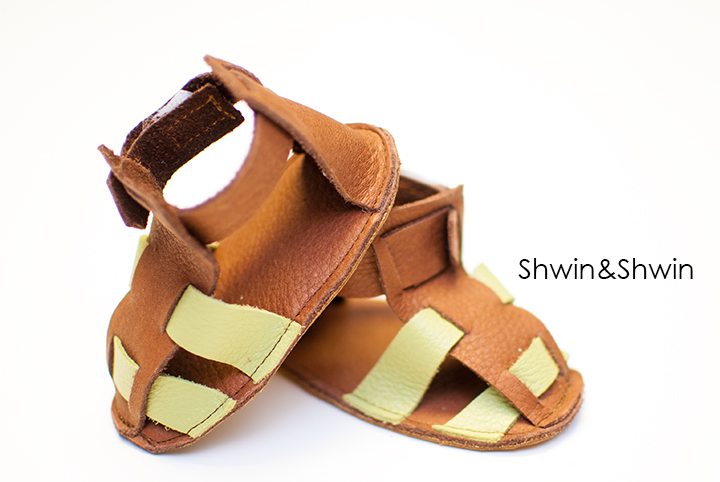
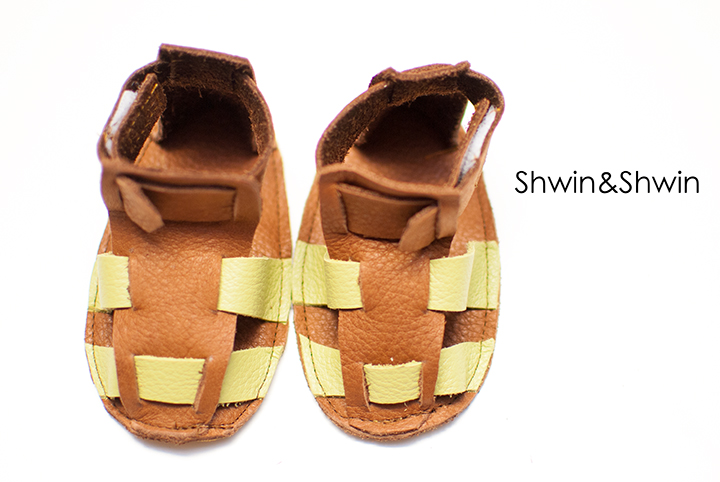
Let’s face it, newborn sandals are ridiculously cute, and totally impractical which makes them the best gift to give because they likely wouldn’t buy them, but who can resist them?

DIY Leather Sandals || FREE PDF Pattern || Shwin&Shwin

Also these sandal are not only adorable but they may be the easiest and fastest shoe I have ever made, ever. They are SO so SO easy to make. Great for a beginner, beginner sewer, or beginner with leather. Seriously easy, and hard to goof up.
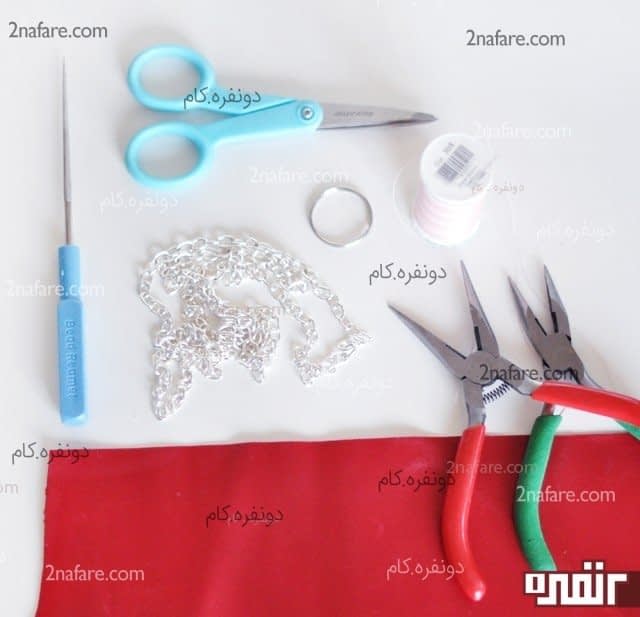
You will need:

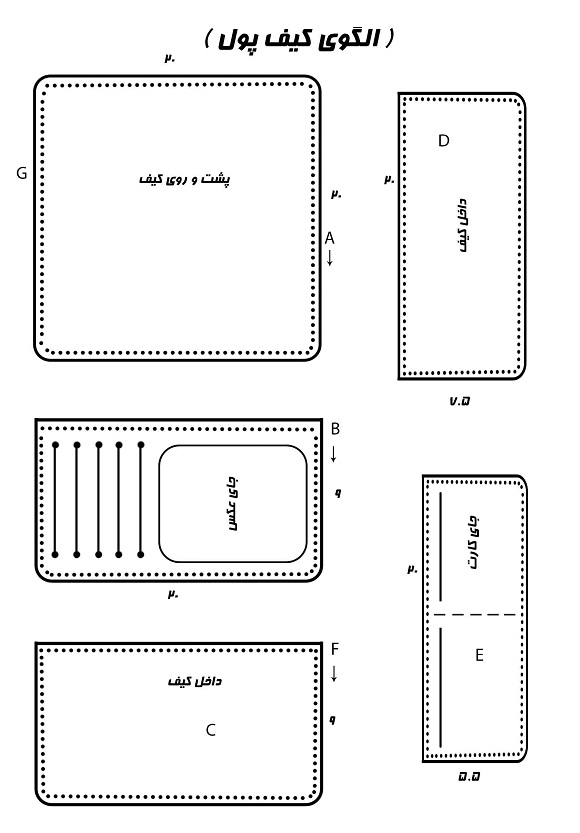
  • Free leather sandals pattern (size 0-3m but after seeing how it all goes together you could easily make it larger to fit any size you need)
  • Scraps of leather (not super thin but not stiff)
  • Scraps of velcro for straps
  • Leather sewing needle
  • Durable sewing thread
  • Teflon sewing foot (highly recommended)
  • Exacto knife

DIY Leather Sandals || FREE PDF Pattern || Shwin&Shwin

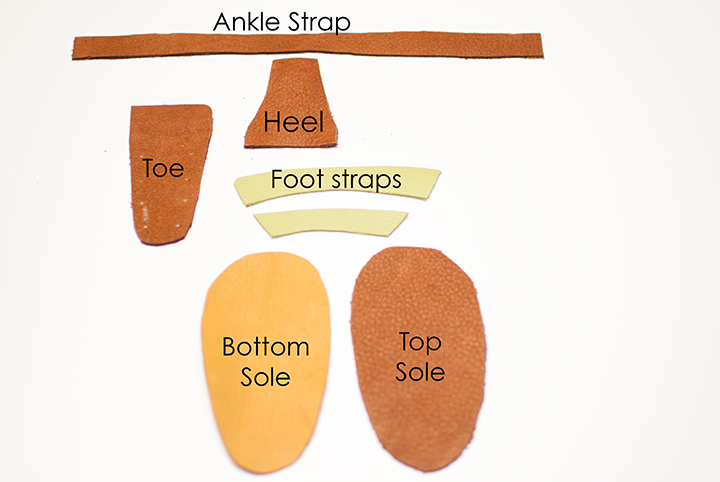
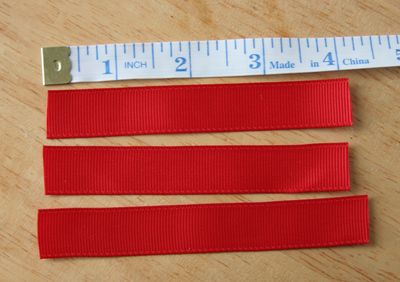
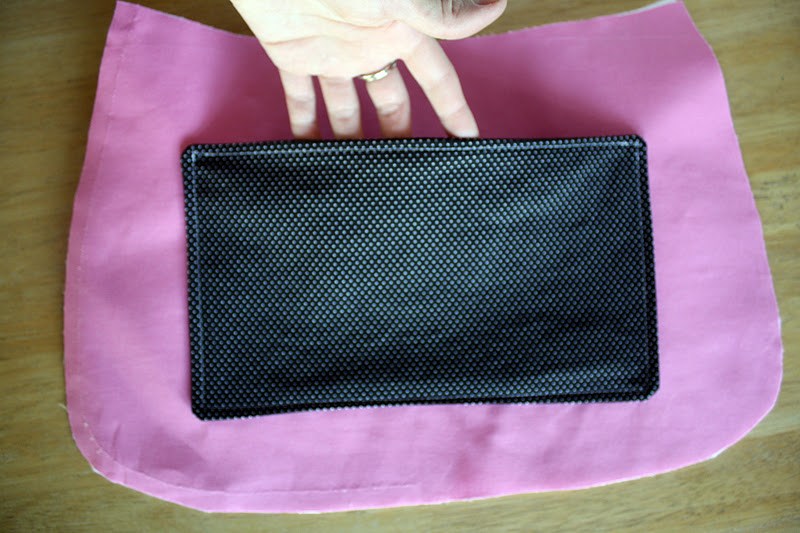
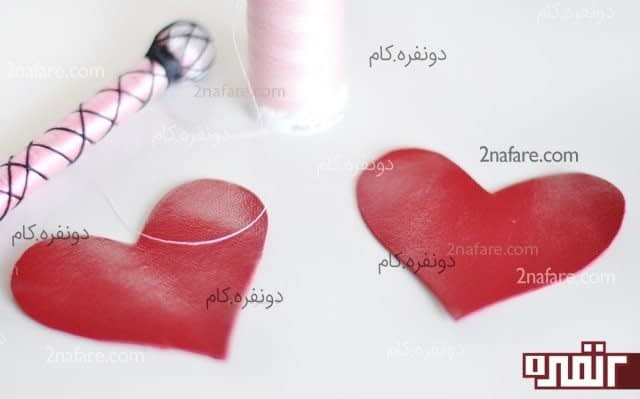
Cut out all of your pieces. I used some contrasting leather, mainly so I could use up scraps but also to add some contrast. Mark the dots and lines over to your pieces using a pencil or chalk.

DIY Leather Sandals || FREE PDF Pattern || Shwin&Shwin

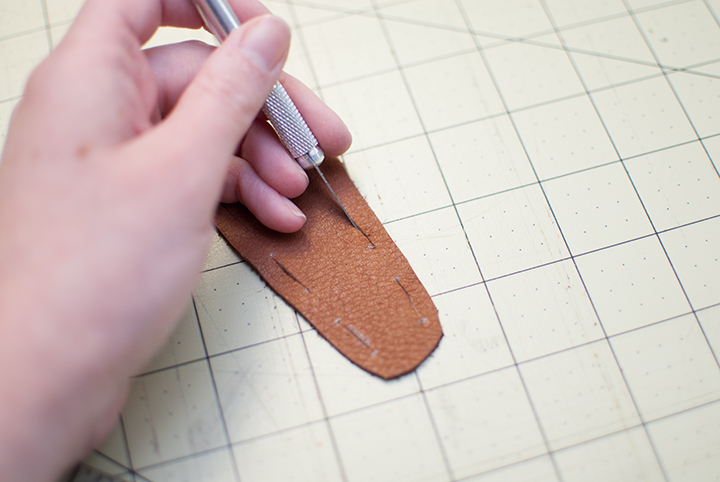
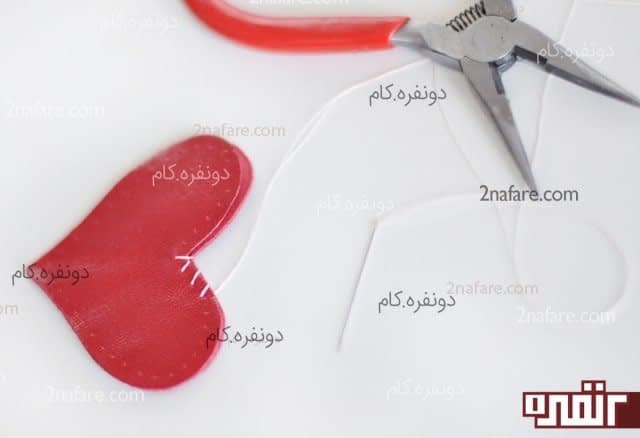
Then using an exacto knife (or blade) cut slits following all the line markings for the toe and heel pieces.

DIY Leather Sandals || FREE PDF Pattern || Shwin&Shwin

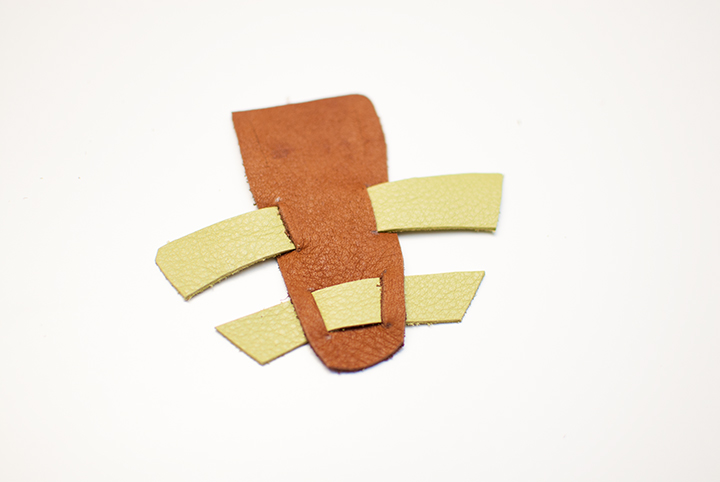
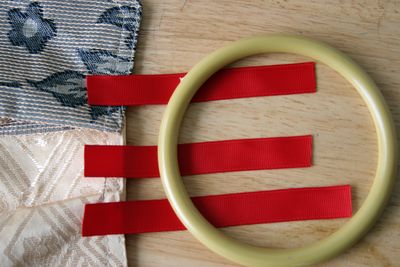
For the toe piece, weave the foot straps into the slits. You can weave them both in the same or have them go the opposite way like shown above, it’s up to you.

DIY Leather Sandals || FREE PDF Pattern || Shwin&Shwin

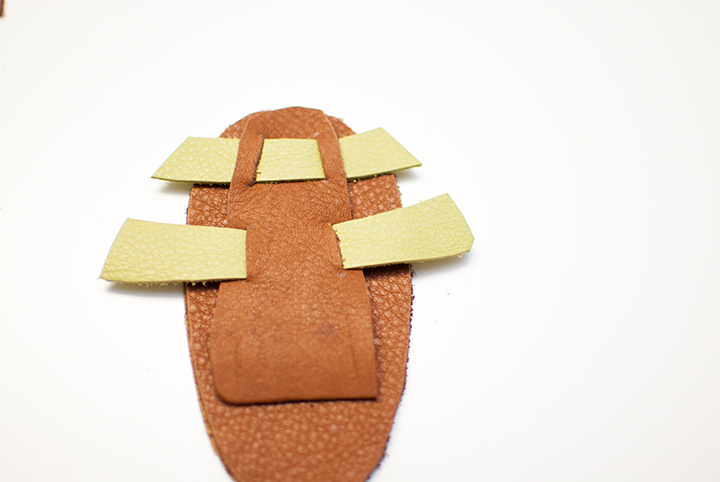
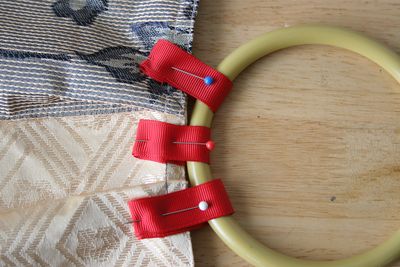
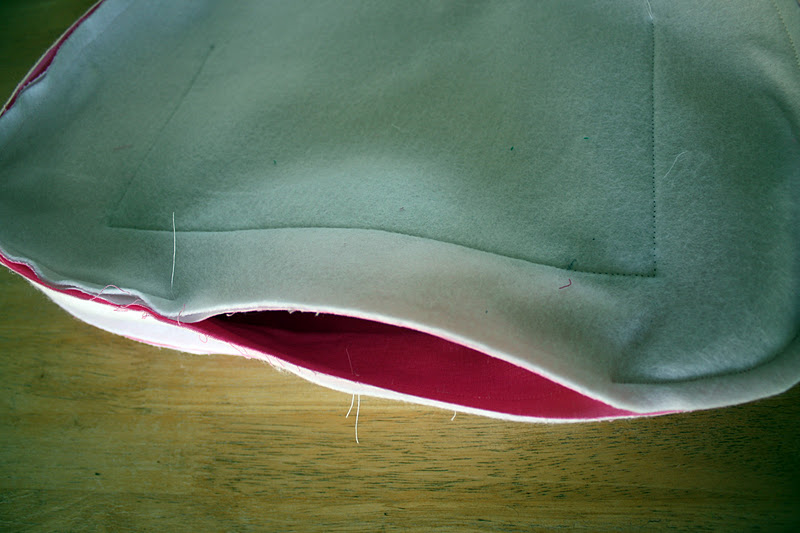
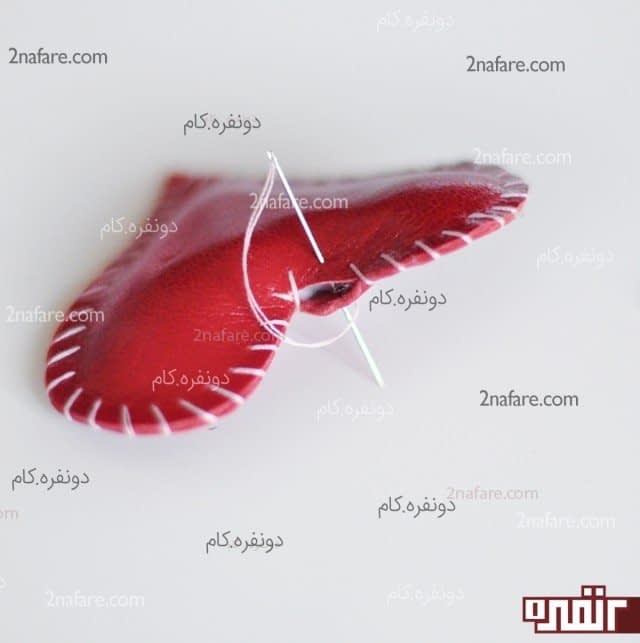
Then stack two sole pieces wrong sides together. Place the toe piece along the center front of the sole, follow the dot markings on the sole pattern piece to place the toe, straps, and heel along the sole.

DIY Leather Sandals || FREE PDF Pattern || Shwin&Shwin

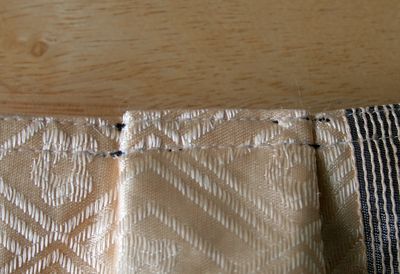
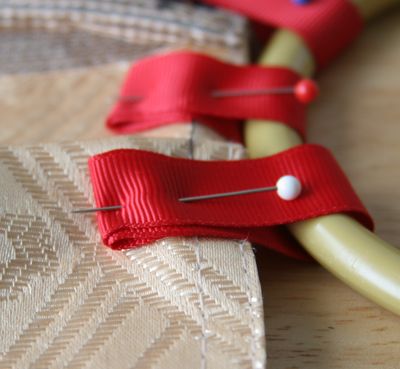
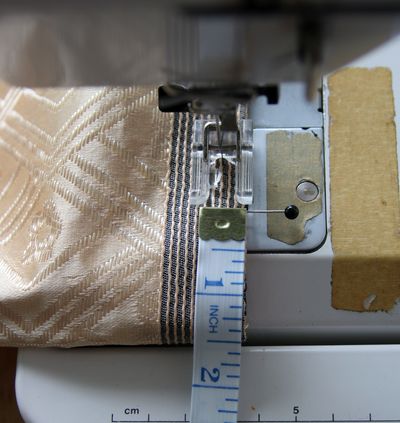
Then sew all along the edge to secure the toe, straps, and heel in place to the sole pieces.

DIY Leather Sandals || FREE PDF Pattern || Shwin&Shwin

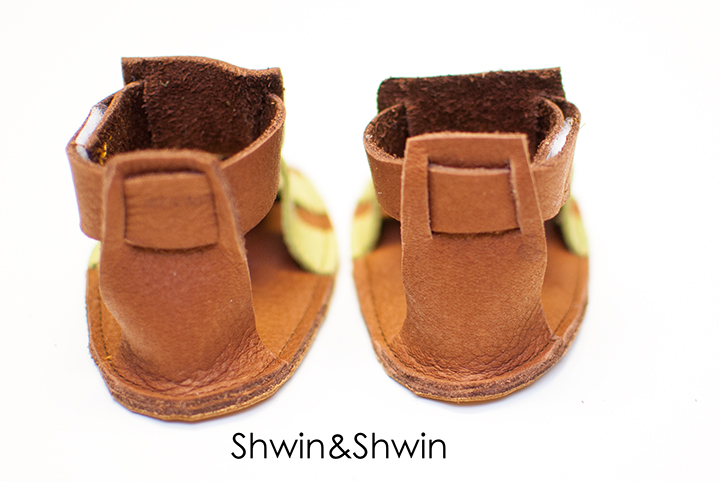
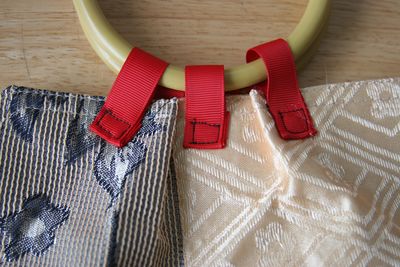
Then weave the ankle straps into the top of the toe piece and the heel piece. Have the ends be on the opposite sides for both sandals so you end up with a left and a right.

DIY Leather Sandals || FREE PDF Pattern || Shwin&Shwin

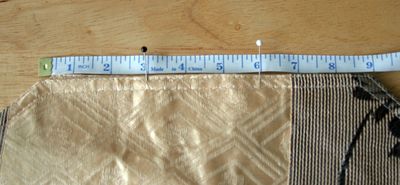
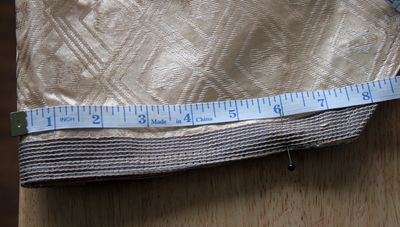
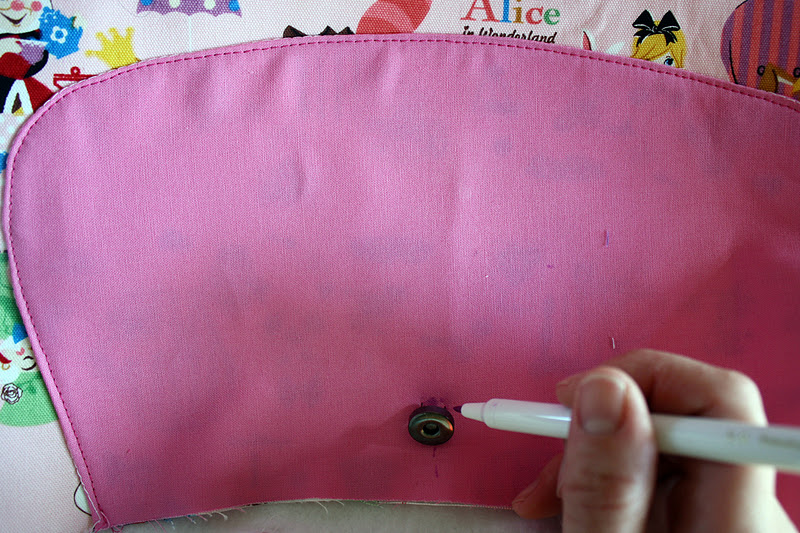
Then measure the childs ankle, and wrap the strap around so the back just tucks into the front loop. (if you can’t measure a child an infant ankle is typically right around 5″)

DIY Leather Sandals || FREE PDF Pattern || Shwin&Shwin

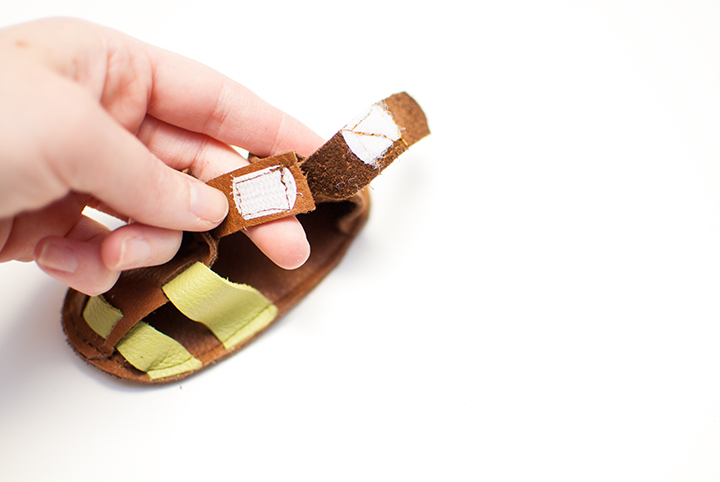
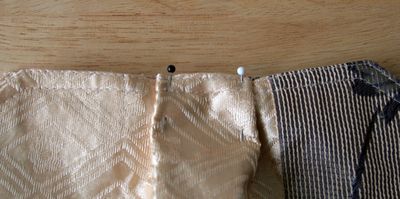
Then add velcro to the strap, even though the front tucks into the loop that is more for looks (and optional) than it is strong enough to hold the strap in place so velcro will help hold the sandal on.

DIY Leather Sandals || FREE PDF Pattern || Shwin&Shwin

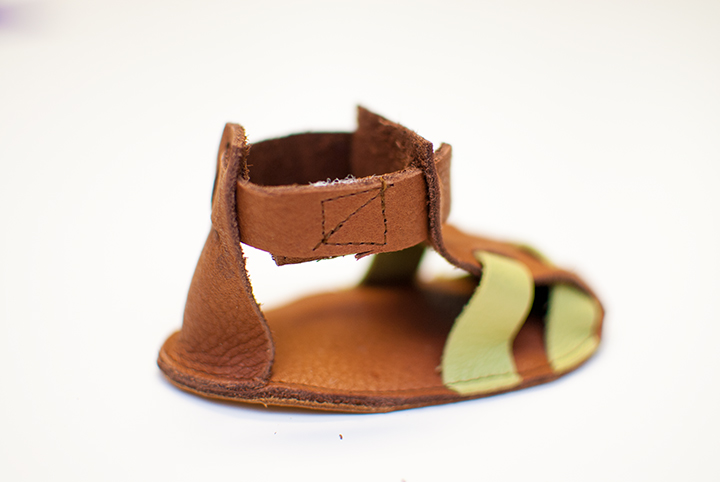
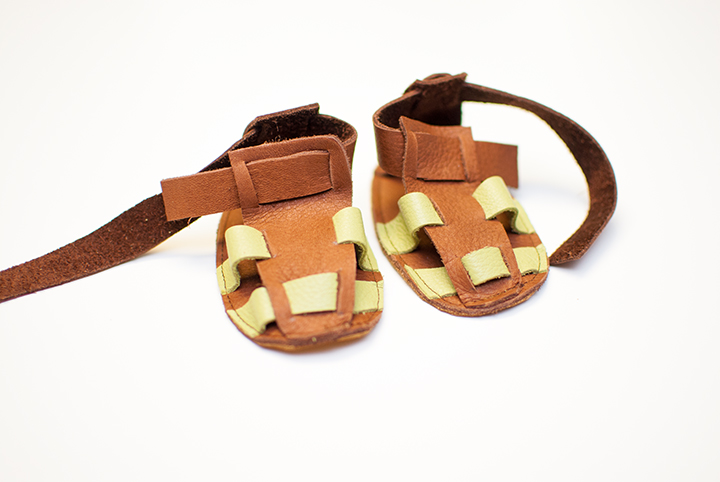
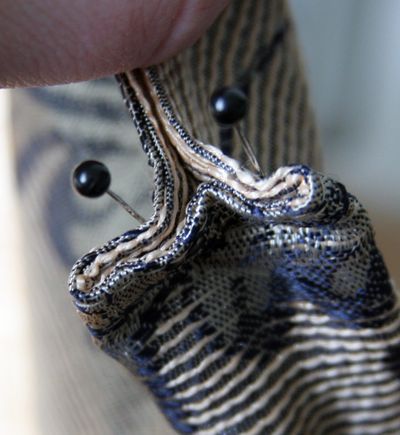
Then wrap the strap and tuck the front.

DIY Leather Sandals || FREE PDF Pattern || Shwin&Shwin

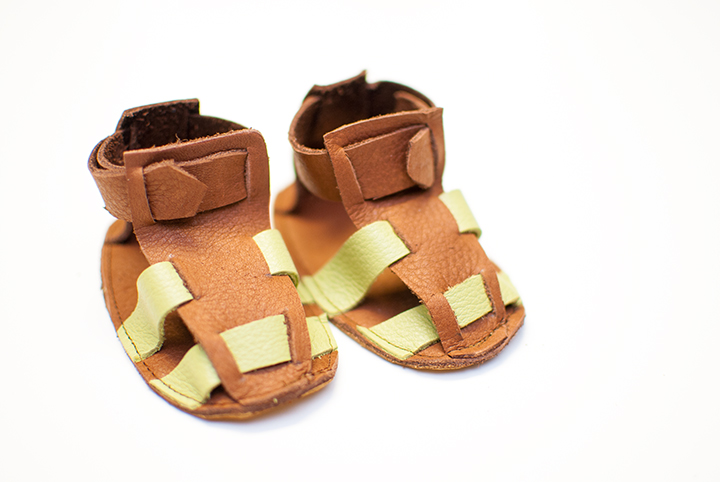
Now the shoes are done. I told you, so so easy.

DIY Leather Sandals || FREE PDF Pattern || Shwin&Shwin

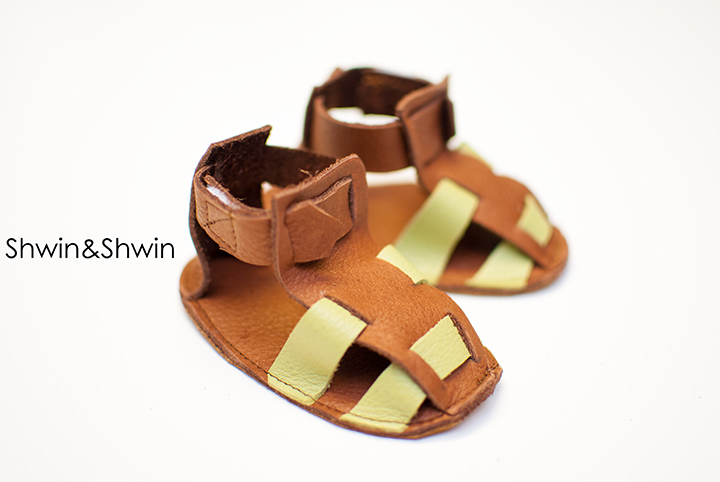
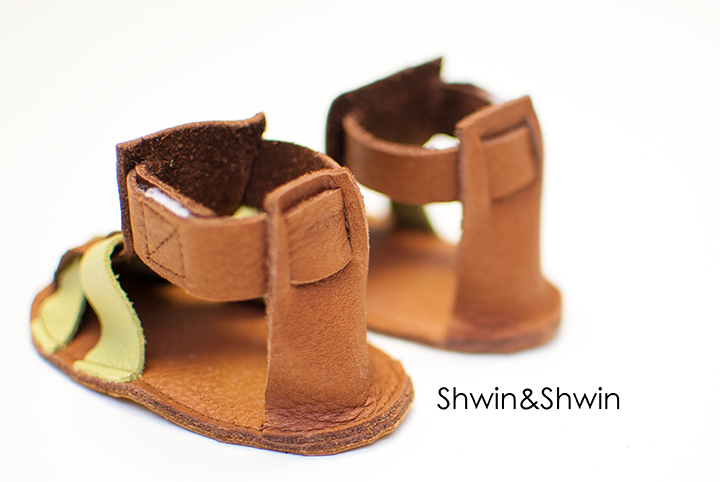
And so so cute. These are perfect for any non or light walker. For a heavy/full time walker (think toddler on up) you may want to find a thicker sturdy leather for the bottom sole piece, and then you may have to use a stitching awl to sew it.


DIY Leather Sandals || FREE PDF Pattern || Shwin&Shwin

۲۳ تیر ۹۵ ، ۱۲:۴۸ ۰ نظر موافقین ۰ مخالفین ۰
کار در خانه

مدل کیف پارچه ای2

.این مدل را با چرم هم می توان دوخت

آدرس سایت اصلی

http://sewsweetness.com/2016/06/pattern-hack-tudor-bag.html


Tudor Bag Collage

p

Materials you will need:

Modified Side Panel Collage

1. .

Bag Strap Marking

1. mark.

Bag Strap double sided tape

2. Bag strap Stitching

3. hidden when attaching straps to the main exterior panel.

Bag Strap Scoring

5. Using a Hera marker or chalk pencil, score/mark a line 1-1/8” from the sewn end of the strap. Fold on the line, finger press.

Bag Strap Pellon Tape

6. ape.

Bag Straps Main Panel

8. .

Handles Scoring 1

2. Using aHandles clipped Together

3. .

Handles Clipped

4. Clip both long sides of the handles. Repeat with the two remaining bag handle pattern pieces. You will have two sets of handles clipped together.

Handle Stitch Collage

5. .

Handle Bury Thread Tails

6. .

Handles coloring ends

7. Optional: Use a permanent marker or fabric paint pen that matches your vinyl and color the exposed ends of both handles.

Handle Ends Scoring

8. Using your Hera marker, or a chalk pencil, score/mark a line 1¼” from each end of your bag handles.

Handle Punch Collage

9. On both ends of a bag handle, make two marks for rivet holes, 3/8” from the short edge and each long edge of the bag handles. I used a seam ripper to make small holes first. Punch holes at marks.

Handle Hole Punch 2

10. Fold each end over the rectangular ring, placing the ring on the 1¼” fold line. Make sure your handle does not get twisted, and use wonder clips to temporarily hold the handle in place. Use pre-punched holes as a guide to punch through the other side of the handle. Place rivets in holes and set using rivet press or rivet setting tools.

Repeat Steps 9 – 10 for second handle.

Interior Pockets with Faux Binding – Step 41

Faux Binding

1. Place both the interior pocket fabric (black fabric) and exterior pocket fabric (white fabric) right sides together. The interior pocket fabric will be 1/2” longer than the exterior pocket fabric. Stitch together using a ¼” seam allowance.

Seam Allowance

2. Press the interior pocket fabric up and over the seam allowance, wrapping the fabric around the seam allowance. The bottoms of the interior and exterior pocket fabric will be wrong sides together and should meet evenly at the bottom. Your seam allowance should be straight up.

Top Stitching

3. Top stitch close to the bottom edge of the faux binding, about a 1/16” seam allowance.

Continue with pattern instructions at Step 43.

Key Holder – After Step 58

Make your key holder to attach to one interior side panel piece.

Key Holder Collage

1. Take the 2” x 5” key holder piece and fold in half length-wise, raw edges meeting and right sides together. Fold one raw edge down to the center fold line.

Key Holder folded

2. Fold the other side down to the center fold line. Pin one end to keep piece folded.

Key Holder Stitched

3. Sew pinned end with a 1/4” seam allowance . Clip corners and trim seam allowance to 1/8”.

Key Holder Pressing Collage

4. Turn piece right side out, open up the un-sewn end, fold down ¼” and press. Refold piece, making sure to use a blunt tool to push out corner, and press well. Top-stitch all the way around around with a 1/8” seam allowance.

Swivel Collage

5. Mark a line 1” from one end. Slide swivel hook onto end, fold over at the 1” mark and stitch all the way around using a small foot, like a zipper foot, sewing over the top-stitching and getting as close to the edge of the swivel hook as your foot will allow.

Side Panel Marking Collage

6. Take your side panel piece and fold length-wise, finger pressing the top to find center. Using your chalk pencil, make a mark in the center, 2” down from the top.

Key Holder Side Panel Collage

7. Pin the top of your key holder at the mark. Stitch in place following your 1/8” top-stitching, stitching a rectangle about 1” in length. Pull your top thread to the back of the side panel piece, knot, and clip threads.

Key Holder Rivets

8. Optional: Use your remaining two rivets here for extra support. Punch two holes ½” apart inside the rectangular stitching lines and in the center of the key holder. Insert and set rivets using a rivet press or rivet setting tools.

Continue with bag assembly as the pattern instructs. I hope you found

۲۳ تیر ۹۵ ، ۱۲:۳۹ ۰ نظر موافقین ۰ مخالفین ۰
کار در خانه

یک کیف ساده

به آدرس زیر رجوع کنید

http://dollarstorecrafts.com/2009/06/placemat-handbag-tutorial/

اگه سمج باشید

الگوهای کیف زیادی برای شما به طور مجانی وجود دارد


Pleating:

  1. Measure and mark equidistant points on the short edges of your placemat. I measured 3" in from each end of mine and marked the points with pins. I then measured another half-inch or so in from those pins and marked them with a second set of pins. (For some reason I didn't take photos of the second set of pins, or my camera ate them. I remember taking them, but mommy memory is so faulty, you know?)

  2. Fold outside pins under inner pins into a pleat on each side. Remove marking pins and just pin the pleat.
  3. Sew over the pleat, reinforcing at the point where fabric overlaps. I used clear thread in the top of my sewing machine so it wouldn't show. I also used a heavy-duty needle in my machine (I have "leather" needles) because I was sewing thick fabric with multiple thicknesses, and I broke my regular needle
  4. Remember to pleat both short ends of the placemat.

Adding handles:

  1. For each side, measure three pieces of ribbon approximately 4". You can use a match or lighter to seal the edges of the ribbon so they won't unravel. This sounds a lot more intimidating than it is! Just barely touch the end near an open flame.

  2. Line the three ribbons up near the pleat on the wrong side (the side that will become the inside) of your purse. This will be the inside of the pleat. (Observant readers will note my finished purse is shown with the "wrong side" pleat outward in the photo. That's because I liked how the ribbon tabs looked on the wrong side more than they did on the right side. The extra red was just prettier that way. This purse will work turned either way.)
  3. Fold the ribbon over the hoop and pin. I folded my raw edges under and pinned a 4x thickness of ribbon onto the fabric because I wanted extra reinforcement.Here's a close-up of the folded-under edge of the ribbon.
  4. Repeat handle attachment for second end of the placemat.
  5. Sew ribbons to placemat. I sewed a box on the reinforced bit of ribbon just to make sure it was well attached. Excuse the black thread that was used for demonstrative purposes! You will want to match thread if possible (or use the clear thread).

Sewing the sides together:

Because the placemat already has finished edges, you can sew this together and not turn the whole thing inside-out when you're done. Or you can turn it inside-out (as shown in final picture). It will work either way.

  1. Fold placemat in half, matching handles up. Measure 1-1/2" down from edge of purse and mark with a pin.

  2. Measure 1-1/2" from fold and mark with a second pin (more if you want a roomier purse). You will sew between the pins, reinforcing at each edge.
  3. Take unsewn gap at fold and pinch into a T-formation and pin, as shown. Sew each side of T together to form gusset.

Your purse is done! Add embellishments if desired, like these ribbon rosettes.

Here's a second placement of the rosettes.

To make ribbon rosettes:

  1. Finish edges of ribbon with match or lighter.
  2. Take a 6" length of ribbon and sew a running stitch through one long end of the ribbon.
  3. Curl into a rosette and sew ends together or coil into a more full rosette.
  4. Attach a button to center of rosette if desired.
  5. Sew
۲۳ تیر ۹۵ ، ۱۲:۲۹ ۰ نظر موافقین ۰ مخالفین ۰
کار در خانه

مدل کیف پارچه ای

آدرس مطلب
 
 
th
.

3b. .

3e.

4e. .

4g.

5a.e.

5c. .

5d.

5e.

STEP 6 ~ ASSEMBLE THE EXTERIOR

6a.

6b. .

6e. .

6f. .

6g. .

6h.

. Press the unfinished edge in 1/2″ on each side.

7d. opening alone).

7e.

7f.

.


۲۳ تیر ۹۵ ، ۱۲:۲۳ ۰ نظر موافقین ۰ مخالفین ۰
کار در خانه

الگوی جاسوزنی چرمی ساده و زیبا

ORIGAMI NEEDLECASE - FREE PDF PATTERN FROM MAKERY.CO.UK

Sometimes I need a break from sewing and just need to get my craft on! For ages my sewing needles have been scattered about between my pin dish and various other little pots and drawers; and I could never find the needle that I wanted, when I wanted it. And so…this little leather origami needle wrap was born…ORIGAMI NEEDLECASE - FREE PDF PATTERN FROM MAKERY.CO.UK

The origami needle wrap features  a simple envelope shape, with a wrap around magnetic closure. The whole thing opens out to lay flat on your work surface and 3 separate felt inserts allow you to organise needles by type/size etc. It’s super simple to make and you can download the free pattern at the end of this post if you want to make one of your very own 🙂ORIGAMI NEEDLECASE - FREE PDF PATTERN FROM MAKERY.CO.UK

I made mine from 1mm natural leather. I got the whole thing out of a 20cm  x  20cm square purchased on ebay here. I used 1mm wool felt for the inside. Also purchased on ebay here. Magnets used here are strong neodymium disc magnets that I had left over from my air dry clay fridge magnets and are available here. ORIGAMI NEEDLECASE - FREE PDF PATTERN FROM MAKERY.CO.UK

ORIGAMI NEEDLECASE - FREE PDF PATTERN FROM MAKERY.CO.UK

First step is to cut out and trace the template onto the leather. I used a Frixon pen for this, as the marks can be removed later simply by applying heat from an iron (through a pressing cloth as opposed to directly onto the leather)…I use these quite alot directly onto fabric when I’m sewing too. Awesome pens!ORIGAMI NEEDLECASE - FREE PDF PATTERN FROM MAKERY.CO.UK

To mark the position of the slit opening for the strap, I simply used the tip of my seam ripper to make an indentation through the paper pattern and onto the leather…ORIGAMI NEEDLECASE - FREE PDF PATTERN FROM MAKERY.CO.UK

ORIGAMI NEEDLECASE - FREE PDF PATTERN FROM MAKERY.CO.UK

Cut the whole thing out carefully…

ORIGAMI NEEDLECASE - FREE PDF PATTERN FROM MAKERY.CO.UK

Then using a scalpel cut the slit opening as indicated on the pattern. Note the pen marks that are currently still visible…

ORIGAMI NEEDLECASE - FREE PDF PATTERN FROM MAKERY.CO.UK

…and after the application of a little heat, magically vanished!!

ORIGAMI NEEDLECASE - FREE PDF PATTERN FROM MAKERY.CO.UK

The wrap is then assembled as above. The strap slides through the little slit from the RS. Magnets are super glued in place. Make sure before you stick the magnets down that they are the right way up. If you stick them the wrong way, the closure magnets will repel away from eachother as opposed to fastening.  The placement marks on the pattern are right for the materials that I used. But different materials will have a different “turn of cloth” value (they will fold slightly differenly) which may subtly affect the placement of the fasteners. Tape the whole arrangement above in place, and just test it all wraps up and closes to your satisfaction before you commit to gluing the magnets in place and securing all the element permanently. ( I use magic tape as there isn’t the sticky residue that you get with sellotape)

ORIGAMI NEEDLECASE - FREE PDF PATTERN FROM MAKERY.CO.UK

The strap is stitched in place from the outside, and there is a dotted line on the pattern piece for the strap that lines up with the slit to help you get it in the right position. (if you sink it too far in to the slit, it will effectively reduce the length of the strap which then won’t wrap around fully).

ORIGAMI NEEDLECASE - FREE PDF PATTERN FROM MAKERY.CO.UK

Cut and stick in the felt (magnet is now nicely covered!) I used bondaweb for neatness , but glue/spray adhesive should be fine too; as long as it doesn’t soak the felt too much or seep out onto the leather around the edges

ORIGAMI NEEDLECASE - FREE PDF PATTERN FROM MAKERY.CO.UK

Add your needles and stand back and admire!

ORIGAMI NEEDLECASE - FREE PDF PATTERN FROM MAKERY.CO.UK

I really am a little in love with the neatness and simplicity of this shape…

ORIGAMI NEEDLECASE - FREE PDF PATTERN FROM MAKERY.CO.UK

The absence of any visible closures adds to the clean lines 🙂

ORIGAMI NEEDLECASE - FREE PDF PATTERN FROM MAKERY.CO.UK

The pattern is available, free to download, here and conveniently prints onto just one sheet of A4.  I’d love to hear from you if you make one so do let me know in the comments, or tag me @portialawrie over on Instagram so I can see!

ORIGAMI NEEDLECASE - FREE PDF PATTERN FROM MAKERY.CO.UK

Enjoy your new “luxe” needle wrap!!

۲۳ تیر ۹۵ ، ۱۱:۲۱ ۱ نظر موافقین ۰ مخالفین ۰
کار در خانه

فیلم آموزش چرمدوزی

الگوی کیف مردانه ساده را از اینجا دریافت کنید:

دریافت

توضیحاتی داشت که انگلیسی بود و من حذف کردم

توضیحات را از آدرس زیر   ببینید

http://www.artofmanliness.com/2012/11/30/how-to-make-a-wallet/


فیلم آموزش کیف زنانه

http://www.dalfak.com/w/0p28x/%DA%86%D8%B1%D9%85-%D8%AF%D9%88%D8%B2%DB%8C%D8%9B-%D8%A2%D9%85%D9%88%D8%B2%D8%B4-%D8%AF%D9%88%D8%AE%D8%AA-%DA%A9%DB%8C%D9%81-%D9%BE%D9%88%D9%84-%D8%B2%D9%86%D8%A7%D9%86%D9%87


فیلم کوتاه آموزش چرمدوزی


http://www.dalfak.com/w/08ilj/%D8%A2%D9%85%D9%88%D8%B2%D8%B4-%DA%86%D8%B1%D9%85-%D8%AF%D9%88%D8%B2%DB%8C-%D8%8C-%D8%AF%D9%88%D8%AE%D8%AA-%D8%B3%D8%A7%D9%82%D9%87-%D8%AF%D9%88%D8%B2%DB%8C


سایت زیر انگلیسی است

یک کتابخانه تخصصی کامل با ویدئوهای آموزشی برای کیفهای دست دوز

از زبان انگلیسی نترسید

تلاش کنید می توانید فیلمهای آموزشی را بگیرید

کیفهایی که نمایش داده می شود به روز و زیبا هستند

از آنها الگو بگیرید

https://www.leathercraftlibrary.com/t-instructional-videos.aspx


۲۳ تیر ۹۵ ، ۰۹:۱۹ ۰ نظر موافقین ۰ مخالفین ۰
کار در خانه

آموزش حکاکی روی چرم


توی این پست تصاویری می بینین از کاربردای مختلف ابزار حکاکی روی چرم.

چرم رو باید قبل از حکاکی مرطوب کرد تا به راحتی بشه روش طرح و نقشه دلخواه رو پیاده کنین.


۲۲ تیر ۹۵ ، ۱۱:۴۹ ۰ نظر موافقین ۰ مخالفین ۰
کار در خانه

آموزش دوخت یک کیف چرمی زیبا


طرز دوخت کیف چرمی,روش های دوخت کیف چرمی

این کیف چرمی زیبا را با دست بدوزید


این کیف رودوشی زیبا را می توانید به عنوان یکی از اولین کارهای چرمی بدوزید . برش و دوخت بسیار ساده ای دارد و می دونم از عهده اش بر می آیید. دوخت این کیف با تریشه (نوارهای نازک بریده شده از چرم) انجام می شود.

آموزش دوخت کیف چرمی,دوخت کیف چرمی

از الگو پرینت بگیرید و روی قسمت پشت چرم کپی کنیند. (با خودکار ژله ای دور تا دور الگو بکشید)


آموزش چرم دوزی, نحوه دوخت کیف چرم با دست

اندازه ها به سانتی متر هستند


نحوه دوخت کیف چرمی,دوخت کیف چرمی با دست

بعد در آوردن الگو از روی چرم، اول دورتادور کار را سنبه بزنید و سوراخ کنید


الگوی تهیه شده را روی چرم بگذارید و دورتادور آن را با خودکار ژله ای بکشید. بعد از انتقال الگو بر روی چرم شروع به چیدن یا بریدن چرم با قیچی یا کاتر کنید. به دلیل ضخامت چرم  سوزن از آن به آسانی رد نمی شود.

بنابراین برای دوخت کارهای چرمی باید اول دورتادور کار را سنبه بزنید و سوراخ کنید. فاصله سوراخ ها را از لبه کار نیم سانت و فاصله هر سوراخ تا سوراخ قبلی را نیم سانت در نظر بگیرید . برای دوخت با نخ تریشه فاصله یک سانت مناسب تر است.

دوخت کیف چرمی با دست,طرز دوخت کیف چرمی

تریشه را از داخل سوزن مخصوص رد کنید و آماده دوخت شوید


دوخت کیف چرمی,آموزش چرم دوزی

لبه های دیواره را چرت بزنید تا به راحتی بشود به تکه پشت و جلو آن را وصل کرد

 
بعد از سمبه زنی دیواره کیف با برش های نیم سانتی لبه های دیواره را چرت بزنید تا به راحتی بشود به تکه پشت و جلو آن را وصل کرد.

روش های دوخت کیف چرمی, نحوه دوخت کیف چرمی

دیواره را ابتدا به تکه جلو بدوزید


دوخت کیف چرمی,طرز دوخت کیف چرمی

این شیوه دوخت را دنبال کنید


دوخت کیف چرمی با دست,آموزش کارهای هنری با چرم

مراقب باشید تریشه ها پیچ نخورند


نحوه دوخت کیف چرم با دست,آموزش تصویری چرم دوزی

دوخت پشت کار را ببینید


طرز دوخت کیف چرمی,روش های دوخت کیف چرمی

محکم کاری را فراموش نکنید


آموزش دوخت کیف چرمی,دوخت کیف چرمی

لبه جلو کیف را برگردانید و با یک کوک آن را محکم کنید


آموزش چرم دوزی, نحوه دوخت کیف چرم با دست

قسمت پشت کار را هم به همین شکل بدوزید


نحوه دوخت کیف چرمی,دوخت کیف چرمی با دست

دوخت تکه نگهدارنده در که البته بیشتر تزئینی است


دوخت کیف چرمی با دست,طرز دوخت کیف چرمی


این ها هم تصاویر ساخت و نصب بند روی شانه

۲۲ تیر ۹۵ ، ۱۱:۳۱ ۰ نظر موافقین ۰ مخالفین ۰
کار در خانه

آموزش دوخت زیپ دندانه فلزی در چرم دوزی


آموزش دوخت زیپ دندانه فلزی در چرم دوزی

 شاید شما هم از آن دسته  افرادی باشید که با اتصال زیپ های دندانه فلزی مشکل

دارید ... از شما دعوت می کنم با این آموزش همراه شوید ...به ادامه مطلب بروید

وسایل مورد نیاز :

زیپ دندانه فلزی - انبر دست - چسب - چرم

در ابتدا چرمی را می خواهید به آن زیپ اضافه کنید را برش بزنید . برای این کار لازم است که فاصله

قسمت برش زده شده تا کار ۱.۵ سانتی متر باشد .

صنایع چرم

سپس زیپ را در زیر قسمت برش زده گذاشته و اول و آخر زیپ را با قسمت برش زده تنظیم کرده و علامت

می زنیم.

چرم دوزی

در این مرحله بوسیله انبر دست قسمت های اضافی دندانه ها را از زیپ جدا م می کنیم .

چرم دوزی

 صنایع چرم

تا انجایی که علامت زده بودید دندانه های زیپ را در آورید .

چرم دوز

حالا پشت چرم را چسب زده و زیپ را با دقت فیکس کرده و می چسبانیم .

آموزش چرم دوزی | چرم دست دوز | کیف پول

حالا زیپ شما آماده است .بگذارید چسب خشک شود . بعد از گذشت دو ساعت اطراف زیپ  را به

اندازه ۳ میلی متر با خط کش نشانه گذاشته سنبه زده و دوخت می زنیم . بعد آن را آستر کشی

می کنیم

۲۲ تیر ۹۵ ، ۱۱:۲۶ ۰ نظر موافقین ۰ مخالفین ۰
کار در خانه

آموزش جاسوییچی قلبی

آموزش ساخت یک جا سوئیچی فوق العاده زیبای قلبی شکل رو میذارم. میتونه یک دست ساز خیلی خیلی زیبا و در عین حال ساده باشه که برای خودتون یا کسی که دوستش دارین درست کنید و بهش هدیه بدید.

قلب قرمز زیبا برای جاسوئیچی

قلب قرمز زیبا برای جاسوئیچی

آموزش مرحله به مرله ساخت جاسوئیچی با طرح قلب قرمز

لوازم مورد نیازمون برای این چرم دوزی جذاب و زیبا قیچی و یک تکه چرم و نخ و حلقه و زنجیر جا سوئیچی و ابزاری که بشه باهاش جای سوزن ها رو سوراخ کرد. میتونه یک میخ هم باشه و انبر دستی که باهاش زنجیر و حلقه رو بهش وصل کنیم.

آموزش ساخت مرحله به مرحله جاسوئیچی زیبای قلبی با چرم

آموزش ساخت مرحله به مرحله جاسوئیچی زیبای قلبی با چرم

قلب رو روی چرم با یک خودکار بی رنگ میکشیم و از روش دو تا میبریم.

آموزش ساخت مرحله به مرحله جاسوئیچی زیبای قلبی با چرم

آموزش ساخت مرحله به مرحله جاسوئیچی زیبای قلبی با چرم

آموزش ساخت مرحله به مرحله جاسوئیچی زیبای قلبی با چرم

آموزش ساخت مرحله به مرحله جاسوئیچی زیبای قلبی با چرم

آموزش ساخت مرحله به مرحله جاسوئیچی زیبای قلبی با چرم

آموزش ساخت مرحله به مرحله جاسوئیچی زیبای قلبی با چرم

دور قلب قرمز رو که بریدیم، برای جاهایی که میخوایم سوزن رو توشون فرو ببریم باید سوراخ کنیم. اینکار رو میتونید با یک میخ کوچیک هم انجام بدید.

قلبها رو روی هم روی یه چیزی مثل چوب فیکس کنید و شروع کنید با میخ و چکش دور تا دورشون رو سوراخ کنید. سوراخهاتون به اندازه ی نخ و سوزنتون باشه کافیه. فاصله سوراخ ها رو هم یکسان بگیرید تا زیبایی کارتون بیشتر بشه.

آموزش ساخت مرحله به مرحله جاسوئیچی زیبای قلبی با چرم

آموزش ساخت مرحله به مرحله جاسوئیچی زیبای قلبی با چرم

بعد هم شروع کنید به دوختن.

آموزش ساخت مرحله به مرحله جاسوئیچی زیبای قلبی با چرم

آموزش ساخت مرحله به مرحله جاسوئیچی زیبای قلبی با چرم

آموزش ساخت مرحله به مرحله جاسوئیچی زیبای قلبی با چرم

آموزش ساخت مرحله به مرحله جاسوئیچی زیبای قلبی با چرم

وقتی که تقریبا به انتهای قلب قرمز زیباتون رسیدید، توش رو با پنبه یا پشم شیشه پر کنید تا پفی بشه. مقدار پفش هم به خودتون بستگی داره. به نظرم در حد متوسط پر شه بهتره.

آموزش ساخت مرحله به مرحله جاسوئیچی زیبای قلبی با چرم

آموزش ساخت مرحله به مرحله جاسوئیچی زیبای قلبی با چرم

بعد هم ادامه کارتون رو تا انتها میدوزید و گره میزنید.

آموزش ساخت مرحله به مرحله جاسوئیچی زیبای قلبی با چرم

آموزش ساخت مرحله به مرحله جاسوئیچی زیبای قلبی با چرم

زنجیر ها رو به حلقه جا سوئیچی به اندازه ای که میخوایم وصل میکنیو و انتهاش رو به قلب زیبای قرمز مون وصل میکنیم.

آموزش ساخت مرحله به مرحله جاسوئیچی زیبای قلبی با چرم

آموزش ساخت مرحله به مرحله جاسوئیچی زیبای قلبی با چرم

آموزش ساخت مرحله به مرحله جاسوئیچی زیبای قلبی با چرم

آموزش ساخت مرحله به مرحله جاسوئیچی زیبای قلبی با چرم

آموزش ساخت مرحله به مرحله جاسوئیچی زیبای قلبی با چرم

آموزش ساخت مرحله به مرحله جاسوئیچی زیبای قلبی با چرم

جا سوئیچی قلبی زیبا با چرم

جا سوئیچی قلبی زیبا با چرم

جاسوئیچی با قلب

جاسوئیچی با قلب


۲۲ تیر ۹۵ ، ۱۰:۵۸ ۰ نظر موافقین ۰ مخالفین ۰
کار در خانه