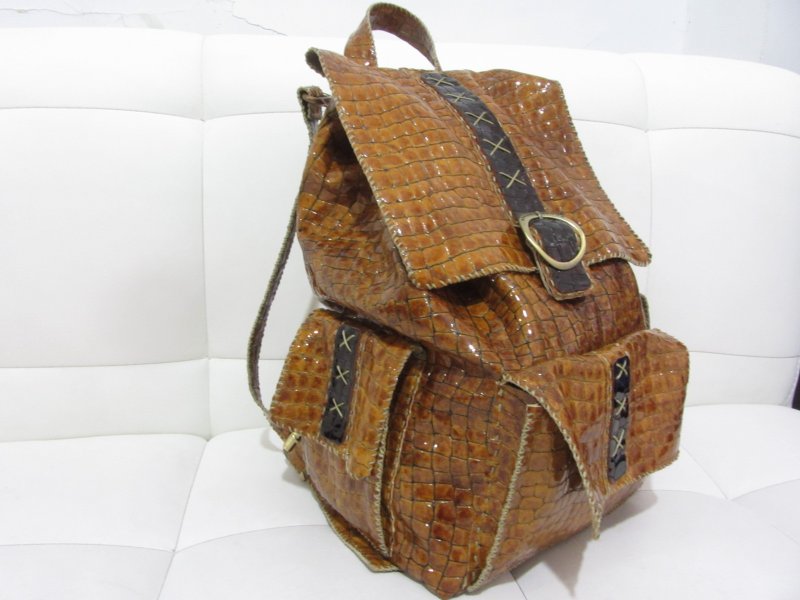
از آدرس زیر می توانید فایل پی دی اف الگوی کیفهایی را که عکس آنها در سایت هست را بگیرید
http://www.instructables.com/id/No-sew-Perfect-Purse/?ALLSTEPS
مثلا فایل پی دی اف همین کیف را از آدرس زیر بگیرید
http://www.instructables.com/files/orig/FRH/KA9P/IRV6354X/FRHKA9PIRV6354X.pdf
از سختی کار نترسید
با تمرین بهتر از این را هم می توانید تولید کنید
به آرامش هنگام کار و لذت پایان کار فکر کنید
توضیحات بیشتر را از این سایت بگیرید
http://www.instructables.com/id/Leather-Briefcase/?ALLSTEPS
Step 14: Finish!
I recommend starting with a little bit of contact cement at the front of the shoe, pressing the two pieces together and do a little at a time (I've marked the front of the top and sole on a the template with a line to help with this). This way you can make adjustments as you go along and if it gets a little off by the end it's okay since it's the back end. ;) Make sure as you are doing this that you don't use two much contact cement because if you go wider than what your seam will be there will be visible contact cement when you flip the shoe inside out.
After attaching both shoes, let it dry a little then take it to your sewing machine. Because I laser cut mine and the laser burns the end of the leather so it doesn't fray, I didn't want a large seam and stitched mine close to the edge (that's what the second line on the pattern is for). With a large seam you will have to trim some of the excess leather off. You can stitch yours however you want but just keep in mind that the further away from the edge you get, the smaller the shoe will be in the end.
After you are done stitching flip the shoes right side out and admire your progress (your making shoes!).
Step 5: Add the Straps
Now you need to add the straps to the Mary Janes. You have a few different options for this and don't need to use the straps I designed. You can stitch an elastic band or add some ribbon or use plastic snaps and buttons. Whatever it is make sure however you attach it there's nothing sticking out on the inside and nothing that can be bitten off. I went with double cap rivets and segma snaps because they would be permanent and I installed them in a way so that they are smooth and flat on the inside. This is probably much more heavy duty than needed on baby shoes that will be worn very briefly so I probably won't do that if I ever make baby shoes again.
Step 6: All Done!
Take a step back and admire what you've done. If they're a little messy don't worry about it-- they're handmade. And the very small human that will be wearing these probably won't mind. ;)
قبلا توضیحات انگلیسی را حذف می کردم
اما شاید برخی بتوانند استفاده کنند
از این به بعد حذف نمی کنم
به شرطی که از آنها نترسید
به خود تصاویر توجه کنید
تقریبا می توان الگو را از خود تصاویر هم به دست آورد
Cut two circles (or rounds), one for each end of the bag, from the 6-7 oz leather, measuring 9" in diameter. You can use 4-5 oz leather, if you prefer. I used 6-7 oz leather to add a bit of stability to my bag. The perfect round object to use as a template is a dinner plate.
Marking and placement of the punch holes is the most critical part of this project; so please forgive me if I spend a lot of time here.
On the first leather round (smooth side up), use your awl (or nail) to very gently scribe a circle 1/2" away from the edge, all the way around. The holes that you punch for lacing will be centered on this line. Next, you will need to make marks on the line so you know how far apart each hole punch should be. Make your first small mark anywhere on the line...from this mark, measure out 1" and keep marking 1" increments all the way around the circle. The first illustration shows a drawn depiction of the first 7 marks. The second illustration shows how the round should look after the holes have been punched.
Prepare to punch the lacing holes.
Protect your working surface and the tips of your punches by placing a poly cutting board or poundo board under your leather work.
Using your mallet/maul and the #9 Craftool Oval Drive Punch, punch out the lacing holes. Note that the punch should be centered over each of the 1" cross marks you made on the circle. Note also, the direction that each oval hole is oriented. The ends of the oval shapes point toward the center of the circle.
Once you finish punching out the lacing holes on the first leather round, repeat the process on the second round. You can cheat! Put the smooth sides of the rounds together with the rough side of the first round facing up and the rough side of the second round facing the work surface. We do it this way to insure that we have to opposite rounds rather than two matching rounds. Use your awl (or nail) to gently trace the punch holes on the second round. If you use this cheating method, the two rounds must stay perfectly lined up the entire time you are tracing, or your lacing holes will be off.
When you finish, count the number of holes you punched on each circle (they should be the same)...my circle has 49 holes.
To add the Dee Rings, cut two strips from the 4-5 oz leather, measuring 3/4" x 5" each. Fold the first strip in half and using the size 6 Craftool Round Hole Drive Punch, punch two holes through the folded leather. The first hole is centered and 1/2" up from the unfolded end; the second hole is centered and up 1-1/2" from the unfolded end. Take note of the illustration for placement of the strip on the round (slightly above center). Use the strip with the holes punched to mark the holes on the round. Punch them out too. Add a 3/4" Dee Ring to the folded end of the strip and attach to the round using the Chicago Screws.
Repeat on the other round.
Step 3: The Body
The length of the body is really your choice. The size I chose was 15" and cut a 15" x 25" rectangle from the 4-5 oz leather. From here on out, I'll refer to the 15" as the top (or bottom) and the 25" as the long sides. Using your awl (or nail), scribe three lines; one at the top and one on each long side, 1/2" from the edge. Refer to the illustration to insure the correct orientation of the oval lacing holes. Mark the 1" increments on the long side lines of the rectangle first, starting at the top of the leather. Punch out the lacing holes on both long sides. My rounds have 49 holes, which means that each long side of the rectangle has to have 49 holes, BUT, because I want the leather to overlap, I added three more holes to the length for a total of 52 holes on each side.
On the top (or short) line that you scribed, starting on the left side, make your first mark 1/2" away from the lacing holes on the long side. Now mark 1" increments across the line. The last 1" mark should be no closer than 1/2" to the punched holes on the right side. Punch out the lacing holes. You should now have both sides and the top holes punched.
Count down to lacing hole number 50 on the long side. Using your awl or nail, scribe a bottom line from the middle of hole 50 on the left to the middle of hole 50 on the right. using the exact measurements from the top line, mark the matching lacing holes on the bottom line. Punch out the holes.
Add your 12" zipper. Measure down 6" from the top and using the dimensions of your zipper, cut a length and width from the leather that allows only the teeth and zipper pull to show. Once you are satisfied with the fit, you can add some Elmer's glue to the zipper material and glue it from the back side of the leather. Make sure the zipper is zipping in the right direction! The glue dries fairly quickly, so it is ready to sew in place. You can either sew it by hand by punching holes or by using a sewing machine that can sew through leather. I normally sew by hand since I don't have an industrial sewing machine. I use the Craftool Round Hole Drive Punch, size 00, catalog #3777-00 to punch the holes and the Craftool Spacer, size 5, catalog #8091-00, to make sure my spacing is consistent. Tandy has several choices for waxed threads (your choice) and also chisels (or pricking irons) that can be used in place of the 00 hole punch.
TIP: To help your zipper move smoothly, rub it with candle wax or beeswax.
If you want to add a pocket, cut a 7" x 10" rectangle from the 4-5 oz leather. You can use a small round object (like a jar lid) as a template to round the four corners. Mark your line around the perimeter of the pocket (1/2" away from the edge) and mark the 1" increments all the way around. Punch the lacing holes. Add the zipper, as before, 2" down from the top of the pocket. Once the lacing holes are punched, place the pocket 3" down from the 12" you zipper you just sewed on the bag, and center it. Use your awl or nail to mark the lacing holes to be punched on the bag. Punch these holes.
It's time to lace!
|
|
|
|
|
|
 |
 55501-00 Basic Leathercraft Kit, Leatherwork Set $69.99This Basic Leathercraft kit, leatherworking set introduces people to the basics of carving, |
 |
 |


